
Install Shiplap Accent Walls Like a Pro: Gulf Coast DIY guide
- Matt Cameron
- 11 hours ago
- 10 min read

TL;DR:
Proper preparation, acclimation, and climate-proofing are essential for successful shiplap installation in humid Gulf Coast regions.
Using moisture-resistant materials and maintaining consistent gaps prevent warping, buckling, and gaps caused by humidity changes.
Attention to detail, including level installation and correct finishing, determines the quality and longevity of the shiplap accent wall.
You walk into your living room for the hundredth time and something feels off. The walls are flat, boring, and completely forgettable. If you live along the Gulf Coast of Alabama, you know that feeling well, and you also know that a simple paint refresh only goes so far. Shiplap accent walls have become one of the most popular and achievable DIY upgrades for homeowners in our region, adding warmth, texture, and serious curb appeal to any room. But installing shiplap here is not the same as doing it in a dry climate. Our humidity is real, and it affects how materials behave. This guide walks you through every step, from choosing the right materials for our coastal weather to finishing and maintaining your wall so it looks sharp for years.
Key Takeaways
Point | Details |
Choose the right materials | Opt for moisture-resistant shiplap and let boards acclimate indoors for 2-3 days before installing. |
Plan for climate challenges | Seal, caulk, and leave expansion gaps to combat Gulf Coast humidity and prevent warping. |
First row sets success | Make your first shiplap row absolutely level—even if your floor isn’t—for pro-quality results. |
Finishing matters | Fill nail holes, prime, and use quality paint so your accent wall stays crisp and bright. |
What you need to get started: Materials, tools, and planning for humidity
Now that you know why shiplap is a smart choice for your space, it is crucial to gather the right materials and understand the Gulf Coast’s humidity challenges before your first cut. The Gulf Coast’s moisture levels can turn a beautiful accent wall into a warped, gapped mess if you choose the wrong materials or skip the prep work. Getting this part right is where most successful DIY shiplap projects begin.
Choosing your shiplap material
You have three main material options, each with real trade-offs for our climate:
MDF (medium-density fiberboard) shiplap: Smooth, easy to paint, and affordable. MDF holds up well when properly sealed, but it must be primed on all edges before installation. Raw MDF edges absorb moisture fast.
Prefinished solid wood shiplap: Looks beautiful and authentic. Cedar is a solid choice here because of its natural resistance to moisture. Always buy kiln-dried boards and inspect for warping before you buy.
Vinyl/PVC shiplap: The most moisture-resistant option available. PVC will not warp, swell, or grow mold. It costs more upfront but is worth considering for bathrooms, laundry rooms, or any wall near exterior exposure.
For Gulf Coast Alabama’s high humidity, acclimate wood for 48 to 72 hours indoors before installing, and prioritize MDF or moisture-resistant materials over raw pine or untreated wood. Stack boards loosely in the room where they will be installed so they adjust to the indoor temperature and humidity before you nail a single piece. This step alone prevents most post-install warping.
Paying attention to humidity control for Gulf Coast homes is also important before you start. If your home has existing moisture or ventilation issues, no amount of good materials will save your finished wall. Address root causes first.
Essential tools and materials
Item | Purpose |
Stud finder | Locate wall studs for secure nailing |
Level (4 ft recommended) | Ensure first row is perfectly straight |
Miter or circular saw | Cut boards to length and around obstacles |
Nail gun (15 or 16 gauge) or hammer | Fasten boards to wall |
Nickels or 1/8 inch spacers | Create consistent expansion gaps |
Tape measure and pencil | Mark cuts and stud locations |
Moisture-resistant primer and paint | Seal and finish boards |
Caulk gun and paintable caulk | Fill edges and transitions |
Sandpaper (120 grit) | Smooth filled nail holes and edges |
Planning your layout
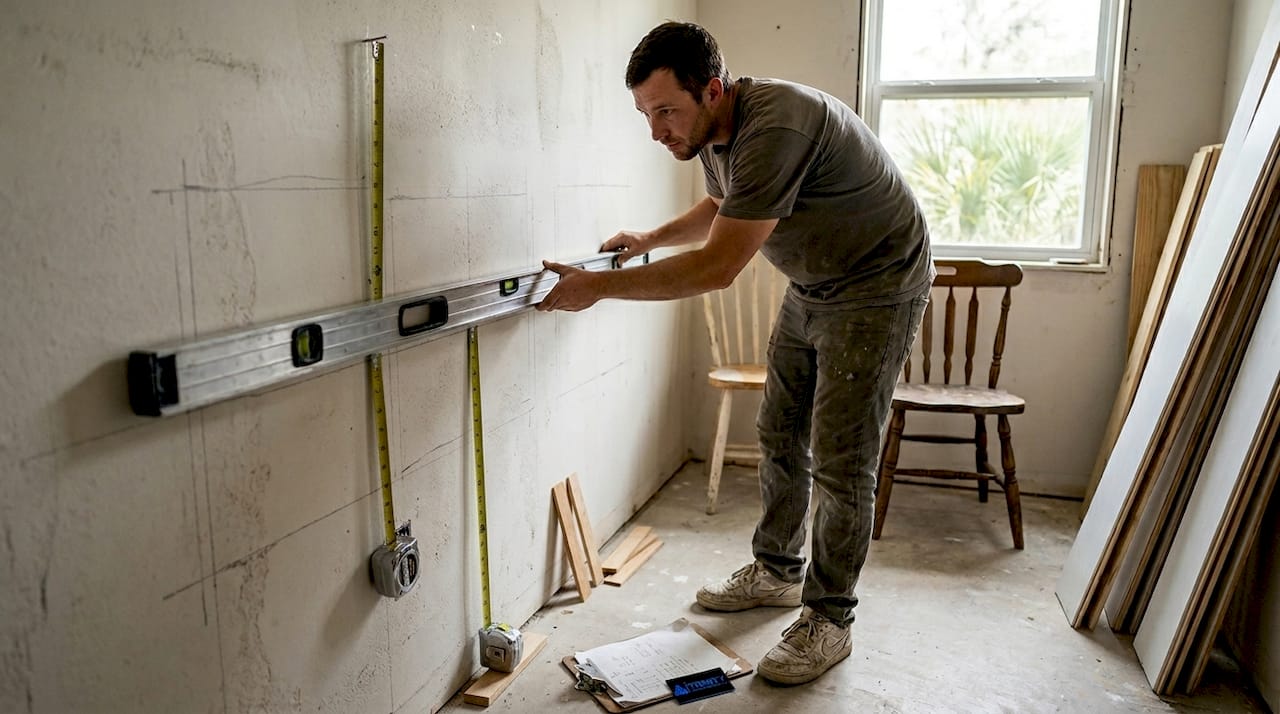
Uneven walls require shims or furring strips before boards go up, so run a long level across your wall and note any dips or bumps. Mark all stud locations with painter’s tape along the top and bottom of the wall so you can see them clearly during installation. Also map out outlet and light switch locations so you know which boards will need cutouts.
Pro Tip: Good ventilation for coastal homes matters more than most people realize. If your crawlspace or wall cavities already have moisture issues, adding shiplap can trap humidity against the drywall. Fix ventilation problems before you pick up a nail gun.
Step-by-step installation: From wall prep to nailing the first board
With your tools and materials ready, follow these step-by-step instructions to ensure a smooth, professional-looking install.
Prep the wall surface. Remove outlet covers and switch plates. Fill any large holes or cracks in the drywall with joint compound and let it dry fully. Sand smooth so your shiplap lays flat.
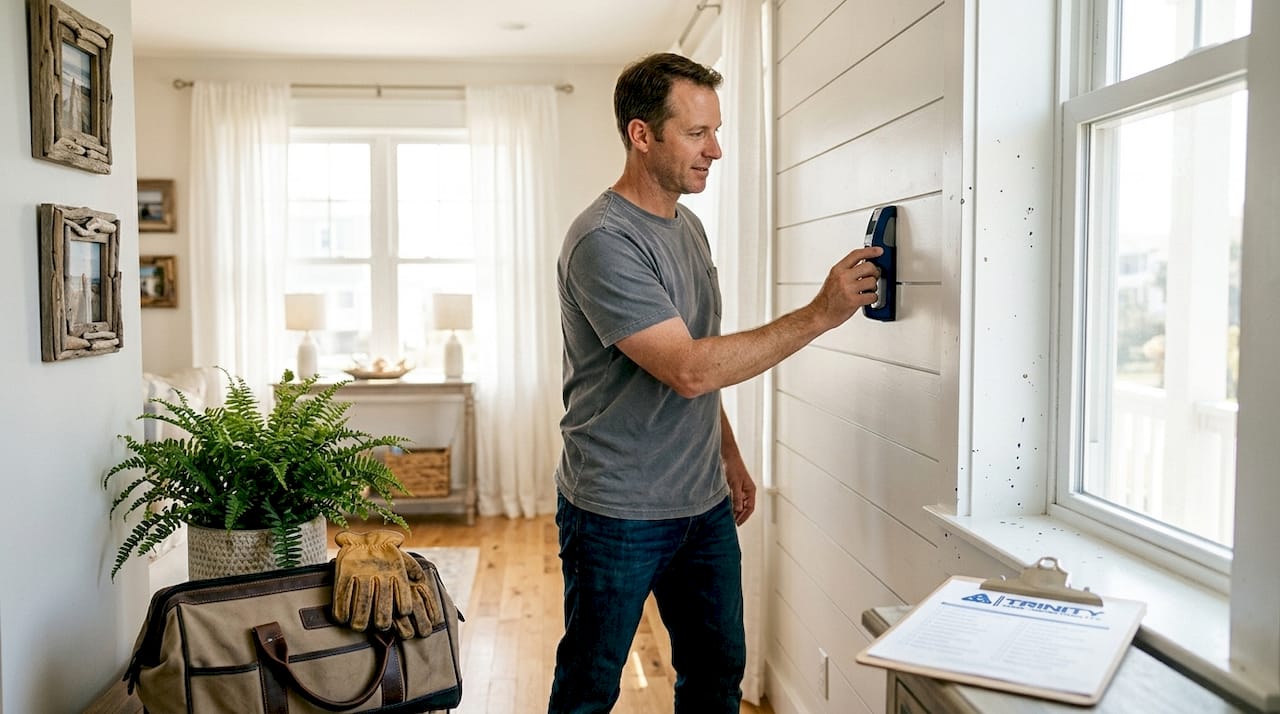
Mark your studs clearly. Use a stud finder and mark every stud location with a vertical pencil line from floor to ceiling. Studs in most homes are 16 inches apart on center. These marks are your nailing targets.
Plan your layout from top to bottom. Decide whether you are running boards horizontally or vertically. For horizontal runs, measure the wall height and divide by your board width plus the 1/8 inch gap to estimate how many rows you need. If the bottom row will be less than half a board width, adjust your starting point upward.
Cut your first boards. Use a miter saw for clean, square cuts. Measure twice and cut once. For your first row, cut a few boards to length but leave them uninstalled until you confirm your level line.
Snap a level chalk line. The first board must be perfectly level even if it sits slightly off the floor. Use your 4-foot level to snap a horizontal chalk line where your first row will sit. This one step determines whether the entire wall looks straight.
Install the first row. Set your first board on the chalk line and nail it into every stud it crosses. Use two nails per stud for solid holding. Standard installation steps include starting from level, using consistent spacers, and nailing into studs throughout the entire project.
Add spacers and continue up the wall. Place nickels flat on top of the first board as spacers, then set your second board on top of them. Nail it in and repeat. Keep your spacers consistent on every row.
Handle electrical outlets as you go. When you reach an outlet, measure its exact position on the board below it, transfer those measurements to your new board, and use a jigsaw to cut the opening before nailing.
Safety warning: Before cutting any board near an outlet, switch, or fixture, turn off the circuit breaker for that wall. Always check for live wires and plumbing pipes before drilling or nailing into any wall surface.
Step | Estimated time |
Wall prep and stud marking | 30 to 45 minutes |
Layout planning and first cuts | 45 to 60 minutes |
Installing boards (12x8 wall) | 4 to 6 hours |
Outlet cutouts and edge work | 1 to 2 hours |
Caulking and finishing | 1 to 2 hours |
Pro Tip: Use this DIY shiplap installation guide as a companion reference as you work through each phase. Having a second set of eyes on the layout before you commit to nailing saves a lot of backtracking.
Dealing with tricky spots: Outlets, corners, and uneven walls
Even the best-laid DIY plans hit snags. Here is how to handle those tricky spots so your accent wall stands out for the right reasons.
Electrical outlets and switches
When your shiplap goes over existing drywall, the outlet boxes sit deeper than your new wall surface. You will need box extenders, which are simple plastic or metal rings that push the outlet forward so the face plate sits flush with your new shiplap surface. They cost just a few dollars each and install in minutes. Precise measuring and a steady jigsaw hand are the keys to clean outlet cutouts.
Inside and outside corners
Inside corners: Butt one board tight into the corner and overlap the adjacent wall’s boards on top of it. Caulk the seam for a clean finish.
Outside corners: Use a miter cut at 45 degrees so boards from both walls meet at a crisp point. Sand the joint lightly and caulk before painting.
Gaps at trim: If your shiplap meets baseboards, crown molding, or door trim, run a thin bead of paintable caulk along the joint. This seals the edge and gives a built-in, professional look.
Uneven walls
Gulf Coast homes, especially older ones in Mobile or Baldwin County, often have walls that are not perfectly flat. If your level shows more than 1/4 inch of variation across a wall, you have two choices. Shims work well for small isolated low spots. Furring strips, which are thin strips of wood nailed to the wall in a grid, work better for large areas of unevenness. They create a flat nailing surface and actually improve airflow behind your shiplap, which matters in humid climates.
Design note: Do not skip the gap spacing. That 1/8 inch shadow line between boards is what gives shiplap its signature layered look. Boards butted tight together just look like paneling. The gap is the whole point.
Staggering board joints
When boards do not reach the full width of the wall, you will have end joints mid-wall. Stagger these joints so they do not line up vertically between rows. A random pattern looks natural and is structurally better than aligned joints. Always make sure every joint lands on a stud.
Pro Tip: For help troubleshooting post-install gaps or spacing issues, check out our guide on fixing shiplap gaps before you reach for the caulk gun out of frustration.
Finishing touches and maintenance: Seal, paint, and climate-proof your wall
Installing shiplap is only the beginning. These final steps will keep your accent wall looking sharp for years, even in our sticky Gulf Coast weather.
Finishing steps in order
Fill nail holes. Use a lightweight spackling compound or wood filler to fill every nail hole flush with the board surface. Let it dry completely, then sand smooth with 120-grit sandpaper.
Caulk all edges. Run a thin, even bead of paintable caulk along every edge where shiplap meets trim, ceilings, baseboards, and corners. Smooth it with a damp finger for a clean line.
Prime before painting. Prime all edges before installation, and apply a second coat of moisture-resistant primer to the full installed surface before you paint. Pay special attention to MDF cut edges, which soak up paint and primer like a sponge without proper sealing.
Paint with a humidity-rated product. Choose a paint labeled moisture-resistant or mildew-resistant. Sherwin-Williams Duration and Benjamin Moore Aura are two reliable options for humid climates. Use a roller for flat surfaces and a small brush to get paint into the shadow gaps between boards.
Inspect for expansion gaps. Run your finger along each gap to confirm no boards have shifted tight against each other. If they have, you may need to score the caulk and gently separate them before the next humidity season causes buckling.
Maintenance tips for Gulf Coast homeowners
Wipe down the wall with a slightly damp cloth once or twice a year to remove dust and grime from the shadow gaps.
Inspect caulk lines annually, especially after summer. Gulf Coast heat and humidity cycles can crack caulk over time. Reapply where needed.
Watch for any soft spots or discoloration that could signal moisture getting behind the boards. Catch it early and it is a simple fix.
Keep indoor humidity between 40 and 55 percent with your HVAC system. This protects both your shiplap and the rest of your home.
Budget and time snapshot
Cost estimate: A 12x8 foot shiplap accent wall runs roughly $200 in materials for a weekend DIY project, making it one of the most affordable high-impact upgrades you can tackle yourself.
For ongoing issues after installation, our resource on maintaining shiplap and fixing gaps covers the most common problems Gulf Coast homeowners run into after their first humid summer with a new accent wall.
Why attention to detail makes or breaks your shiplap project
With the physical installation and finishing done, it is worth stepping back to understand what separates a jaw-dropping accent wall from a mediocre one. Here is our honest take after seeing dozens of DIY shiplap projects across Gulf Coast Alabama homes.
Ninety percent of DIY shiplap problems come from two things: rushing the prep phase and skipping climate-proofing steps. Homeowners see the finished photos online, get excited, and go straight to nailing boards. They skip the acclimation period. They forget to prime the edges. They use standard interior paint in a coastal home that experiences serious humidity swings from June through September. Then they wonder why the boards cup or the paint peels within a year.
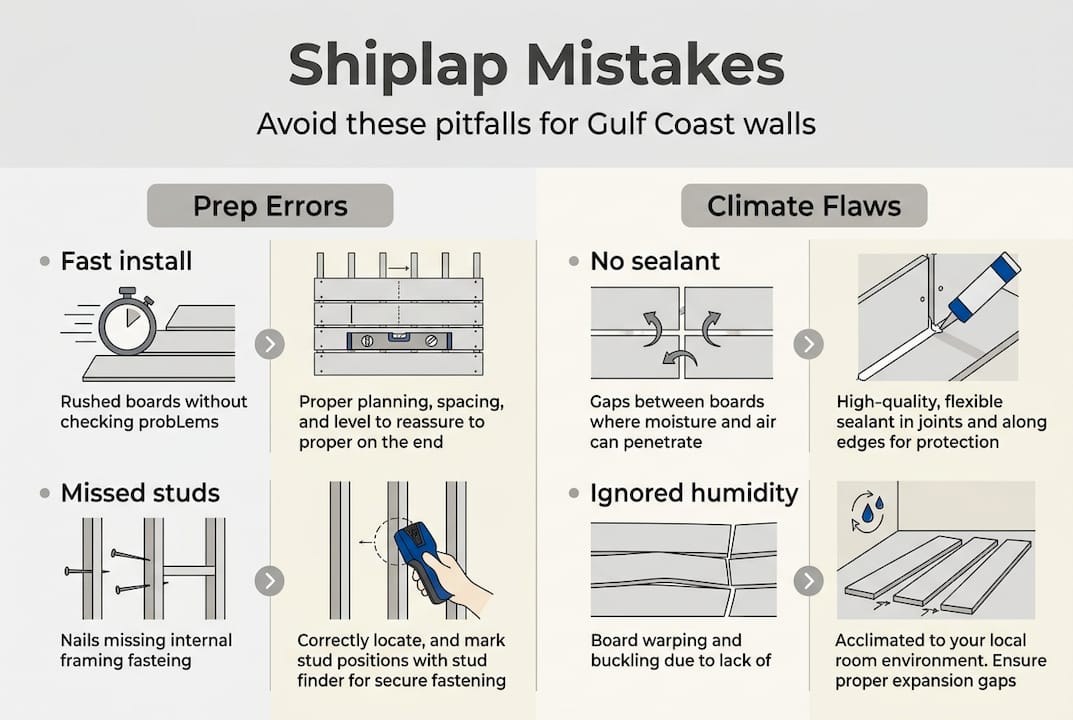
The nickel gap is a perfect example of the discipline that separates good results from great ones. It sounds almost too simple. Drop a few nickels on top of each board as a spacer and move on. But DIYers in humid Gulf Coast areas who skip consistent spacers end up with tight spots that buckle when humidity rises and wide gaps that look sloppy when the air is dry. The spacer discipline is not about aesthetics alone. It is about giving the wood room to move with the seasons.
There is also a common misconception that shiplap is forgiving. It is not. The boards amplify every imperfection in your wall because your eye naturally follows the long horizontal or vertical lines. A wall that is off level by just 1/8 inch over 12 feet becomes very visible by the time you are halfway up. Starting level and checking level on every third row is not perfectionism. It is just the minimum standard for a result you will actually be proud of. For more guidance on avoiding these overlooked shiplap mistakes, revisit your finishing checklist before you consider the project done.
Looking for expert inspection or advice before you build?
Before you nail your first shiplap board, it is worth knowing exactly what you are working with behind that wall. Hidden moisture, old mold, or poor ventilation can undermine even the best installation. That is where Trinity Home Inspections comes in.

We are InterNACHI-certified inspectors serving Baldwin, Mobile, Escambia, and surrounding Gulf Coast Alabama counties. We use thermal imaging and moisture meters to identify problems behind walls before they become expensive surprises. If you want to check for mold inspection services or need to review your home’s records before a renovation, we make it simple. You can also use our home permit and deed search tool to confirm permit history before your project begins. Give us a call or reach out online. We are here to make sure your next home project starts on solid ground.
Frequently asked questions
What is the best material for shiplap in Gulf Coast Alabama?
Moisture-resistant MDF, sealed cedar, or PVC shiplap are the best choices for our region. Avoid raw wood because Gulf Coast humidity causes rapid warping and swelling without proper sealing.
Do I need to leave gaps between shiplap boards?
Yes, always use spacers to leave about a 1/8 inch gap between boards. This gives the material room to expand and contract with changing humidity levels, which prevents buckling.
Can I install shiplap over drywall?
Absolutely. Just make sure you nail into studs through the drywall rather than into drywall alone. Nailing only into drywall will not hold long-term and the boards will eventually loosen.
How much does it cost to DIY a shiplap accent wall?
Budget roughly $200 for a 12x8 foot wall in materials. Most projects fit comfortably into a weekend, making this one of the most cost-effective home upgrades you can tackle yourself.
Should I run shiplap boards vertically or horizontally?
Vertical boards elongate a room visually and make ceilings feel higher, while horizontal boards add width. Choose based on your room’s proportions and the feeling you want to create.
Recommended

