
Add Shiplap Walls for Farmhouse Feel: DIY Guide
- Matt Cameron

- Mar 15
- 9 min read
Achieving that perfect farmhouse aesthetic in your Gulf Coast Alabama home can feel overwhelming, especially when you’re unsure where to start or which materials will hold up against coastal humidity and salt air. Shiplap walls offer an authentic, timeless charm that transforms ordinary rooms into warm, inviting spaces. This guide walks you through every step of planning, preparing, and installing shiplap walls yourself, with special attention to material choices that perform well in our unique coastal climate. You’ll learn how to avoid common mistakes, select the right tools, and maintain your new walls for years of beauty and durability.
Key takeaways
Point | Details |
Preparation ensures professional finish and durability | Removing trim and locating studs creates a stable foundation for secure installation. |
Material choice impacts appearance and coastal performance | Moisture-resistant composites like ACRE outperform natural wood in humid, salt air environments. |
Proper tools and techniques simplify DIY installs | Brad nail guns and miter saws cut project time significantly while delivering professional results. |
Attention to leveling and spacing prevents issues | Consistent nickel gaps and level starting boards prevent warping and maintain clean lines. |
Maintenance varies by material and environment | Composite shiplap requires minimal upkeep compared to natural wood in coastal settings. |
Preparing your walls and selecting materials for Gulf Coast homes
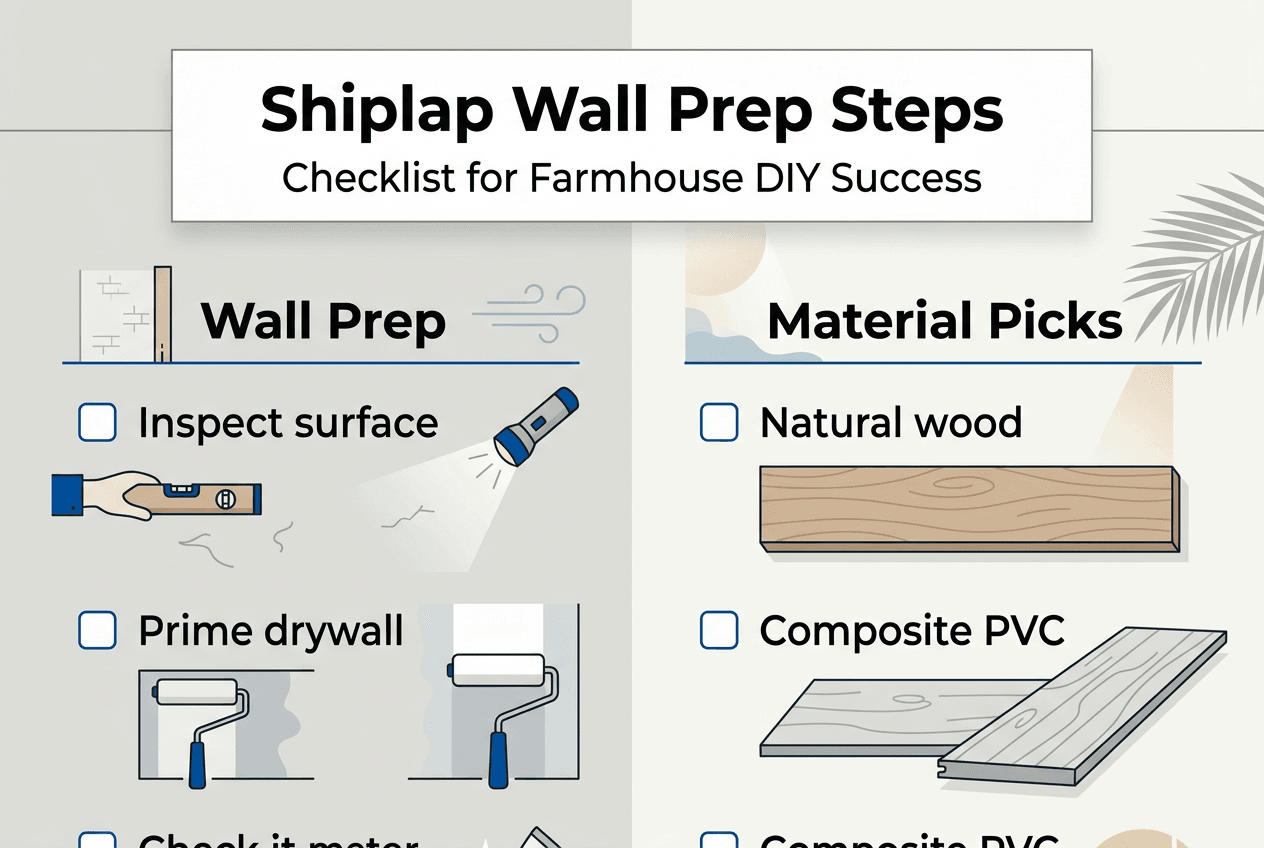
Before you pick up a single board, your walls need proper preparation to ensure a long-lasting, professional finish. Shiplap installation requires careful wall preparation, including removing trim and locating studs for secure anchoring. Start by carefully removing existing baseboards, crown molding, and outlet covers. If your trim is in good condition, label each piece and store it safely for potential reuse or replacement after installation. Next, locate and mark all wall studs using a stud finder, marking their centers with light pencil lines from floor to ceiling. This step is critical because nailing into studs provides the structural support your shiplap needs to stay secure.
Material selection makes or breaks your project in Gulf Coast Alabama’s challenging climate. Natural wood shiplap presents high maintenance challenges in coastal environments due to moisture and salt air. While pine and cedar offer beautiful grain patterns, they demand regular sealing, staining, and vigilant moisture monitoring to prevent warping, rot, and mold growth. For homeowners seeking lower maintenance and better performance, ACRE shiplap offers moisture and UV resistance suitable for coastal interiors. This composite material resists swelling, cracking, and fading while delivering the authentic shiplap look without constant upkeep.
Before installation begins, inspect your walls for any pre-drywall inspection issues that could compromise your finished project. Look for moisture stains, soft spots, or cracks in walls that might indicate structural problems. Address these issues now, before covering them with shiplap. Clean the wall surface thoroughly, removing dust, grease, and loose paint to ensure proper adhesion if you’re using any construction adhesive alongside nails.
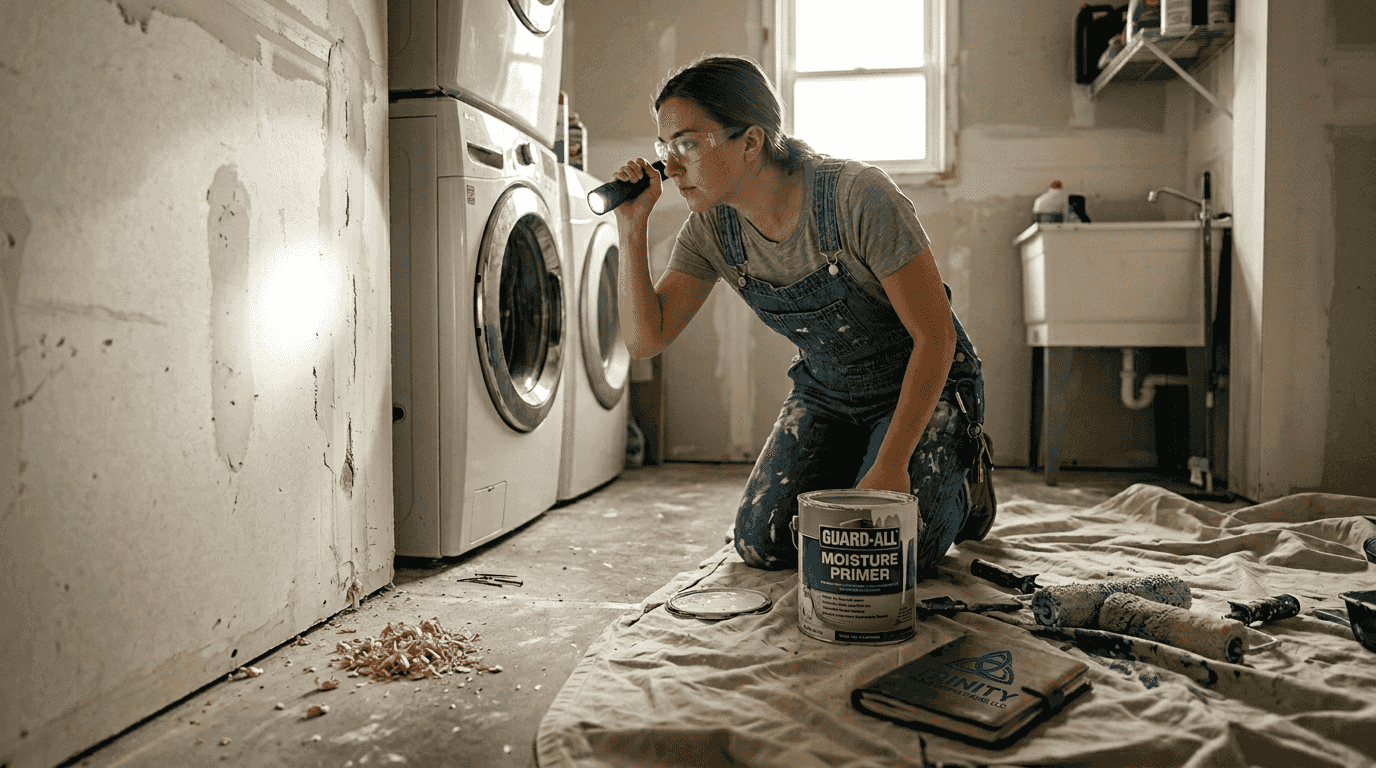
Pro Tip: In coastal areas, consider applying a moisture barrier primer to drywall before installing shiplap, especially in rooms facing prevailing winds or near bathrooms and kitchens. This extra layer of protection helps prevent moisture from migrating through your walls and damaging the shiplap from behind.
Your material choice should also account for the room’s specific conditions. High-humidity spaces like laundry rooms benefit from composite materials, while climate-controlled living areas can accommodate natural wood if you’re committed to maintenance. For those interested in coastal shiplap siding options, research shows composites consistently outperform wood in salt air environments. Calculate your square footage carefully, measuring wall height and width to determine total coverage needed, and remember to subtract windows and doors from your calculations.
Essential tools and calculating materials for your shiplap project
Gathering the right tools before you start saves time, frustration, and costly mistakes. A brad nail gun and miter saw are essential for faster, professional installs. Here’s your complete tool checklist:
Brad nail gun with 18-gauge nails (1.25 to 2 inches)
Miter saw or circular saw for precise cuts
4-foot or 6-foot level for straight installation
Measuring tape (25-foot minimum)
Pencil for marking studs and cut lines
Nickel or spacers for consistent gaps
Stud finder to locate wall framing
Safety glasses and hearing protection
Caulk gun and exterior-grade caulk
Sandpaper or sanding block for cut edges
Accurate material calculation prevents mid-project runs to the hardware store and controls costs. Add a 10-15% waste factor to material calculations for miscuts. Follow these steps to calculate your needs:
Measure the total square footage of each wall (height times width).
Subtract square footage for windows, doors, and other openings.
Add all wall square footages together for total coverage area.
Divide total square footage by the coverage area of one shiplap board (accounting for actual width after tongue and groove overlap).
Multiply the result by 1.15 to account for waste, miscuts, and future repairs.
For example, a 10x10 foot room with 8-foot ceilings has approximately 320 square feet of wall space. After subtracting a standard door and window, you might have 290 square feet to cover. If using 6-inch wide shiplap boards that cover 5.5 inches after overlap, you’ll need roughly 55 boards at 8 feet each, plus 15% waste brings you to about 63 boards total.
Material Type | Cost per Square Foot | Maintenance Level | Coastal Durability |
Pine shiplap | $1.50 to $3.00 | High (annual sealing) | Low to moderate |
Cedar shiplap | $3.00 to $5.00 | Moderate (biennial treatment) | Moderate |
ACRE composite | $4.00 to $6.00 | Very low (occasional cleaning) | High |
PVC shiplap | $3.50 to $5.50 | Very low (wash only) | Very high |
Pro Tip: Purchase all your shiplap from the same production lot to ensure consistent color and grain patterns. Different lots can vary noticeably, creating a patchwork appearance that undermines the farmhouse aesthetic you’re working to achieve.
Budgeting for a typical 10x10 room ranges from $200 for basic pine materials to $500 or more for premium composites, not including tools. If you don’t own a brad nailer or miter saw, factor in $150 to $300 for quality tools that will serve you well beyond this single project. Renting tools is an option, but purchasing makes sense if you plan multiple rooms or future projects.
Step-by-step installation guide to achieve the perfect farmhouse wall
With preparation complete and materials on hand, you’re ready to transform your walls. Start with a perfectly level bottom board and maintain consistent nickel-thick spacing. Follow this proven sequence:
Install the starter board. Measure up from the floor about the thickness of a nickel (roughly 1/16 inch) to allow for expansion. Use your level to draw a perfectly horizontal line across the wall at this height. Position your first shiplap board along this line, checking level in multiple spots. Nail into each stud using your brad nailer, placing nails where they’ll be covered by the next board or hidden in the groove.
Work your way up. Place a nickel or spacer on top of your first board to create the signature shiplap gap. Position the second board, ensure it’s level, and nail it into place. Repeat this process, checking level every few boards to catch any drift before it becomes noticeable.
Handle corners and edges. At inside corners, butt boards tightly together or use trim pieces for a finished look. At outside corners, miter cut boards at 45-degree angles for professional seams, or use corner trim to cover raw edges.
Cut around obstacles. Measure carefully for outlets, switches, and windows. Mark cut lines on your shiplap, then use your miter saw or jigsaw to make precise cuts. Test fit before final installation.
Finish the top row. Your final board may need to be ripped to width. Measure the remaining space, subtract your nickel gap, and cut the board lengthwise. Install with the cut edge facing up, where it will be covered by crown molding or trim.
Use blind nailing to hide fasteners and allow for wood expansion and contraction. Position nails at a slight angle through the tongue of each board, driving them just below the surface. This technique keeps nails invisible while providing strong hold. For composite materials that don’t expand as much as wood, you can face nail more liberally, but maintain the same careful spacing.
Moisture protection is critical in Gulf Coast homes. Seal cut ends and use exterior caulk to create a watertight barrier. Apply primer or sealer to every cut end before installation, paying special attention to areas around windows, doors, and outlets where moisture can penetrate. After installation, run a thin bead of paintable caulk along the top edge where shiplap meets ceiling trim, at inside corners, and around all openings. This simple step dramatically extends the life of your installation.
“The difference between a DIY shiplap project that looks homemade and one that looks professionally installed comes down to three things: level starting boards, consistent spacing, and attention to finishing details like caulking and trim work.”
Reinstall outlet covers, baseboards, and crown molding to complete the transformation. If you removed trim in good condition, reinstall it now. Otherwise, choose new trim that complements your farmhouse aesthetic. Paint or stain your shiplap according to manufacturer recommendations, using products rated for interior use in humid climates.
Maintaining and troubleshooting your shiplap walls in coastal Alabama
Proper maintenance preserves your investment and keeps your farmhouse walls looking fresh for years. Natural wood shiplap requires regular refinishing to combat moisture and salt air damage. Expect to clean, lightly sand, and reseal or repaint wood shiplap every two to three years in Gulf Coast conditions. Watch for early signs of moisture damage like discoloration, soft spots, or peeling finish, addressing issues immediately before they spread.
Composite and synthetic shiplap offer reduced maintenance and increased durability in coastal settings. These materials typically need only occasional cleaning with mild soap and water. Inspect annually for any fastener loosening or gap changes, tightening or adjusting as needed. The performance difference is substantial:
Maintenance Task | Natural Wood Frequency | Composite Frequency |
Cleaning | Monthly | Quarterly |
Refinishing/sealing | Every 2 to 3 years | Never (color-through material) |
Moisture inspection | Monthly | Annually |
Gap/fastener check | Every 6 months | Annually |
Replacement due to damage | Moderate likelihood | Low likelihood |
Common issues have straightforward solutions. If boards bow or warp, it usually indicates moisture problems or inadequate fastening. Remove affected boards, address any underlying moisture sources, and reinstall with proper nailing into studs. Gaps that widen over time often result from seasonal humidity changes. In wood shiplap, this is normal. Extreme gaps may require removing and reinstalling boards during moderate humidity conditions. Discoloration near windows or HVAC vents suggests moisture infiltration or condensation. Improve ventilation, check window seals, and consider adding a dehumidifier in problem rooms.
Pro Tip: Keep leftover shiplap boards stored flat in a climate-controlled space. When repairs are needed years later, having matching material from the same lot ensures seamless fixes. Even composite materials can vary slightly between production runs, making exact color matching difficult.
For rooms with persistent humidity issues like bathrooms or laundry areas, upgrade to PVC or marine-grade composite shiplap designed specifically for wet environments. These materials cost more upfront but eliminate the constant maintenance cycle that plagues wood installations in high-moisture spaces. Regular monitoring takes just minutes but prevents costly repairs. During your seasonal home maintenance routine, walk through shiplap rooms with a flashlight, checking corners, edges, and areas around plumbing for any signs of trouble.
Enhance your Gulf Coast home with professional inspection services
You’ve invested time and effort into creating beautiful farmhouse walls that enhance your home’s character and value. Protecting that investment means ensuring the rest of your home’s systems and structure are equally sound. At Trinity Home Inspections, we help Gulf Coast Alabama homeowners identify potential issues before they become expensive problems. Our InterNACHI-certified inspectors use thermal imaging, moisture meters, and other advanced tools to spot hidden concerns that could affect your shiplap walls and entire home.

Whether you’re planning renovations, buying a home, or simply want peace of mind, our same-day photo and video-rich reports give you the clarity to make smart decisions. Before starting major projects like shiplap installation, consider a real estate home permit search deed search to verify previous work was properly permitted. After installation, our indoor air quality testing can confirm your home remains healthy and well-ventilated. Planning to sell? A pre-sale home inspection helps you address issues proactively, leading to smoother transactions and better offers. We serve Mobile, Baldwin, Escambia, Washington, Monroe, and surrounding counties with the same faith-based values and attention to detail you put into your own home projects.
FAQ
What types of shiplap materials are best for Gulf Coast Alabama homes?
Moisture-resistant composites like ACRE perform best in our coastal climate, resisting humidity, salt air, and temperature swings without warping or requiring constant maintenance. Natural wood options like cedar can work in climate-controlled interior spaces if you’re committed to biennial sealing and regular inspections. For high-moisture rooms like bathrooms, PVC shiplap eliminates wood’s vulnerability entirely while maintaining the farmhouse aesthetic.
How much should I budget for a DIY shiplap wall installation?
A typical 10x10 room costs between $200 and $500 for materials, depending on whether you choose budget pine or premium composite shiplap. Tool purchases add $150 to $300 if you don’t already own a brad nailer and miter saw, though these tools prove valuable for future projects. Factor in an additional $50 to $100 for fasteners, caulk, primer, and finishing supplies to complete the job properly.
Can I install shiplap walls in high-moisture areas like bathrooms?
Avoid natural wood shiplap in bathrooms and other high-humidity spaces where constant moisture exposure leads to warping, mold, and finish failure. Instead, use PVC shiplap or marine-grade composites specifically engineered for wet environments. These alternatives deliver the same farmhouse look with none of the maintenance headaches, performing reliably even in steamy shower areas and laundry rooms. Proper ventilation and sealing around all edges remain essential regardless of material choice.
Recommended
