
A Step-by-Step Guide for Clean Outside Windows Easily
- Matt Cameron

- Feb 25
- 10 min read
Grimy windows can steal the shine from even the best-looking homes in Baldwin and Mobile County. Keeping your exterior glass clean does more than brighten your rooms—it maintains property value and shows pride in your space. With a DIY routine and the right supplies, you can achieve a streak-free, professional finish using key tools and safe cleaning methods recommended by the American Cleaning Institute. Discover a simple sequence to tackle coastal dirt and achieve clear, beautiful windows every time.
Quick Overview
Main Insight | Insight Explanation |
1. Gather All Cleaning Supplies | Prepare two buckets, squeegee, microfiber cloths, and soft scrubber before starting to ensure efficiency and accuracy. |
2. Remove Dust and Debris First | Dry brush or vacuum surfaces to eliminate loose particles, preventing scratches during washing. |
3. Use a Proper Cleaning Technique | Apply solution with a soft cloth or sponge from top to bottom, taking time to address stubborn spots. |
4. Squeegee and Buff Effectively | Use a squeegee at a 45-degree angle, then buff with a dry microfiber cloth for a streak-free shine. |
5. Inspect for Missed Spots | Check windows from various angles after drying to identify and touch up any remaining streaks or smudges. |
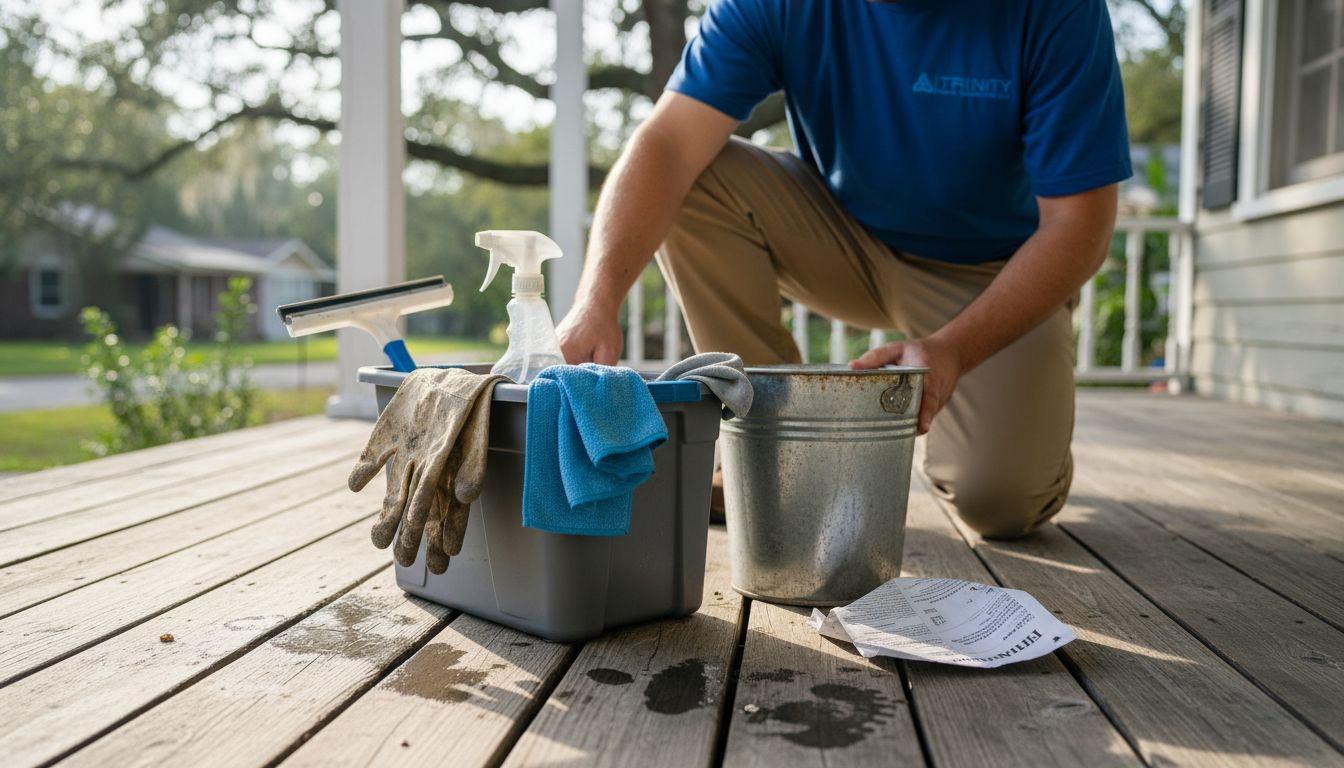
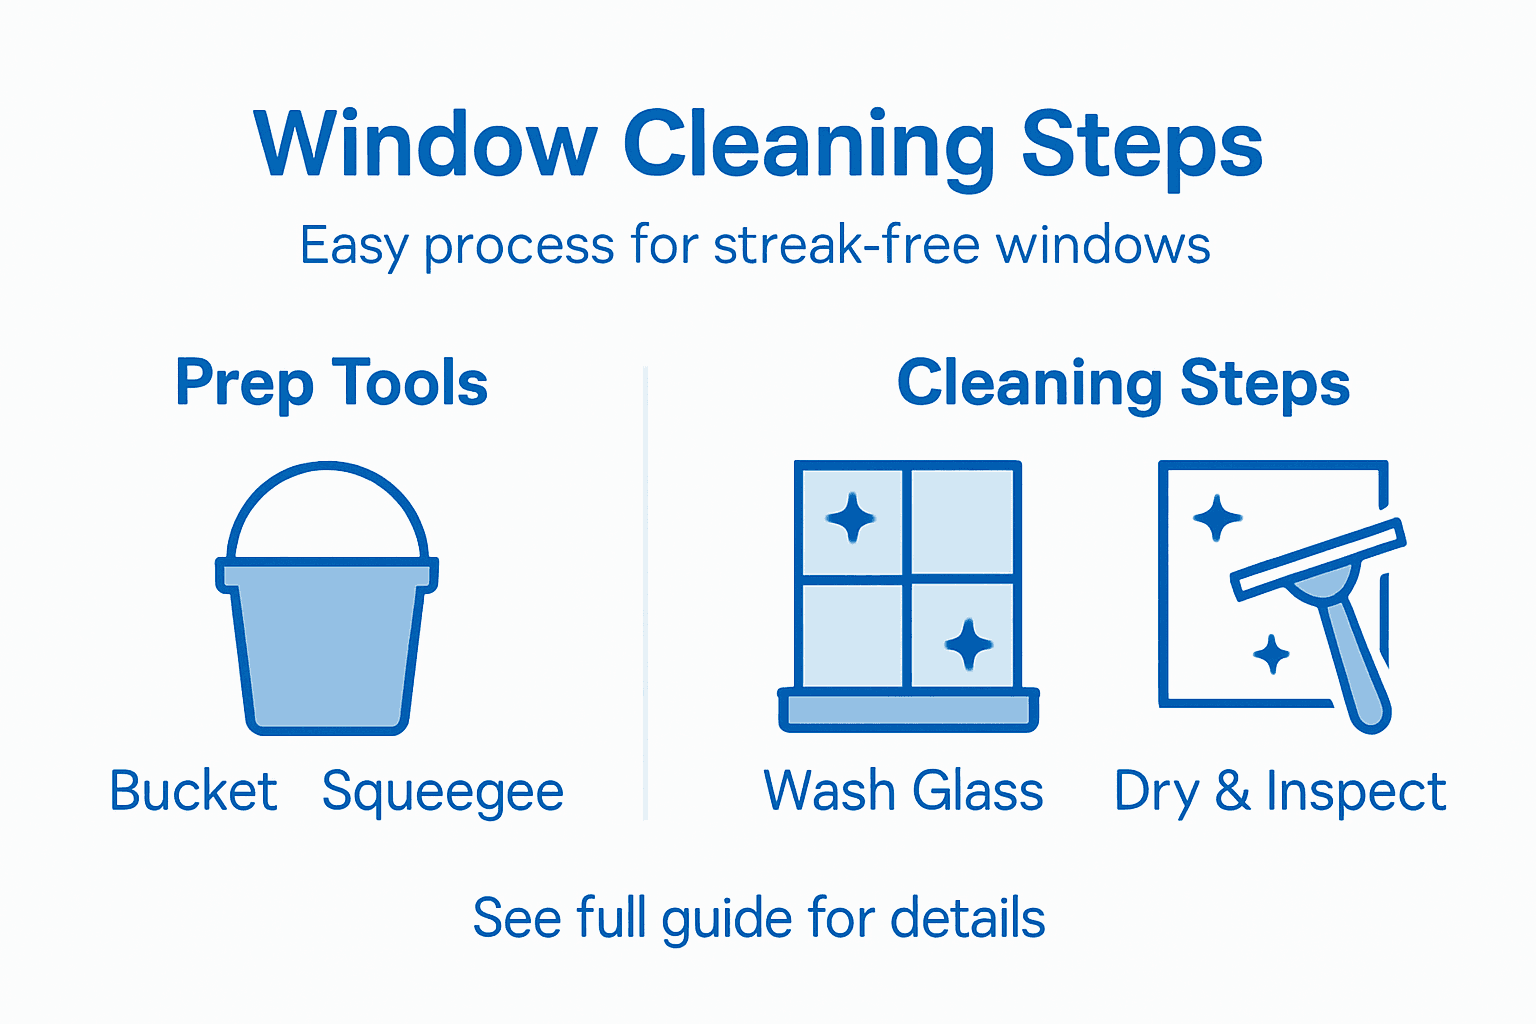
Step 1: Gather Essential Tools and Supplies
Before you grab a bucket and head outside, take a few minutes to assemble everything you’ll need. Having the right tools on hand makes the job faster, safer, and actually enjoyable instead of frustrating.
Start by gathering your basic cleaning supplies. You’ll need a sturdy bucket (preferably two—one for your cleaning solution and one for rinsing), a squeegee for streak-free drying, and microfiber cloths for wiping and polishing. The American Cleaning Institute recommends preparing to clean by having paper towels and proper cleaning solutions readily available before you begin.
For the actual cleaning, grab a soft-bristled scrubber or sponge to gently remove dirt and grime without scratching your glass. Never use abrasive scrubbers—they’ll damage the surface. If your windows are particularly dirty or high up, you’ll want a sturdy ladder that’s tall enough to reach comfortably without overextending yourself.
When it comes to cleaning solutions, use non-abrasive detergents and deionized water to protect your glass integrity. Your water quality matters more than you might think, especially if you have hard water in Baldwin or Mobile County.
Here’s what your basic window cleaning kit should include:
Two buckets (one for solution, one for rinsing)
Squeegee with replaceable blade
Microfiber cloths (at least three)
Soft-bristled scrubber or sponge
Mild, non-abrasive detergent
Garden hose with spray nozzle
Sturdy ladder (if needed for upper windows)
Towels for final drying
Don’t skip reading product labels before using any cleaning solution. Different products work better on different surfaces, and some can be harsh on certain finishes.
Here’s a quick reference comparing common window cleaning tools and their main uses:
Tool | Primary Function | Why It’s Important |
Squeegee | Removes water, prevents streaks | Delivers a professional, clear finish |
Microfiber Cloth | Buffs and dries glass | Leaves glass lint-free and shiny |
Soft Scrubber | Removes dirt and grime | Cleans without scratching surfaces |
Ladder | Provides safe access | Ensures comfort cleaning high windows |
Having everything gathered and organized before you start saves time and prevents those frustrating mid-job trips back inside for forgotten supplies.
Pro tip: Store all your window cleaning supplies in a portable caddy or bucket so you can move from window to window without multiple trips, and keep your tools organized so they dry properly between uses.
Step 2: Remove Dust and Debris from Window Surfaces
This step is your foundation for a streak-free finish. Removing loose dirt, dust, and debris first prevents you from grinding particles into the glass during washing, which would scratch the surface and leave you with a frustrating mess.
Start by dry-brushing your window surfaces with a soft-bristled brush or microfiber cloth. Work systematically from top to bottom, using gentle downward strokes. This initial pass clears away loose dust, pollen, bird droppings, and atmospheric residue that’s accumulated on your glass. In Baldwin and Mobile County, our coastal air brings salt spray and moisture-borne particles that settle on windows, so this step matters more than you might think.
If you prefer a faster approach, use a handheld vacuum with a brush attachment to suck up loose particles. Keep the suction gentle to avoid damaging window frames or sills. For stubborn debris like dried mud or stuck-on pollen, a soft brush with water rinsing works effectively without introducing chemicals prematurely.
Pay special attention to the window frame edges and sill where debris collects. These areas trap dirt that can scratch glass if you don’t remove it first. Work slowly here—it takes an extra minute but saves you from scratches later.
Your debris removal should include:
Loose dust and dirt particles
Pollen buildup (especially during spring)
Dead insects and spider webs
Bird droppings or dried rain spots
Debris from the window frame and sill
Once you’ve cleared the loose material, your window is ready for the actual washing phase. You’ll notice the glass looks better already, and you’ve eliminated the main culprits that cause scratching.
Removing loose debris first is the difference between a professional-looking clean and streaks that show every imperfection on your glass.
Pro tip: Work on a cloudy day or early morning when the sun isn’t heating your windows, which prevents cleaning solutions from drying too quickly and causing streak marks.
Compare the effectiveness of window cleaning under different weather conditions for optimal results:
Condition | Cleaning Outcome | Potential Issues |
Overcast Day | Fewer streaks, easier to spot flaws | Cleaner, streak-free finish |
Sunny Afternoon | Solutions dry too quickly | Increased streaks, missed spots |
Early Morning | Solutions work longer | Less risk of premature drying |
Step 3: Wash Windows with Cleaning Solution
Now that you’ve cleared away loose debris, it’s time to apply your cleaning solution and actually wash the glass. This is where you’ll see the transformation from dusty to sparkling.
Fill your bucket with water and add your mild cleaning solution. You can use a commercial glass cleaner, or create your own by mixing a small amount of mild dish soap with water. If you prefer a traditional approach, non-abrasive detergents mixed with water work excellently for exterior windows without risking damage to coated or tinted glass.
Dip your soft cloth or sponge into the solution and apply it generously to your window. Work from top to bottom in overlapping strokes, making sure you cover the entire glass surface. Don’t rush this step—let the solution sit for a few seconds on stubborn spots to help break down grime and mineral deposits that are common in our Alabama coastal water.
As you scrub, pay attention to the corners and edges where dirt tends to accumulate. Use gentle circular motions rather than aggressive scrubbing, which can leave swirl marks. Remember that your goal is to dissolve the dirt, not to muscle it off.
Once you’ve scrubbed the entire window, rinse thoroughly with clean water from your garden hose. Make sure no cleaning solution residue remains—this is crucial for avoiding streaks. Be careful not to spray solution onto your window frames or sills excessively, as this can damage paint or wood finishes.
Your washing process should follow this order:
Prepare your cleaning solution in the bucket
Soak your cloth or sponge in the solution
Apply solution to the glass surface
Scrub gently using top-to-bottom motions
Rinse thoroughly with clean water
Repeat for stubborn spots if needed
After rinsing, you’re ready to squeegee and dry—but don’t skip those steps. They’re what turn a wet window into a streak-free, crystal-clear finish.
The patience you invest in thorough rinsing here directly translates to fewer streaks and a professional appearance.
Pro tip: Keep a second bucket of plain rinse water nearby so you can remove solution residue without waiting to refill your hose, which speeds up the entire process.
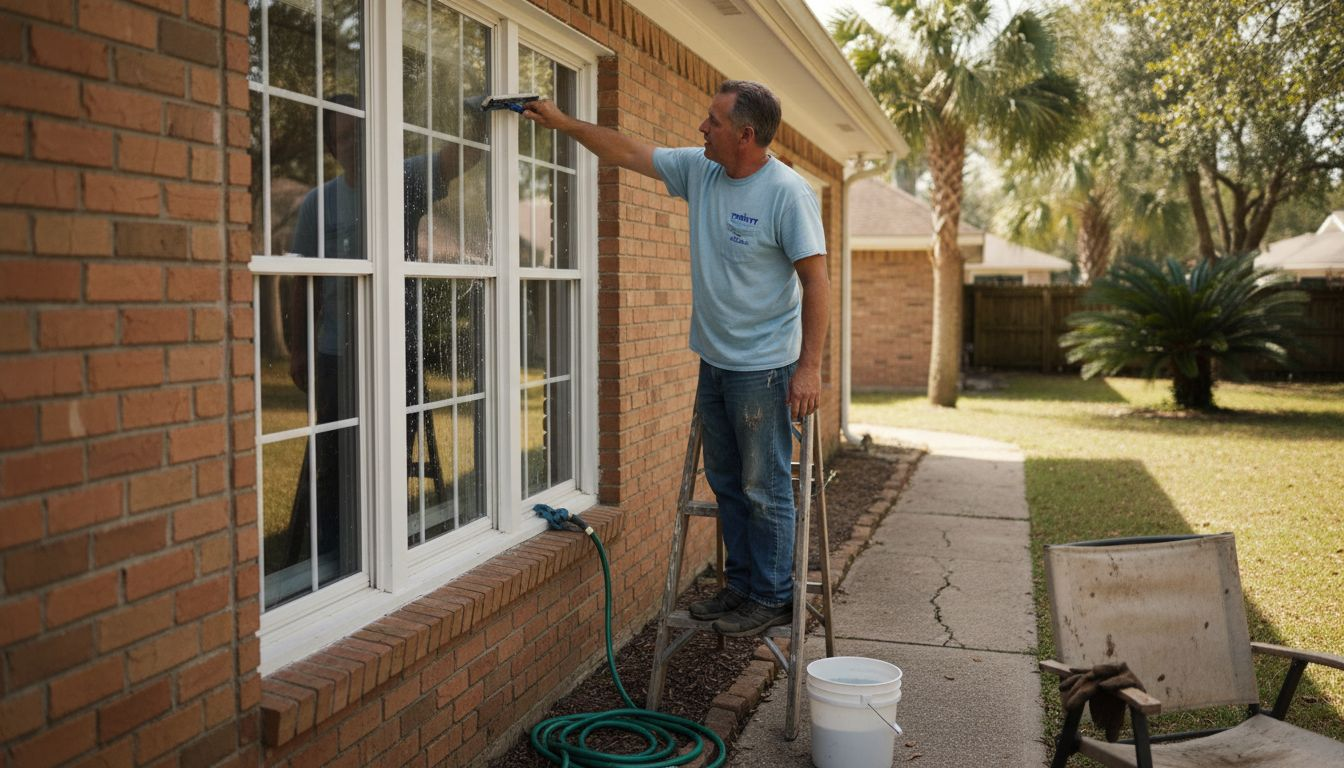
Step 4: Dry and Buff Windows for a Streak-Free Shine
This final step separates a mediocre window cleaning from a professional-looking result. Drying and buffing correctly transforms wet glass into sparkling clarity without a single streak in sight.
Start by using your squeegee to remove excess water from the glass. Hold it at a 45-degree angle and pull downward in one smooth motion, wiping the blade on a clean cloth between each pass. This removes the bulk of the water and prevents dripping onto your frames and sills.
After squeegeeing, grab your clean, dry microfiber cloth and buff the entire window surface. Microfiber is your best friend here because it absorbs water and polishes glass without leaving lint or residue. Work in overlapping circular motions, paying special attention to corners and edges where water tends to pool.
Timing matters more than you might think. Avoiding direct sunlight while drying prevents streaks caused by the cleaner drying too quickly on hot glass. If you’re cleaning on a sunny day, work on the shaded side of your house first, or wait until early evening when the sun is lower.
If streaks appear after buffing, dampen your microfiber cloth slightly with clean water and buff again. Sometimes a second pass is all you need to achieve that crystal-clear finish. Never use paper towels for this final step—they leave fibers behind that catch the light.
Your drying sequence should follow this pattern:
Use squeegee to remove bulk water
Wipe squeegee blade between each stroke
Buff entire surface with dry microfiber cloth
Work in circular motions
Address corners and edges last
Inspect for any remaining streaks
Step back and admire your work. Clean windows instantly improve your home’s curb appeal and let more natural light inside. This is what makes the effort worthwhile.
The difference between good and great window cleaning is always in the final buffing step.
Pro tip: Keep your microfiber cloths in a designated, lint-free location and wash them separately from other laundry to maintain their streak-fighting effectiveness.
Step 5: Inspect Windows and Touch Up Missed Spots
Before you pack away your supplies, take a critical look at your work. This inspection step ensures you haven’t missed anything and that every window shines uniformly.
Step back from your windows and view them from different angles. Look at the glass from the side where light hits it directly, then from an angle. This reveals smudges and streaks that might be invisible straight-on. Visually inspecting windows from multiple angles ensures all areas are clean and identifies any missed spots that need attention.
Pay special attention to the top corners and bottom edges where water pools and mineral deposits accumulate. These areas often get overlooked during the initial cleaning. Also check the window frame where glass meets frame, as dirt can hide in those crevices.
If you spot a smudge or streak, don’t be discouraged. Simply dampen your microfiber cloth with your cleaning solution and gently buff that area. A quick touch-up takes seconds and makes all the difference in your final result. Work the solution into the spot, then wipe it clean with a dry cloth.
For stubborn mineral deposits or hard water spots, apply a small amount of solution directly to the cloth and let it sit on the spot for a few seconds before wiping. The extra contact time helps dissolve minerals that resist quick buffing.
Your inspection checklist should include:
Viewing windows from multiple angles
Checking top corners and edges
Looking for residual streaks or hazing
Examining the glass-to-frame junction
Testing for any remaining cleaning solution residue
Verifying uniform clarity across the entire pane
Once you’ve addressed any touch-ups, step back one final time. Your windows should now be crystal clear, streak-free, and noticeably brighter. This level of cleanliness instantly boosts your home’s curb appeal and shows that you take pride in maintaining your property.
A thorough inspection at the end prevents disappointment and ensures professional-quality results.
Pro tip: Clean your windows on an overcast day or late afternoon so you can see streaks and imperfections more clearly, making touch-ups easier to spot and address.
Keep Your Windows Clear and Your Home Safe with Expert Inspections
Cleaning your windows step-by-step as outlined is a rewarding way to improve your home’s appearance and curb appeal. However, even the clearest windows cannot reveal hidden issues like moisture damage, insulation gaps, or electrical concerns that could affect your home’s safety and value. That is why pairing your window maintenance with a professional home inspection is essential. At Trinity Home Inspections, we provide comprehensive InterNACHI-certified inspections throughout Baldwin, Mobile, and surrounding counties, using advanced tools such as thermal imaging and moisture meters to uncover potential problems that ordinary cleaning cannot detect.
Let us help you protect your home with:
Same-day detailed reports with photos and videos that reveal the full picture
FAA drone inspections to access hard-to-see roof areas safely
Free thermal imaging that detects hidden moisture and electrical heat spots
Thorough testing of windows, doors, and outlets to ensure functionality

Ready to get more than just a clean look? Visit Trinity Home Inspections today to schedule your home inspection and gain peace of mind knowing your home is safe and sound. Learn how our detailed, faith-based service goes beyond surface cleaning and protects what matters most to you. Discover more about our services on our landing page and check out why homeowners across the Gulf Coast trust us for honest, thorough inspections.
Frequently Asked Questions
How do I gather the essential tools for cleaning outside windows?
Start by collecting a sturdy bucket, a squeegee, microfiber cloths, a soft-bristled scrubber or sponge, and a mild detergent. Organizing your tools in advance makes the entire window cleaning process more efficient and enjoyable.
What is the best technique for removing dust and debris from window surfaces?
Begin by dry-brushing the windows with a soft-bristled brush or microfiber cloth, working from top to bottom. This initial step clears away loose dirt and prevents scratches during washing.
How do I wash windows with a cleaning solution?
Fill a bucket with water and a mild cleaning solution, then apply the mixture generously using a cloth or sponge. Make sure to scrub gently using overlapping strokes for the best results.
What steps should I follow to dry and buff windows for a streak-free shine?
First, use a squeegee held at a 45-degree angle to remove excess water from the glass. Then, buff the surface with a clean, dry microfiber cloth to achieve a clear finish.
How can I inspect and touch up missed spots after cleaning my windows?
After cleaning, step back to view the windows from different angles to spot any streaks or smudges. If you find any, dampen a microfiber cloth with cleaning solution and gently buff those areas to restore clarity.
When is the best time to clean outside windows for optimal results?
The ideal time to clean windows is on an overcast day or during the early morning. This prevents cleaning solutions from drying too quickly, reducing the chances of streaks.
Recommended