
Changing Water Filter in Refrigerator: Step-by-Step Guide
- Matt Cameron

- Feb 5
- 8 min read
Nothing is more frustrating than noticing cloudy water coming from your kitchen tap in Gulf Shores or Mobile. Reliable water quality and refrigerator efficiency depend on proper filter care, yet changing this small component often leaves homeowners uncertain. You will find straightforward, researched steps to help you select, prepare for, and safely replace your refrigerator water filter, protecting your family and your investment.
Table of Contents
Quick Summary
Key Takeaway | Explanation |
1. Verify filter compatibility | Check your refrigerator model for the correct water filter type to avoid purchasing the wrong one. |
2. Follow manufacturer guidelines | Adhere to specific instructions for filter removal and installation to ensure safe operations and avoid contamination. |
3. Flush the system after installation | Run water through the new filter for several minutes to clear air and residues, ensuring clean water output. |
4. Monitor for common issues | After installation, be aware of signs like unusual taste or leaks, indicating potential installation errors or filter issues. |
5. Schedule regular inspections | Consider appliance inspections to maintain water quality and refrigerator efficiency, preventing costly repairs and ensuring safety. |
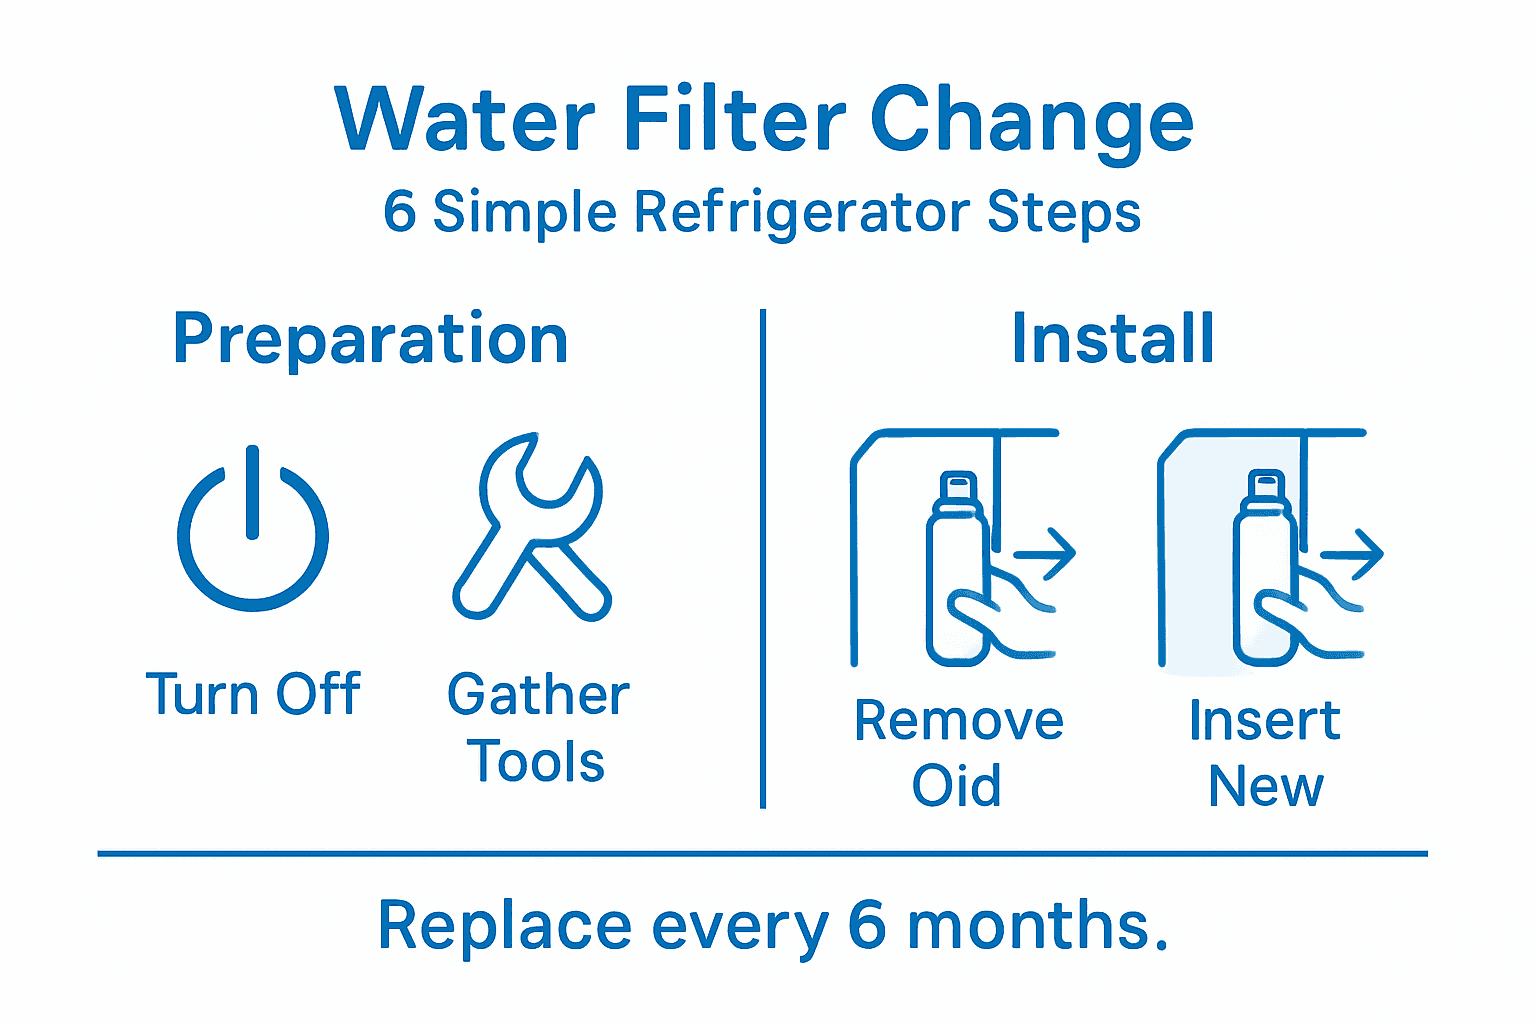
Step 1: Prepare for changing water filter safely
Before diving into your refrigerator water filter replacement, you’ll want to gather the right tools and take essential safety precautions. Certified filter replacement requires careful preparation to ensure clean, safe drinking water.
Start by checking your refrigerator’s manual or model specifications to confirm the exact filter type needed. Not all filters are universal, so purchasing the correct replacement is crucial. Here are the key preparation steps:
Verify filter compatibility with your specific refrigerator model
Gather necessary tools like pliers or a filter wrench
Clear workspace near the refrigerator
Wear clean protective gloves
Keep a towel or container nearby for potential water drips
Prior to removal, understand manufacturer guidelines to prevent potential contamination. Most filters require turning off the water supply or unplugging the refrigerator before replacement.
Carefully read the manufacturer’s instructions specific to your refrigerator model to ensure safe and proper filter replacement.
Pro tip: Keep the old filter packaging nearby as a reference when installing the new filter, which can help you match orientation and installation requirements precisely.
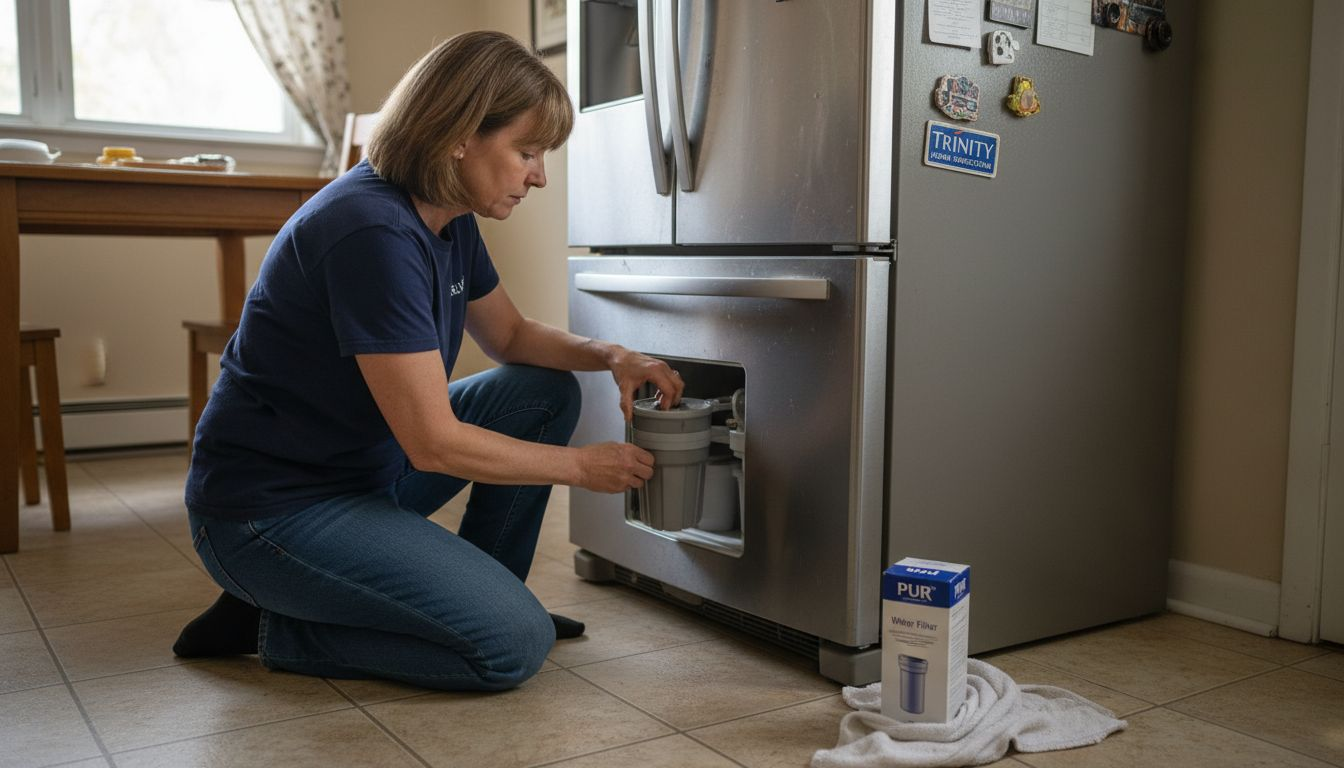
Step 2: Locate and remove refrigerator water filter
Now that you’ve prepared for the water filter replacement, it’s time to locate and carefully remove the existing filter. Appliance maintenance requires precise identification of the filter’s specific location, which can vary depending on your refrigerator model.
Typically, water filters are found in one of three primary locations:
Inside the refrigerator compartment
Near the water dispenser
At the base grille of the refrigerator
To find the exact location, consult your refrigerator’s manual or look for a conspicuous filter housing. Carefully follow manufacturer guidelines to prevent food contamination during the process. Most filters require a simple twist or pull mechanism for removal.
Warning: Always empty nearby food items to prevent potential spills or contamination during filter removal.
Before removing the filter, make sure to turn off the water supply and unplug the refrigerator for safety. Some models might require you to press a release button or rotate the filter counterclockwise to detach it.
Pro tip: Take a quick photo of the current filter’s position before removal to help you install the new filter correctly.
Step 3: Install new water filter securely
With the old filter removed, it’s time to install your new refrigerator water filter carefully and correctly. Water treatment system standards require precise installation to ensure optimal performance and water quality.
Follow these key steps for secure installation:
Remove any protective packaging from the new filter
Check that filter seals are intact and undamaged
Align the filter exactly as the old one was positioned
Insert the filter firmly but without excessive force
Listen for a clicking sound indicating proper locking
Proper filter installation involves matching the filter’s orientation precisely. Most models require a specific twist or push mechanism to secure the filter in place. Gently rotate or lock the filter according to your refrigerator’s specific instructions.
Caution: Incorrect installation can lead to water leaks or reduced filtration effectiveness.
After installation, run several gallons of water through the new filter to clear out any air pockets and carbon residue. This process helps ensure clean, fresh-tasting water and prepares the filter for regular use.
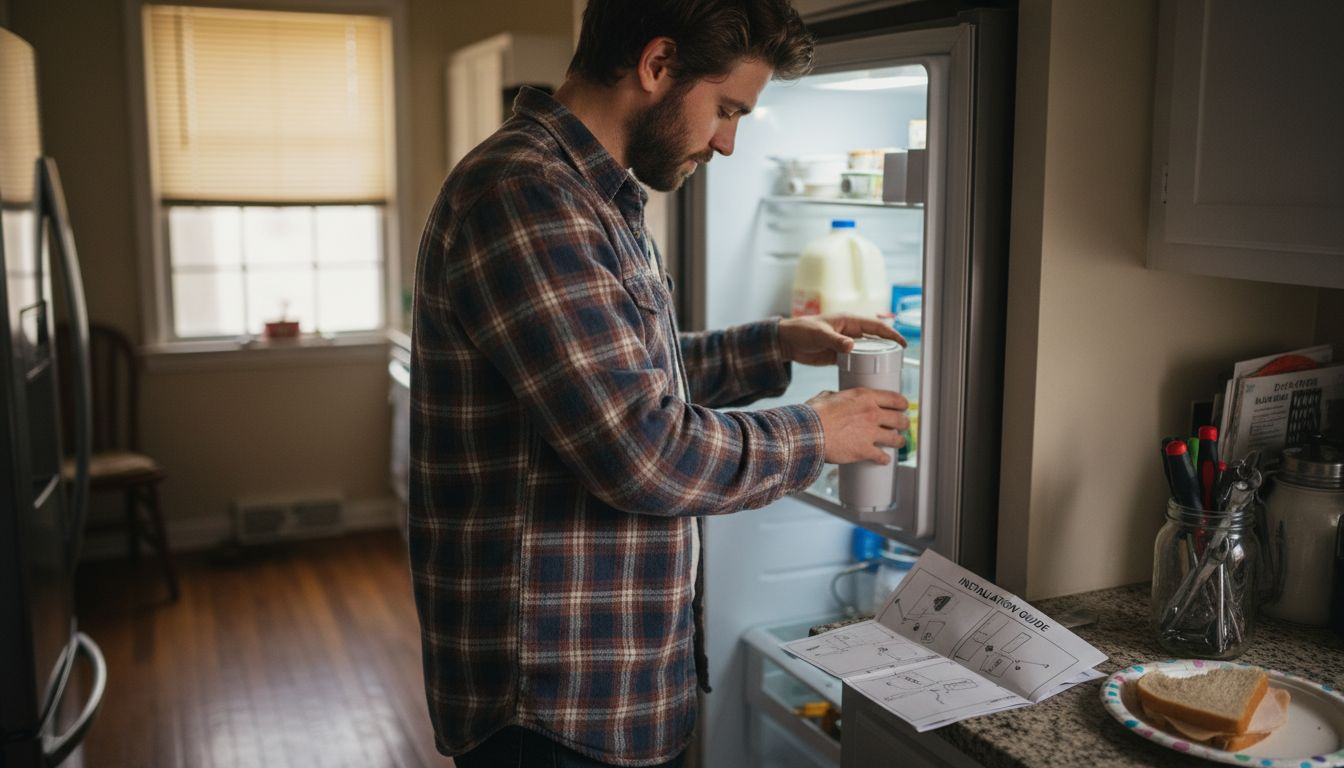
Pro tip: Keep the installation instructions nearby and take a photo of the final position in case you need to reference it for future filter changes.
Step 4: Flush and test water system after replacement
Now that you’ve installed the new water filter, it’s crucial to properly flush and test your refrigerator’s water system. Comprehensive water pipe flushing ensures you remove any trapped air, carbon particles, and potential contaminants.
Here are the key steps for flushing your water system:
Dispense cold water continuously for 5-7 minutes
Discard the first few gallons of water
Run water through both the dispenser and ice maker
Check water clarity and taste
Observe water pressure and flow
Water quality testing is essential after filter replacement. Pay attention to water taste, odor, and appearance. Initially, you might notice some cloudiness or carbon dust, which is normal and should clear after several minutes of flushing.
Warning: Discard the first few batches of ice and water to ensure system cleanliness.
If you notice persistent issues like unusual taste, reduced water pressure, or leaks, double-check the filter installation or contact the manufacturer’s customer support.
Here’s a quick reference to common refrigerator water filter issues and their likely causes:
Issue Observed | Possible Cause | Recommended Action |
Water tastes unusual | Filter not installed correctly | Reinstall and flush filter |
Reduced water pressure | Clogged or old filter | Replace with new filter |
Water leaks after change | Improper filter seal | Check and reseat filter |
Cloudy water | Trapped air or carbon particles | Flush several gallons through |
Error codes show on panel | Incorrect filter fit | Verify filter compatibility |
Pro tip: Mark your calendar with the filter replacement date to help you remember when the next replacement is due.
Step 5: Verify results and restore refrigerator setup
After successfully replacing and flushing your water filter, it’s time to verify the system’s performance and restore your refrigerator’s full functionality. Checking refrigerator system components ensures everything is working correctly and prevents potential issues.
Perform these verification steps:
Test the water dispenser thoroughly
Check ice maker functionality
Verify water temperature and flow
Monitor for any system error codes
Ensure autofill functions are working properly
Temperature setting verification is crucial for maintaining food safety. Use an independent thermometer to confirm internal temperatures are consistent. The refrigerator should maintain 37-40°F and the freezer at 0°F for optimal performance.
Caution: Persistent error codes or unusual performance may require professional diagnostic services.
If everything checks out, congratulations! You’ve successfully completed your refrigerator water filter replacement. Take a moment to appreciate your work and the improved water quality you’ve just ensured for your household.
Pro tip: Take a quick photo of the new filter’s installation date and model number for future reference and easy replacement tracking.
Step 6: Understand why Trinity Home Inspections checks this during appliance inspections
At Trinity Home Inspections, we take appliance assessments seriously because water filters are more than just a component - they’re a critical aspect of home safety and efficiency. Appliance inspection protocols help us identify potential maintenance issues before they become costly problems.
Our inspection process for refrigerator water filters includes:
Verifying filter installation integrity
Checking for signs of wear or damage
Assessing water flow and pressure
Evaluating potential contamination risks
Confirming proper maintenance history
Energy efficiency standards guide our comprehensive approach. We understand that a well-maintained water filter impacts not just water quality, but also the overall performance and longevity of your refrigerator.
Our goal is to provide you with a clear picture of your appliance’s condition, helping you make informed decisions about maintenance and potential repairs.
By examining water filters during home inspections, we help homeowners prevent unexpected breakdowns and ensure their appliances operate at peak efficiency.
Below is a summary of inspection benefits when refrigerator water filters are assessed during a home inspection:
Inspection Benefit | Description | Impact for Homeowner |
Maintains water quality | Ensures no contamination or blockages | Safer drinking water |
Extends appliance lifespan | Prevents filter-related breakdowns | Reduces costly repairs |
Supports energy efficiency | Promotes optimal appliance operation | Lowers utility expenses |
Tracks maintenance history | Offers evidence of regular servicing | Increases property value |
Pro tip: Request a detailed photo report during your home inspection to have a visual record of your appliance’s water filter condition.
Protect Your Home Water Quality with Expert Appliance Inspections
Changing your refrigerator water filter correctly is essential to maintain safe, clean drinking water and avoid costly leaks or appliance issues. If you want peace of mind knowing your water filtration system is installed properly and your refrigerator functions at peak performance, professional inspection is a smart next step. At Trinity Home Inspections, we understand the importance of verifying filter installation integrity, water flow, and potential contamination risks during our thorough home appliance assessments.

Don’t leave your home’s water quality to chance. Schedule an InterNACHI-certified home inspection today and get same-day photo and video reports that clearly show the condition of your refrigerator’s water system and more. Learn how our trusted professionals provide actionable insights you can rely on at Trinity Home Inspections, where integrity meets expertise. Discover our comprehensive inspection services and why homeowners across Alabama trust us to deliver honest answers and clear communication. Take control of your home safety now.
Frequently Asked Questions
How do I know which water filter is compatible with my refrigerator?
To find the correct water filter for your refrigerator, check the user manual or model specifications. Make sure to verify the filter type before purchasing to ensure compatibility.
What tools do I need to replace my refrigerator’s water filter?
You typically need basic tools like pliers or a filter wrench for safe removal. Gather these tools along with a towel and protective gloves before starting the replacement process.
How do I safely remove the old water filter from my refrigerator?
To safely remove the old water filter, turn off the water supply and unplug the refrigerator. Consult your manual to find the filter’s location, then twist or pull it to detach it without damaging any components.
What steps should I follow to install the new water filter securely?
Carefully remove the protective packaging from the new filter and align it just like the old one. Insert it firmly into place, making sure you hear a click to confirm it is locked in correctly.
How do I flush and test the water system after replacing the filter?
To flush your water system, dispense cold water continuously for 5–7 minutes while discarding the first few batches. Check the clarity and taste of the water to ensure it is clean and free of contaminants.
Why is it important to check the water filter during a home inspection?
Inspecting the water filter during a home inspection helps verify installation integrity and identifies potential contamination risks. This proactive measure can prevent costly repairs and ensures safer drinking water.
Recommended


