
4–6 Week Seller Checklist: Room By Room Fixes Inspectors Will Flag


Get your house ready to sell by tackling six things in order: declutter every room, fix any deal-killer safety or structural issues, deep clean top to bottom, refresh curb appeal, book a pre-listing inspection, and schedule professional photos only after everything above is done. Start this process four to six weeks before you list, and budget roughly 1 to 3% of your expected sale price for prep work.
TL;DR:
Prioritize fixing safety and deal-breaking issues like roof leaks, foundation cracks, and outdated electrical panels before addressing cosmetic updates.
Focus on decluttering, deep cleaning, and staging in the final weeks to maximize visual appeal and buyer perception without overspending.
Conduct a pre-listing inspection to identify and repair potential issues early, preventing costly surprises during buyer negotiations.
Enhance curb appeal quickly with cleaning, landscaping, and exterior repairs, as these deliver fast, noticeable improvements for online listings.
Limit repairs and upgrades if under a tight timeline, investing mainly in safety, cleanliness, and presentation to maximize value per hour.
Home Selling Checklist Timeline: How to Sequence Your Prep
A checklist without a schedule just becomes a pile of chores you tackle in the wrong order. The 4 to 6 week runway recommended by real estate professionals gives you enough time to fix problems, clean properly, and still hit the market when buyer traffic is strongest in your area.
Here’s how to break that window down:
Weeks 6 to 8: Order a pre-listing inspection, get contractor quotes on anything major, and start decluttering closets and storage areas nobody sees day to day.
Weeks 4 to 5: Complete repairs flagged by the inspection, paint any rooms that need it, and start packing away a third of your visible belongings.
Weeks 2 to 3: Deep clean every room, handle landscaping and exterior touch ups, and gather your documents folder.
Week 1: Stage each room, do a final walkthrough, and schedule your photographer.
Day of photos: Final tidy, lights on, blinds open.
The prioritization rule is simple: anything that affects safety, financing, or the inspection report goes first. Staging and cleaning happen last, right before your photographer shows up, because a spotless kitchen counter doesn’t stay spotless for three weeks with a family living around it.
If you’re working with a shorter runway, focus only on decluttering, deep cleaning, and curb appeal rather than trying to squeeze in every item. Print this checklist, tape it to the fridge, and assign each task a name and a date. A checklist that lives only in your head tends to lose the boring items first, and those are usually the ones buyers notice.
What to Fix First: Deal-Killers vs. High-ROI Updates
Not every flaw on your house needs equal attention. Some issues can tank a deal entirely, while others are cosmetic annoyances that cost little to fix and pay back well at closing.
Deal-killers are the items that stop financing cold or give a buyer’s agent leverage to renegotiate the whole contract. These typically include active roof leaks, significant foundation cracks, plumbing leaks, and recalled electrical panels like Federal Pacific or Zinsco panels. FHA and VA loans carry stricter property condition requirements than conventional financing, so a home with peeling exterior paint (a lead paint concern) or a broken handrail can actually sink a government-backed loan even when the buyer loves the house.
Quick Stat: Sellers who budget 1 to 3% of their expected list price for prep work cover most cleaning, minor repairs, and staging costs without overspending on upgrades that won’t return their value.
Before you touch paint swatches, walk your house with this deal-killer list:
Roof leaks or visibly missing shingles
Foundation cracks wider than a quarter inch or doors that stick from shifting
Active plumbing leaks under sinks or around water heaters
Outdated or recalled electrical panels
Visible mold or persistent moisture staining
Once those are handled, shift to updates that buyers notice and appraisers reward. Fresh interior paint in neutral tones, updated cabinet hardware, new light fixtures, and re-caulked bathrooms all deliver strong returns for modest spend. Weekend projects worth your Saturday: tightening loose doorknobs, replacing burnt-out bulbs with matching color temperatures, patching nail holes, and swapping dated switch plates. None of these cost more than a trip to the hardware store, but they change how a buyer feels walking through the door.
Room-by-Room Checklist for Selling Your House
This is where the checklist earns its keep. Buyers judge a house room by room, and so do inspectors, which means your prep work should follow the same path.
1. Kitchen
Clear every counter down to two or three appliances, tops. Open and run each appliance, including the dishwasher and garbage disposal, to confirm nothing sticks or leaks. Tighten loose cabinet hardware, touch up chipped grout between tile, and check that range hood venting actually pulls air rather than just making noise. A kitchen that looks clean but smells like last night’s dinner undercuts everything else you’ve done.
2. Bathrooms
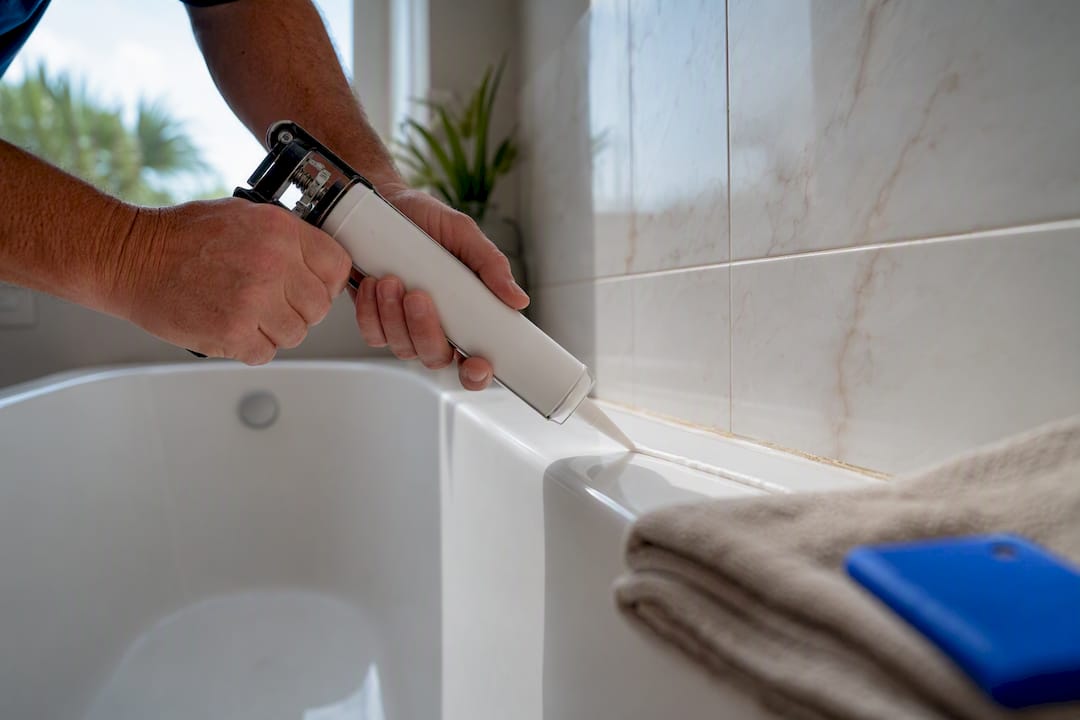
Re-caulk around tubs and sinks where the old caulk has yellowed or gapped. Fresh grout lines make a bathroom look years newer for the cost of a tube of grout pen. Test that the exhaust fan actually vents to the exterior (not just spins) and confirm every toilet flushes without running continuously. Clear out personal care items, medications, and anything that makes the space feel used rather than move-in ready.
3. Living Areas
Pull furniture away from walls to create walking paths and make rooms photograph larger. Check every lamp and overhead fixture for burnt bulbs, and match bulb color temperature across a room so it doesn’t look like a mismatched showroom. Touch up scuffed baseboards and trim, which buyers register subconsciously even when they can’t name what looks off.
4. Bedrooms
Declutter closets aggressively. A packed closet signals “not enough storage” even in a house with plenty. Fold and organize what remains, add a few empty hangers, and remove anything stacked on closet floors. Check carpet for stains or worn patches and consider a professional cleaning or a small area rug to cover a problem spot. Make beds with simple, neutral bedding rather than busy patterns that compete for attention in photos.
5. Attic
Clear a path to the attic access point and remove anything blocking it. Inspectors need to physically enter or view attic spaces, and a blocked or locked attic door is one of the most common access problems sellers create without realizing it. Check for obvious signs of moisture staining on the underside of the roof deck, and confirm insulation is evenly distributed rather than clumped or missing in sections.
6. Basement or Crawlspace
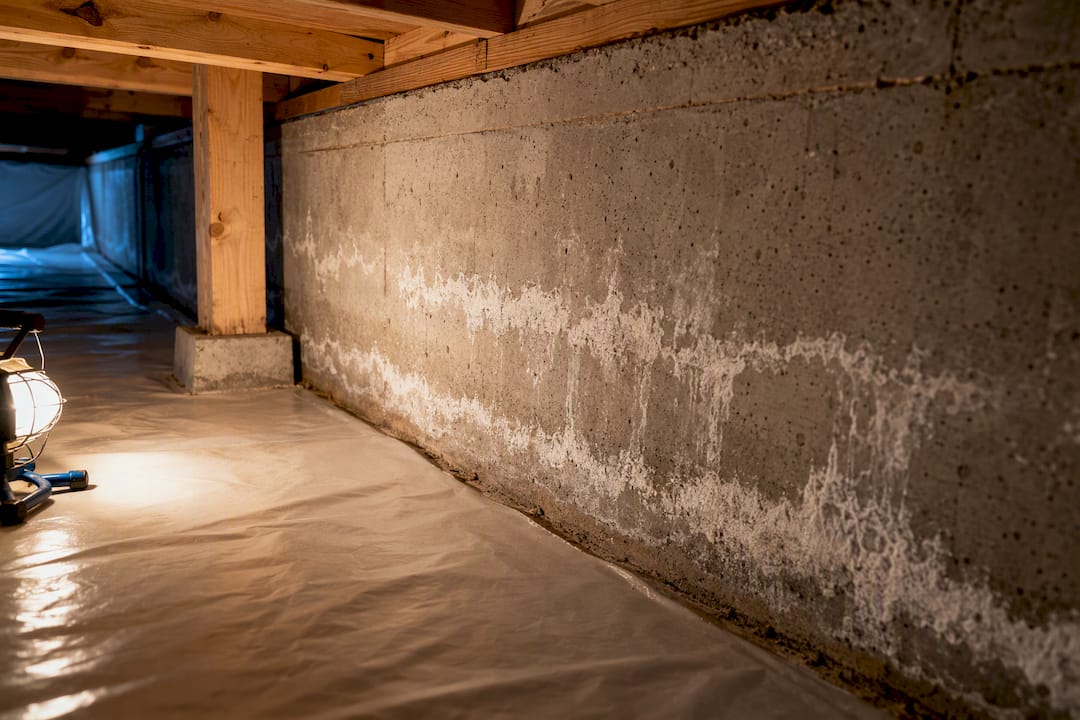
Clear boxes and storage away from the perimeter walls so moisture and foundation issues are visible rather than hidden. Look for efflorescence (that white, chalky residue) on concrete walls, which signals water intrusion even without active leaking. Keep crawlspace entries unblocked. A crowded crawlspace entry slows down inspections and forces rushed follow-up visits, which rarely works in a seller’s favor.
7. Laundry and Utility Areas
Confirm your electrical panel is fully accessible, not blocked by storage shelving or laundry baskets. Same goes for the water heater and furnace, both of which inspectors need clear access to evaluate. Clean lint from the dryer vent (a fire safety item that also matters to insurance underwriters) and clear general clutter so the space looks intentional rather than forgotten.
Working through inspection focus areas room by room before you list gives you a preview of what a buyer’s inspector will likely flag. Our home inspection checklist for sellers breaks down the seven areas inspectors scrutinize most closely, which pairs well with the room-by-room work above.
Deep Cleaning, Decluttering, and Staging Before Listing
Cleaning and staging aren’t the same task, even though sellers often lump them together. Cleaning removes dirt. Staging removes distraction. You need both, in that order.
Start with decluttering: remove a significant portion of your visible belongings from every room, including bookshelves, countertops, and closets. A storage unit or a friend’s garage works fine for the interim. Buyers can’t picture their own life in a space crowded with yours.
The deep clean list covers the spots regular weekly cleaning skips:
Baseboards and window sills, wiped down room by room
Vent covers and ceiling fan blades, where dust builds up unnoticed
Windows washed inside and out, since natural light reads very differently through clean glass
Grout lines scrubbed or refreshed with a grout pen
Behind and under major appliances, including the space under the refrigerator
Carpets professionally cleaned or spot-treated for stains
Once the house is clean, stage it. Neutralize bold paint colors and swap out highly personal décor, but don’t strip every room bare. A few intentional accents (a bowl of fresh fruit, a folded throw blanket, a small plant) read as lived-in without reading as messy. Layer lighting rather than relying on one overhead fixture per room, and go light on scent. A heavily scented candle raises more suspicion about what it’s covering up than it does warmth.
Pro Tip: Pack sentimental and highly personal items first, like family photos and kids’ artwork. It’s the easiest decluttering category to procrastinate on, and it does the most to help buyers picture the house as theirs instead of yours.
Curb Appeal Checklist: First Impressions Buyers See Online
Most buyers see your house online before they ever see it in person, which makes the exterior your first (and sometimes only) shot at getting a click. Curb appeal improvements tend to deliver the fastest visible payoff of any category on this checklist, and most of them cost a weekend and a trip to the hardware store.
Start at the front door, since it’s the focal point of nearly every listing photo:
Repaint or clean the front door and update house numbers if they’re dated or hard to read
Add a fresh doormat and simple potted plants flanking the entry
Replace or clean exterior light fixtures near the entry and along walkways
Edge the lawn, refresh mulch in planting beds, and pull visible weeds
Power wash the driveway, walkway, and siding if it’s been more than a year
Then work up to the roofline. Clear debris from gutters, replace any missing or curling shingles, and trim tree branches hanging over the roof, since these show up in both drone photos and buyer walkthroughs. Check that walkways are level and railings are secure. A wobbly porch rail is a small fix that raises an outsized safety flag for both buyers and their inspectors. If your entry doors or garage door look dated rather than just dirty, interior and exterior door upgrades are worth pricing out, since doors carry more visual weight in photos than most sellers expect.
Documents, Warranties, and Pre-Listing Inspection Prep
Buyers ask for more paperwork than most sellers expect, and scrambling to find it after an offer lands slows everything down. Sellers who have their documents ready close faster and field fewer extension requests, so build this folder early.
Gather the following before you list:
Appliance manuals and warranty documents
Permits for any additions, roof replacement, or major system work
Service records for HVAC, water heater, and pest control
Recent utility bills, since buyers often ask about average costs
HOA documents and bylaws, if applicable
A pre-listing inspection belongs in this same folder of prep work. Typical cost runs $300 to $600 depending on home size and add-ons like sewer scope or mold testing, and it gives you the same information a buyer’s inspector will find, just on your timeline instead of theirs.
Quick Stat: A pre-listing inspection lets sellers fix issues before a buyer’s inspector ever walks through, which removes a major point of leverage from the negotiation table.
Beyond the negotiation advantage, a pre-listing report gives you real numbers to take to contractors instead of vague guesses, which tends to produce tighter, more accurate repair quotes. Our pre-inspection checklist for sellers walks through how to prepare for the visit itself, and a property and permit search can help fill in any permit gaps before a buyer’s title company finds them first.
Photo Day and Showing Day Checklist
Photos and showings each need their own short routine, and mixing the two up is where sellers waste effort.
1. Before the Photographer Arrives
Open every blind and curtain to maximize natural light, since professional photos of staged, decluttered rooms drive significantly more online clicks and showing requests. Clear kitchen and bathroom counters completely, make every bed, and remove pet bowls, litter boxes, and trash cans from any room that will be photographed.
2. Right Before a Showing
Turn on every light, even during the day, and set the thermostat to a comfortable temperature. Have a plan for pets, whether that’s a friend’s house or a closed-off garage, and take trash out on your way to the car.
3. For Virtual Tours
Walk the route you want the video to follow before recording, and clear hallways of anything that would look cluttered in a continuous shot. A steady, slow walkthrough reads better than a rushed one, even if it means recording a few extra times to get it right.
Budget, Timeline, and the Repair-vs-As-Is Decision
If you’re working with the full 4 to 6 week window, spread costs across repairs, cleaning, and staging evenly. On a compressed timeline, put every dollar into decluttering, deep cleaning, and curb appeal since those return the most value per hour invested.
Quick Stat: Budgeting 1 to 3% of your expected list price covers most sellers’ cleaning, minor repair, and staging costs without overspending on upgrades a buyer won’t pay extra for.
Sample buckets on a $300,000 home might look like $1,500 to $3,000 for repairs, cleaning, and staging combined, adjusted up if your pre-listing inspection turns up a deal-killer item.
Use a simple decision flow when repair costs surprise you: get two contractor quotes, compare that number against your expected net proceeds, then choose to fix it, disclose and price around it, or sell as-is. There’s no universally right answer here. A $4,000 roof repair on a home listing for $450,000 is a different math problem than the same repair on a $180,000 home.
What an Inspector Sees That Sellers Miss
Attic doors nailed shut or blocked by storage boxes
Electrical panels crowded with junk, forcing us to move things before we can even open the cover
Crawlspace entries stacked with lawn equipment or firewood
We provide photo and video reports, paired with thermal imaging, to help sellers identify moisture or insulation issues before a buyer’s inspector visits. Leave utilities on for the visit, set out any manuals you’ve gathered, and clear access to the attic, panel, and crawlspace ahead of time. It shaves real time off the inspection and gets you a cleaner report to work from.
Pricing Your House Right for Today’s Market
Overpricing costs more than underpricing in almost every market condition, because a house that sits gathers a stigma that follows it even after a price drop. Buyers and their agents track days on market, and a stale listing signals something is wrong even when the real issue is just an ambitious asking price.
Look at recent comparable sales within the last 90 days, not last year’s numbers, since local market conditions shift faster than most sellers expect. Pay attention to how many homes in your price range are currently active. A neighborhood with five competing listings needs a sharper price and stronger presentation than one where you’re the only option. If your local market favors buyers right now, price competitively from day one rather than testing a high number and chasing it down with reductions. If it favors sellers, you still shouldn’t reach far past recent comparables. Ask your agent for a comparative market analysis broken down by price per square foot, lot size, and condition, not just a single number pulled from an algorithm. The best pricing conversations involve a real person who’s walked your house and knows what the comparables actually looked like inside.
Choosing and Working With a Real Estate Agent
Interview at least two or three agents before signing anything, and ask each one for their marketing plan, not just their commission rate. A strong agent should walk you through exactly how they’ll photograph, list, and promote your specific house, not recite a generic script they use on every seller.
Ask how many listings they’ve closed in your specific neighborhood or price range in the last year. Local, recent experience matters more than a large overall sales volume from a different part of town. Ask how they handle showings, how quickly they respond to buyer agent inquiries, and whether they recommend a pre-listing inspection, since a good agent should welcome the extra information rather than treat it as unnecessary. Once you’ve chosen someone, put your prep timeline in writing together so you both know which tasks fall on you and which the agent handles, like scheduling the photographer or ordering a sign.
Legal Disclosures and What Sellers Are Required to Report
Every state requires sellers to disclose known material defects, meaning problems that affect the home’s value or safety and that the seller actually knows about. This typically covers things like past water damage, foundation repairs, pest infestations, and known issues with major systems. Disclosure laws vary by state, so check your specific state’s real estate commission requirements or ask your agent for the standard disclosure form used in your area.
The general principle holds everywhere: disclose what you know, and don’t guess at what you don’t. If you’re unsure whether something qualifies, a pre-listing inspection report gives you a documented, third-party basis for your disclosures rather than relying on memory alone. Failing to disclose a known defect can expose you to legal liability well after closing, even if the buyer’s own inspector later finds the same issue.
Getting Ready for Open Houses and Individual Showings
An open house and a private showing call for the same baseline prep, but an open house adds a few extra layers since strangers will move through the home without an agent guiding every step.
Secure or remove valuables, medications, and personal documents before opening your doors to the public. Lock any rooms you’d rather keep off-limits, and brief whoever’s hosting on which areas are open. For individual showings, aim for consistency. Buyers who tour a home twice notice when it looks worse the second time, so keep the same tidy baseline between visits rather than a one-time deep clean followed by a slow slide back to normal life.
Negotiation Strategies for Handling Offers
Review every offer against more than just the sale price. Financing type, contingencies, closing timeline, and requested repairs all affect what an offer is actually worth to you. A slightly lower cash offer with a fast, contingency-free close sometimes beats a higher offer loaded with inspection and financing contingencies.
When a buyer’s inspection turns up issues, respond with the same information you likely already have from your own pre-listing inspection. That puts you in a position to negotiate from documented facts rather than guessing at what’s fair. Decide in advance which repairs you’re willing to make, which you’d rather offer as a credit, and which you won’t budge on. Having that line drawn before an offer arrives keeps the negotiation from feeling reactive.
An Inspector’s Take: One Story, Two Shortcuts
A seller once thought their pre-listing inspection would be a formality. It flagged a hidden roof leak above the garage, fixed for under $400 instead of a five-figure buyer renegotiation weeks later. Pack sentimental items first, and schedule photos two weekdays after your deep clean, once dust has settled and nobody’s tracked mud back in.
— Matt
Trinity Home Inspections: Pre-Listing Inspections That Give You the Full Picture
Before you spend money guessing which repairs matter, a pre-listing inspection tells you exactly what a buyer’s inspector will find, on your schedule instead of theirs. Trinity Home Inspections is the local alternative to walking into negotiations blind: same-day photo and video reports, free thermal imaging included at no extra charge, and a color-coded breakdown separating safety issues from minor DIY items so you know what actually needs a contractor.
[

What’s included with a pre-listing inspection: a full walk of the home covering roof, electrical, plumbing, and structural components, thermal imaging to catch hidden moisture or insulation gaps, a same-day report organized by priority, and optional add-ons like sewer scope or mold testing if you want the fuller picture before listing. We also provide a list of trusted contractors for quotes, so you’re not starting from scratch once the report lands in your inbox.
If you want help getting ahead of what a buyer’s inspector will find, call 251-210-7376 or visit Trinityinspectionsllc to book your pre-listing inspection across Baldwin, Mobile, Escambia, Washington, Monroe, and Clarke counties.
Sources
FAQ
What Is the Most Common Reason a Home Fails to Sell?
Overpricing relative to recent comparable sales is the most frequent reason homes sit without offers, often compounded by clutter or deferred maintenance that makes the price feel even less justified to buyers touring in person.
How Do You Get an Empty House Ready to Sell?
Focus on deep cleaning every surface, staging key rooms with a few rented or borrowed furniture pieces to help buyers gauge scale, and maximizing natural light since empty rooms photograph starkly without it.
How Quickly Can You Get a House Ready to Sell?
With a compressed timeline of two weeks or less, prioritize decluttering, deep cleaning, and curb appeal over cosmetic repairs, since those three categories deliver the most visible impact per hour invested.
Should I Get a Pre-Listing Inspection Before I List?
Yes. A pre-listing inspection, typically $300 to $600, lets you fix or disclose issues on your own terms rather than reacting to a buyer’s inspection report during active negotiations.
What Should I Prioritize if My Budget Is Tight?
Spend first on anything that affects safety, financing eligibility, or the inspection report, then move to curb appeal and deep cleaning, which return the most visible value for the least money.
Recommended