
Pre-Inspection Checklist for Sellers: Ensure a Smooth Sale
- Matt Cameron
- Oct 21, 2025
- 9 min read
Updated: Jan 26

Did you know that nearly 90 percent of home sales involve an inspection before closing? Preparing for this step can make or break a sale. Buyers often move on quickly if they spot neglected repairs or maintenance issues. With a few targeted strategies, you can highlight the best features of your property, minimize surprises, and encourage strong offers right from the start.
Quick Summary
Key Point | Explanation |
1. Assess major home systems thoroughly | Inspect roof, foundation, HVAC, electrical, and plumbing for potential issues. Address repairs to enhance buyer confidence. |
2. Fix visible repairs to improve appeal | Tackle minor issues like leaks, peeling paint, and damaged fixtures. A well-maintained appearance can attract buyers. |
3. Declutter to create spaciousness | Remove personal items and excess furniture. A clutter-free environment helps buyers envision themselves in the home. |
4. Gather important documentation | Collect receipts, warranties, and maintenance records. Organized documentation builds trust with potential buyers during inspections. |
5. Conduct a final readiness check | Verify all systems and safety devices work properly. A thorough self-review helps prevent surprises on inspection day. |
Table of Contents
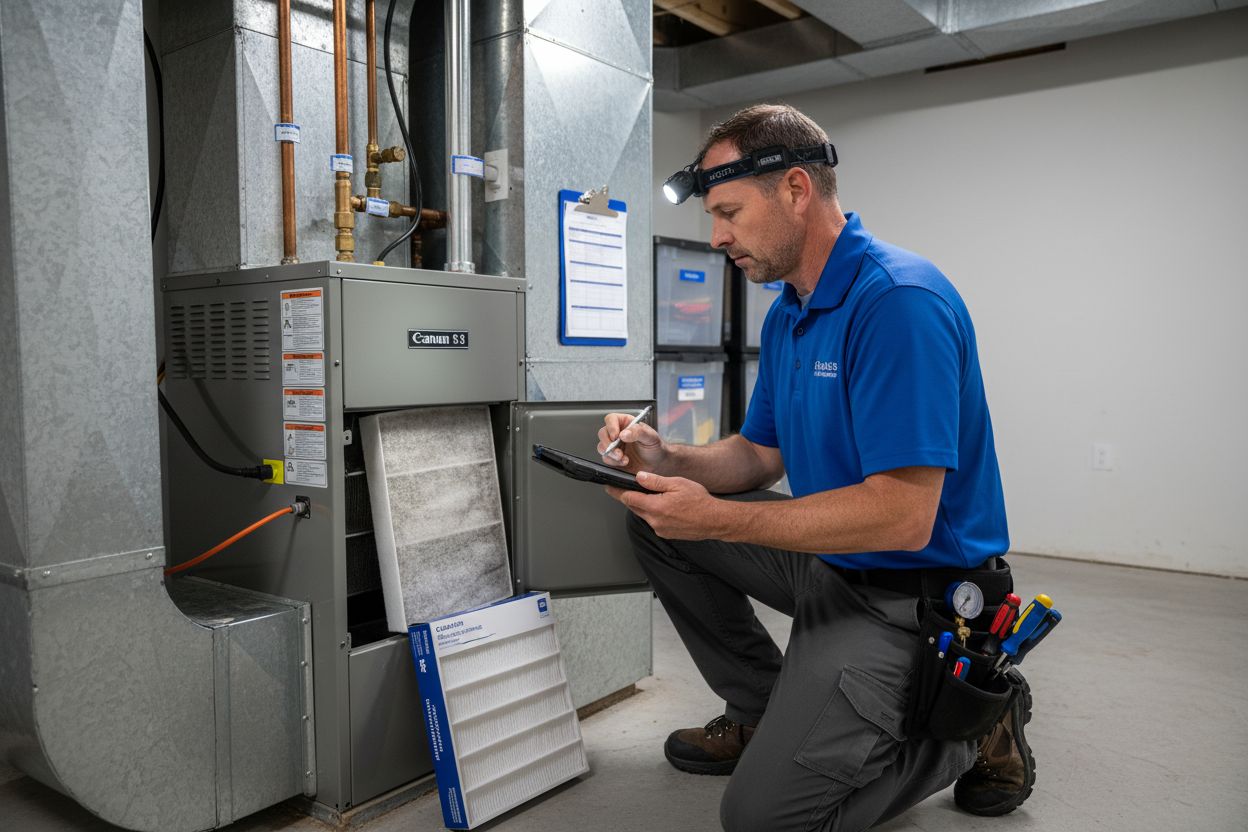
Step 1: Assess Major Home Systems for Functionality
Before listing your home, a thorough assessment of your major home systems can prevent potential sale roadblocks and demonstrate your property’s excellent condition. The goal is to proactively identify and address any functionality issues that might concern potential buyers.
Start with a comprehensive walkthrough of your home’s critical systems. This means examining your roof, foundation, heating and cooling systems, electrical network, and plumbing infrastructure. According to insights from home inspection experts, these are the most scrutinized areas during a property evaluation.
Here’s a summary of key home systems to assess before listing:
System | What to Check | Common Issues |
Roof | Missing shingles Leaks Visible damage | Water stains Sagging Wear & tear |
Foundation | Cracks Water stains Shifting | Structural movement Moisture problems |
HVAC | Heating/cooling function Filter condition No unusual sounds | Poor airflow Noisy units Unresponsive controls |
Electrical | Outlet function Circuit breakers Wiring age | Outdated wiring Non-working outlets Tripped breakers |
Plumbing | Faucet leaks Water pressure Drainage | Leaks Low pressure Water damage |
Begin with the roof. Check for missing shingles, signs of water damage, or areas of potential leakage. Walk around the exterior and look for sagging, uneven surfaces, or visible wear. Next, investigate your home’s foundation and basement or crawl spaces. Look for cracks, water stains, or signs of structural movement that might indicate deeper issues.
Move on to your HVAC system. Test both heating and cooling functions to ensure they operate smoothly. Listen for unusual sounds, check air filter conditions, and verify that temperature controls work correctly. For electrical systems, look for outdated wiring, check circuit breaker functionality, and ensure all outlets are working properly.
Pro Tip: If you notice any complex issues during your assessment, consider scheduling a professional pre-listing inspection to get a detailed evaluation.
Finally, examine your plumbing. Check under sinks for leaks, test water pressure, flush toilets, and run faucets to confirm everything functions correctly. Look for signs of water damage around pipes and fixtures that might indicate past or present problems.
By methodically assessing these major home systems, you’ll not only increase your chances of a smooth sale but also demonstrate your home’s care and maintenance to potential buyers.
Your proactive approach signals transparency and can significantly boost buyer confidence.
Step 2: Address Visible Repairs and Maintenance Issues
Addressing visible repairs and maintenance issues can significantly improve your home’s marketability and prevent potential buyers from getting cold feet during the inspection process. Your goal is to tackle those small but noticeable problems that could raise red flags for potential purchasers.
Start with a comprehensive walk through your home and create a detailed list of minor repairs. According to home inspection research, buyers pay close attention to small details that suggest overall home maintenance. Learn how agents build comprehensive repair reports to understand what buyers will be looking for.
Focus first on exterior maintenance. Trim overhanging tree branches and shrubs that touch your home. Clean your gutters thoroughly and ensure proper drainage away from the foundation. Check for any loose or damaged siding, peeling paint, or worn exterior surfaces that need attention. These visible elements create a critical first impression for potential buyers.
Inside your home, address simple but impactful fixes. Repair dripping faucets, tighten loose doorknobs, replace cracked outlet covers, and patch any drywall holes or cracks. Lubricate sticky doors and windows, and recaulk around windows and doors to improve their appearance and functionality. Paint walls in neutral colors to create a fresh and welcoming environment.
Pro Tip: Walk through your home as if you were a critical buyer. Take photographs to help you spot issues you might normally overlook.
Pay special attention to your home’s systems. Service your HVAC system, clean the chimney, and ensure proper ventilation in crawl spaces. These maintenance steps demonstrate to buyers that you have consistently cared for the property.
Dont ignore small cosmetic issues. A fresh coat of paint, cleaned carpets, and well maintained landscaping can make a tremendous difference in how buyers perceive your home. By addressing these visible repairs proactively, you increase the likelihood of a smooth inspection and sale process.
Step 3: Declutter Interior Spaces and Improve Curb Appeal
Preparing your home for inspection means creating a welcoming and spacious environment that allows potential buyers to envision themselves living in the space. Your primary goal is to make your home look larger, cleaner, and more inviting through strategic decluttering and exterior improvements.
Start with interior spaces. According to home staging research, a clutter free environment can make your home appear significantly more appealing. Go through each room systematically and remove personal items, excess furniture, and anything that makes spaces feel cramped. Pack away family photos, clear countertops, and organize closets and storage areas to showcase the full potential of your living spaces.
Focus on creating visual breathing room. Remove extra furniture to make rooms feel larger and more open. Consider storing bulky items in a storage unit temporarily. Organize remaining items neatly and create clear pathways that allow potential buyers to move easily through your home. Check out our home maintenance guide for additional tips on preparing your space.
Move to your home’s exterior and boost curb appeal. Power wash walkways, driveways, and exterior surfaces to remove dirt and grime. Add fresh mulch to garden beds, plant colorful flowers, and trim landscaping to create a welcoming first impression. Touch up exterior paint on trim and address any visible wear that might catch a buyer’s eye.
Pro Tip: Take photographs of your decluttered spaces to ensure you’ve created an inviting and spacious feel.
Pay attention to small details that make a big difference. Clean windows inside and out, ensure good lighting in all rooms, and create a neutral color palette that appeals to a wide range of buyers. A well maintained home suggests to inspectors and potential buyers that you have carefully cared for the property.
By decluttering interior spaces and enhancing your home’s exterior, you set the stage for a positive inspection experience. These steps demonstrate your homes potential and help buyers see themselves making it their own.
Step 4: Prepare Required Documentation and Access Points
The final preparatory step before your home inspection involves gathering important documentation and ensuring seamless access for the inspector. Your goal is to demonstrate organization, transparency, and proactive home maintenance through comprehensive record keeping and easy navigation of your property.
Start by collecting all relevant home documentation. Assemble receipts for recent repairs, maintenance records, warranty information, and documentation for major appliances and home systems. Learn how agents build comprehensive repair reports to understand what records are most valuable for potential buyers.
Create a dedicated folder with these critical documents. Include records for your HVAC system, roof repairs, electrical upgrades, plumbing work, and any major renovations. Organize them chronologically and ensure they are easily accessible. These documents provide concrete evidence of your homes ongoing maintenance and can help build buyer confidence.
Prepare your home for unrestricted access. Clear pathways to key areas like the electrical panel, attic, crawl spaces, basement, and heating systems. Remove any stored items blocking these spaces. If you have locked areas or complex access points, ensure you have keys or access codes readily available for the inspector.
Pro Tip: Create a simple document listing all access points and any special instructions for entering locked or hard to reach areas.
Consider creating a home manual that includes information about recent repairs, system ages, and maintenance history. This extra step shows potential buyers that you have been a responsible homeowner who takes pride in property upkeep.
Ensure pets are secured and out of the way during the inspection. Communicate with your real estate agent about the inspection time and make arrangements to be temporarily absent. This allows the inspector to work efficiently and thoroughly without interruptions.
By meticulously preparing your documentation and access points, you demonstrate professionalism and transparency. These steps not only facilitate a smoother inspection process but also build trust with potential buyers and inspectors alike.
Step 5: Verify Home Readiness Before Inspection Appointment
In the final countdown to your home inspection, conducting a comprehensive self-review ensures you catch any last minute issues and present your home in the best possible light. Your mission is to systematically test and verify every major home system and utility to confirm everything functions smoothly and looks its best.
Understand what home inspectors are looking for to help guide your final preparation. Begin with a thorough walkthrough of your electrical systems. Test every outlet, switch, and light fixture. Verify that ceiling fans operate correctly and replace any burnt out bulbs. Check that all circuits function properly and that your electrical panel shows no signs of wear or potential issues.
Move on to plumbing and water systems. Run all faucets to check water pressure and look for any leaks. Test toilets for proper flushing and examine under sink areas for moisture or water damage. Flush each toilet and run water in sinks and showers to ensure drainage works efficiently. Replace air and water filters if they appear dirty or are near their recommended replacement date.
Conduct a comprehensive HVAC system check. Replace air filters and schedule a professional tune up if possible. Test both heating and cooling functions to ensure smooth operation. Listen for unusual sounds and verify that temperature controls respond accurately.
Pro Tip: Take photographs of your recent maintenance and filter replacements to demonstrate proactive home care.
Check all safety devices. Test smoke detectors and carbon monoxide alarms. Replace batteries and ensure each device functions correctly. Verify that fire extinguishers are accessible and not expired.
Perform a final decluttering and cleaning. Ensure all areas remain accessible and pathways are clear. Remove any items blocking access to electrical panels, crawl spaces, or utility areas. A clean and organized home suggests meticulous maintenance to potential buyers and inspectors.
By methodically verifying your homes readiness, you demonstrate professionalism and increase the likelihood of a smooth inspection process. These final preparations can make a significant difference in how your home is perceived during the inspection.

Confidently Prepare for Your Home Inspection With Trusted Local Experts
Are you feeling overwhelmed by the home inspection process and anxious about potential surprises during your sale? The checklist above highlights how small maintenance issues, missing documentation, and cluttered spaces can quickly turn into obstacles, putting your smooth sale at risk. At Trinity Home Inspections, we understand the stress and uncertainty you face as a seller and are committed to helping you address functionality checks, repair concerns, and organizational gaps before your inspection day.

Choose a local partner who knows exactly what inspectors and buyers are looking for. By working with Trinity Home Inspections, you get the expertise and care of a family-owned business rooted in honesty and attention to detail. Explore our home maintenance inspection guide for more practical tips. Ready to eliminate guesswork and move forward with confidence? Visit our website and schedule your professional inspection today. Complete your pre-listing checklist with expert support so your home stands out and your transaction closes smoothly.
Frequently Asked Questions
How can I assess the major home systems before listing my home?
To assess major home systems, conduct a thorough walkthrough of your roof, foundation, HVAC, electrical, and plumbing systems. Check for visible issues like leaks, cracks, or non-functioning units to identify any necessary repairs.
What visible repairs should I address to improve my home’s marketability?
Address noticeable repairs such as leaky faucets, loose doorknobs, and cracked outlet covers to enhance your home’s appeal. Make a list of these minor repairs and aim to complete them before any showings, which can increase buyer confidence.
How can I declutter my home effectively for an inspection?
To declutter effectively, remove personal items and excess furniture, making sure to create clear pathways for potential buyers to navigate your home. Focus on each room systematically and aim to create an inviting, spacious environment to help buyers envision themselves living there.
What documentation should I prepare for an upcoming home inspection?
Gather crucial documents such as receipts for repairs, maintenance records, and warranty information for appliances and home systems. Organize these records in a dedicated folder to present to potential buyers, showing that you have taken care of your home meticulously.
How do I verify my home’s readiness before the inspection appointment?
To verify your home’s readiness, conduct a comprehensive self-review by testing all electrical outlets, plumbing fixtures, and HVAC systems. Ensure everything is functioning as expected and make any last-minute repairs to enhance the overall presentation of your home before the inspection.
What steps can I take to improve my home’s curb appeal?
Improve your home’s curb appeal by power washing outdoor surfaces, trimming landscaping, and adding fresh mulch and colorful flowers. Focus on details such as touching up paint and cleaning windows to create a welcoming first impression that attracts potential buyers.
Recommended