
Fix a Clogged Kitchen Sink Disposal Fast and Safely
- Matt Cameron

- Feb 15
- 7 min read
Nothing interrupts a quiet evening in your Alabama kitchen like a clogged disposal stopping your cleanup routine in its tracks. For homeowners in Baldwin and Mobile Counties, dealing with a backup means more than just inconvenience—it can create a mess and disrupt your daily flow. By equipping yourself with the right essential tools and safety gear, you can address these clogs yourself, maintain your kitchen’s flow, and prevent future issues with practical steps tailored for your home.
Quick Summary
Key Point | Explanation |
1. Gather Safety Gear First | Always wear gloves and safety glasses before starting repairs to protect against sharp objects and debris. |
2. Disconnect Power to Disposal | Always turn off the circuit breaker or unplug the disposal before inspecting or working on it to avoid electrical hazards. |
3. Use Natural Cleaners for Buildup | Combine baking soda and vinegar to break down residue and neutralize odors in the disposal. |
4. Manually Rotate Disposal if Jammed | Use a disposal wrench to manually rotate the grinding plate and dislodge stubborn food waste safely. |
5. Test for Proper Operation Afterwards | After repairs, restore power and test the disposal to ensure it operates smoothly and drains properly. |
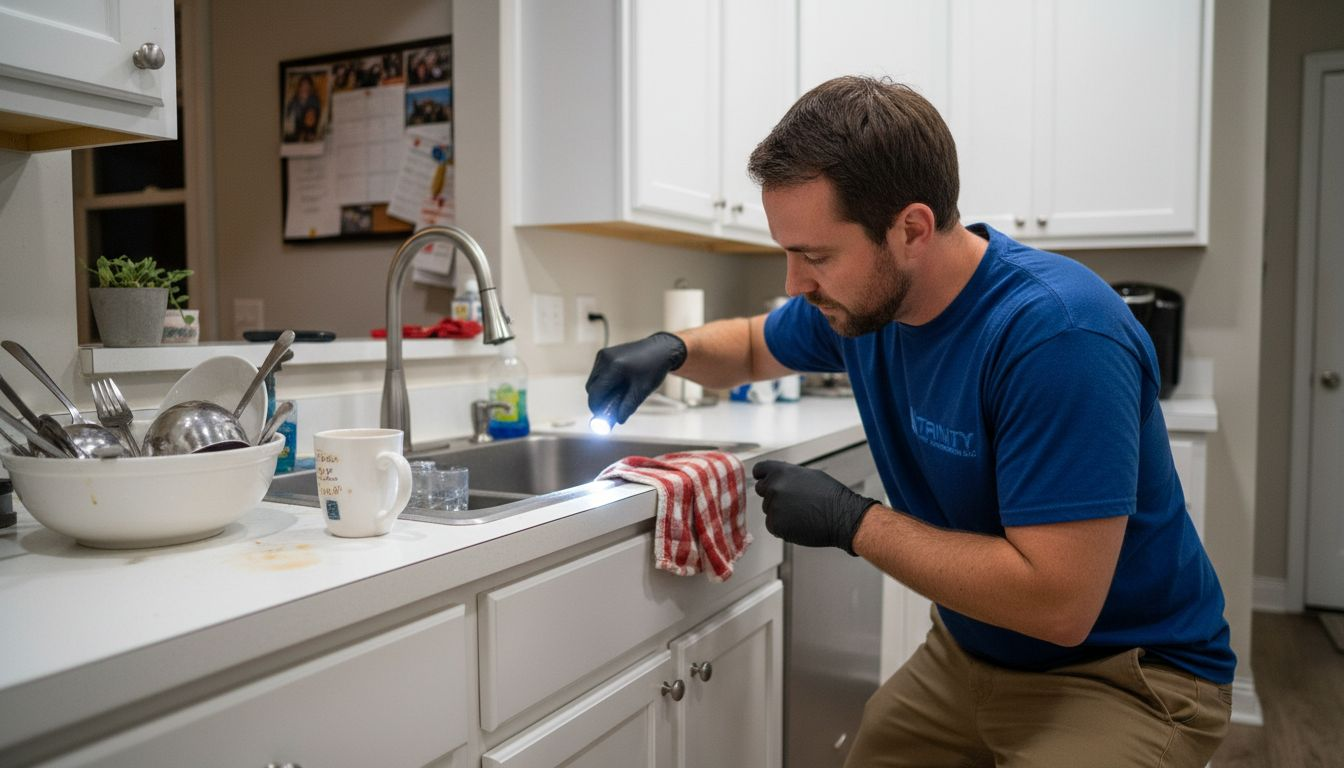
Step 1: Gather essential tools and safety gear
Before diving into fixing a clogged kitchen sink disposal, your first mission is assembling the right gear to stay safe and tackle the job effectively. Safety isn’t just a recommendation - it’s your top priority when working with electrical appliances in a potentially wet environment.
Here’s what you’ll need to prepare for your kitchen sink disposal repair:
Protective gloves to shield your hands from sharp edges and potential debris
Safety glasses to protect your eyes during inspection and work
Flashlight for illuminating the dark interior of the disposal
Garbage disposal wrench for manual rotation of the motor
Needle-nose pliers for retrieving small objects
Sink plunger designed specifically for sink disposals
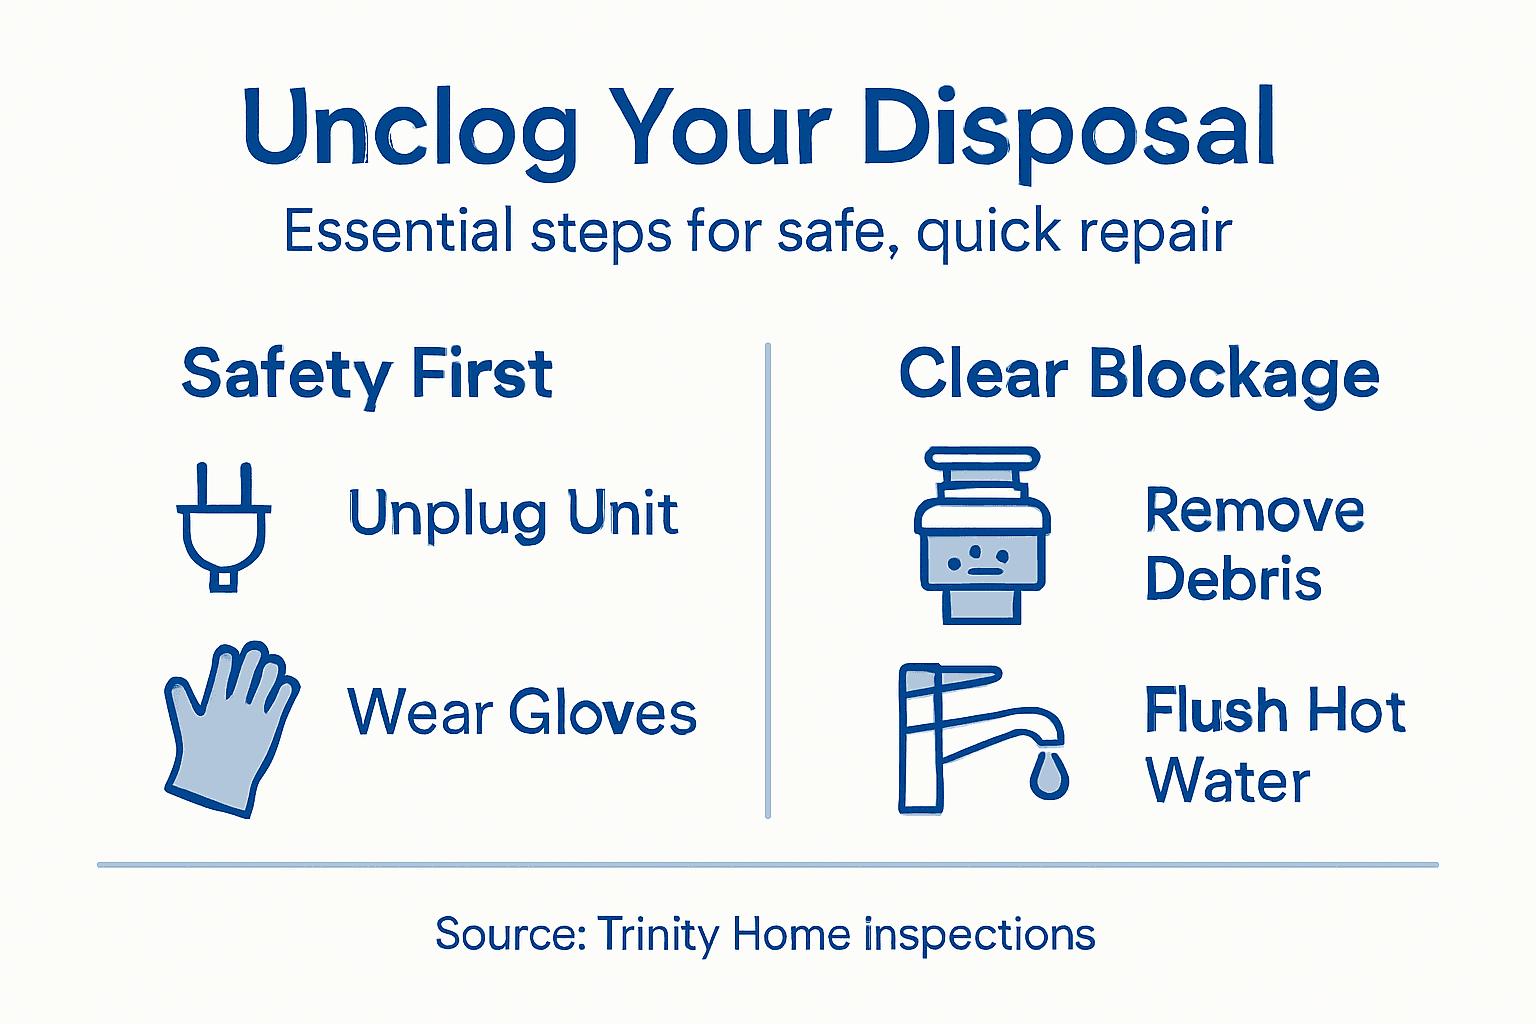
Before touching anything, you’ll want to completely disconnect power to the unit. Carefully follow handyman safety protocols by either unplugging the disposal or switching off the corresponding circuit breaker. This step eliminates any risk of unexpected electrical activation during your repair.
Always treat electrical appliances with respect: power off first, inspect second, repair third.
Pro tip: Keep a small container nearby to collect any debris or parts you remove, which helps maintain an organized workspace and prevents losing small components.
Step 2: Disconnect power and remove visible debris
With your safety gear ready, it’s time to neutralize electrical risks and clear out any obvious blockages in your kitchen sink disposal. The key here is methodical, careful approach that prioritizes your personal safety above all else.
First, you’ll want to completely eliminate electrical hazards by disconnecting power. Implement proper lockout procedures by following these critical steps:
Locate your home’s electrical panel
Identify the circuit breaker controlling the disposal
Switch the breaker to the fully OFF position
Verify power is off by attempting to turn on the disposal
Once power is disconnected, you can safely begin inspecting and clearing visible obstructions. Confirm electrical disconnect requirements before proceeding with any manual intervention. Use your flashlight to carefully examine the disposal’s interior, looking for:
Large food chunks
Utensils or foreign objects
Accumulated debris blocking blades
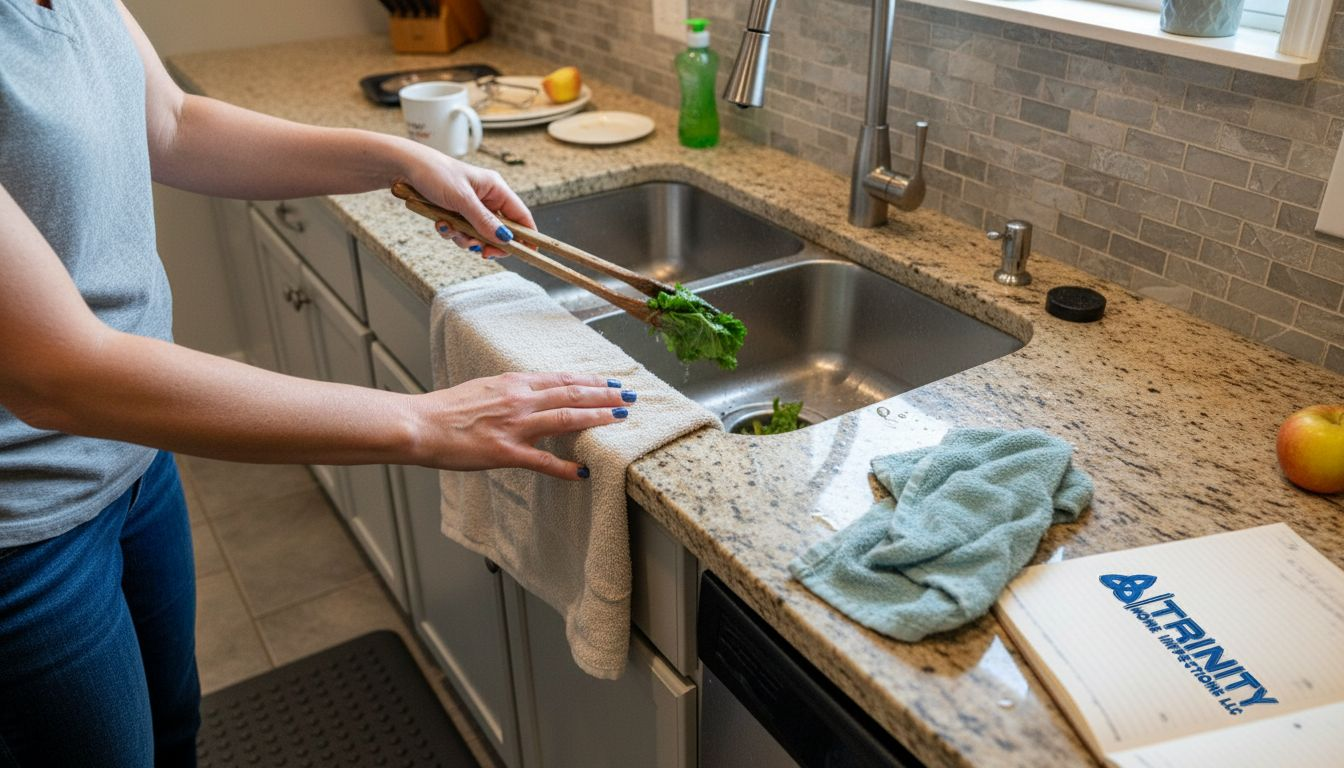
Always use needle-nose pliers to remove objects, never your hands.
Pro tip: Keep a towel or cloth nearby to wipe away any moisture and prevent potential slipping while working in the sink area.
Step 3: Flush with hot water and natural cleaners
Now that you’ve cleared visible debris, it’s time to break down any remaining gunk and sanitize your kitchen sink disposal using safe, effective natural cleaning methods. This step will help dissolve stubborn buildup and eliminate potential odors without damaging your appliance.
Natural cleaning techniques can work wonders for your disposal. Start with this simple yet powerful cleaning sequence:
Pour 1/2 cup of baking soda into the disposal
Follow with 1/2 cup of white vinegar
Let the mixture fizz and react for 10-15 minutes
Flush thoroughly with hot water
The chemical reaction between baking soda and vinegar helps break down organic matter and neutralize odors. Household cleaning products work best when followed by a thorough hot water rinse, which helps move dissolved debris through your pipes.
Hot water is your secret weapon for clearing minor blockages and maintaining a clean disposal.
Pro tip: For extra deodorizing power, drop a few citrus peels into the disposal after cleaning to leave behind a fresh, clean scent.
Here’s a quick reference for safe and effective kitchen sink disposal cleaning methods:
Method | Safety Level | Effectiveness | Typical Use Case |
Manual Debris Removal | High (with gloves) | Good for large items | Objects or food stuck in disposal |
Hot Water Flush | Very high | Moderate | Clearing light buildup |
Baking Soda & Vinegar | Very high | Strong for odors | Breaking down organic residue |
Manual Plate Rotation | Moderate (cautious) | Very effective | Dislodging jams |
Each method offers a specific safety profile and addresses common disposal issues.
Step 4: Manually rotate disposal for jam removal
If your previous cleaning attempts haven’t fully resolved the disposal jam, it’s time to take a more hands-on approach. Manually rotating the grinding plate can help dislodge stubborn food waste and free up the impeller mechanism without risking damage to your appliance.
You’ll need a few specific tools for this delicate operation:
Disposal wrench (often included with the unit)
Allen wrench (hex key) as an alternative
Flashlight for visibility
Work gloves for hand protection
To manually rotate the disposal, follow these precise steps:
Confirm the power is still completely disconnected
Locate the hex-shaped hole underneath the disposal
Insert your wrench into the hole
Gently rotate the wrench back and forth in both directions
Apply steady, moderate pressure to free the stuck grinding plate
Patience is key: Never use excessive force that might damage internal components.
Pro tip: If the wrench method doesn’t work, try using wooden tongs or pliers to manually move the blades, being extremely careful not to damage the mechanism.
Step 5: Test disposal operation and verify drainage
After carefully working through the previous steps, it’s time to verify that your garbage disposal is functioning correctly. Professional inspection techniques recommend a systematic approach to testing your newly cleared disposal.
Follow these critical testing steps to ensure proper operation:
Restore power to the disposal
Run cold water at medium pressure
Turn on the disposal
Listen for smooth, consistent grinding sounds
Observe water drainage speed and consistency
Key indicators of successful repair include:
No unusual grinding or scraping noises
Water draining quickly and completely
No leaks around the disposal unit
Smooth, efficient food waste grinding
Drainage verification protocols suggest checking that water flows freely and doesn’t back up in adjacent sinks or drain areas.
A properly functioning disposal should process food waste quietly and drain water seamlessly.
Pro tip: If you hear persistent unusual sounds or notice slow drainage, repeat the previous cleaning and rotation steps, or consider consulting a professional plumber.
Understanding common problems during disposal repairs can help you troubleshoot efficiently:
Problem Sign | Possible Cause | Recommended Action |
Disposal won’t start | Power not restored | Check breaker, reset unit |
Grinding noise | Foreign object inside | Disconnect power, inspect |
Slow water drainage | Partial clog in drain | Flush with hot water, clear |
Persistent odors | Residue buildup | Use baking soda & vinegar |
Unit leaks | Faulty seal or fitting | Inspect seals, replace gasket |
This summary aids quick identification and resolution of disposal issues.
Ensure Your Kitchen Disposal and Whole Home Stay Safe and Efficient
Dealing with a clogged kitchen sink disposal can be frustrating and even risky without the right knowledge and tools. This article highlights the careful steps needed to fix jams and blockages safely—from disconnecting power to manual rotation and natural cleaning methods. Yet these issues may be signs of deeper concerns within your home’s plumbing or electrical systems that are best evaluated by a professional.
At Trinity Home Inspections, we understand how unexpected problems like a malfunctioning garbage disposal affect your peace of mind and daily life. Our InterNACHI-certified inspectors provide thorough home inspections with advanced tools such as thermal imaging and moisture meters to uncover hidden issues that might be impacting your home’s safety and function. We serve Baldwin, Mobile, Escambia, and the surrounding Gulf Coast Alabama communities with same-day photo and video-rich reports, giving you clear, actionable information.
Discover our comprehensive inspection services to catch potential problems early. Whether you are buying, selling, or simply maintaining your home, trust us to help protect your investment and provide the confidence you deserve. Don’t wait until minor kitchen disposal troubles turn into costly repairs. Reach out today and get the clarity you need to make smart decisions with Trinity Home Inspections.
Schedule your inspection now and take the first step toward a safer and smoother home experience.

Frequently Asked Questions
How do I safely disconnect power from my kitchen sink disposal?
To safely disconnect power from your kitchen sink disposal, locate your home’s electrical panel, identify the circuit breaker for the disposal, and switch it to the fully OFF position. Verify that the disposal is off by attempting to turn it on before starting any repairs.
What tools do I need to fix a clogged kitchen sink disposal?
You will need several tools to fix a clogged kitchen sink disposal, including protective gloves, safety glasses, a flashlight, a garbage disposal wrench, needle-nose pliers, and a sink plunger. Gather these items to ensure you can work safely and effectively.
How can I clear visible debris from the disposal?
To clear visible debris from the disposal, first ensure that power is fully disconnected. Use a flashlight to inspect the interior for large food chunks or foreign objects, and remove them carefully with needle-nose pliers, avoiding the use of your hands.
What natural remedies can I use to clean my kitchen sink disposal?
You can use a simple cleaning technique involving baking soda and white vinegar to clean your kitchen sink disposal. Pour 1/2 cup of baking soda followed by 1/2 cup of vinegar into the disposal, let it fizz for 10-15 minutes, and then flush it with hot water to break down remaining residue.
What should I do if my disposal is still jammed after cleaning?
If your disposal is still jammed after cleaning, manually rotate the grinding plate to dislodge stuck food waste. Turn the disposal off, insert an Allen wrench into the hex-shaped hole under the unit, and gently rotate it back and forth to free the mechanism.
How can I test if my kitchen sink disposal is working properly after repairs?
To test if your kitchen sink disposal is functioning properly, restore power, run cold water at medium pressure, and turn on the disposal. Listen for smooth grinding sounds and check that water drains quickly and completely, ensuring there are no leaks around the unit.
Recommended
Gas Line Inspections and Why They Matter for Home Inspections
Self-Closing Door from Garage to Home: Why It’s Essential for Safety
Cleaning Kitchen Made Easy: Step-by-Step Guide for Malta | Rozie - Malta’s Best Cleaning Services
Can’t Remove Kitchen Grease? Here’s How Plano TX House Cleaning Services Do It Effortlessly