
How to Change Out a Ceiling Fan Safely and Efficiently
- Matt Cameron

- Feb 6
- 7 min read
Tackling a ceiling fan replacement in your Mobile home might seem daunting, but with the right tools and a clear plan, this DIY project is well within reach. Prioritizing safety when handling electrical parts is more than a good habit, it is the foundation of a successful installation. This step-by-step guide highlights how to protect yourself, gather the necessary tools, and follow proven methods for a smooth and safe ceiling fan upgrade.
Table of Contents
Quick Summary
Essential Takeaway | Detailed Explanation |
1. Always turn off power | Ensure complete electrical safety by switching off the circuit breaker before starting any installation work. |
2. Use a voltage tester | Confirm that power is completely off by testing with a voltage tester to prevent accidental electric shock. |
3. Check the mounting bracket | Ensure your electrical box can support the fan and install the mounting bracket securely to prevent wobbling. |
4. Connect wires carefully | Match wire colors correctly and secure connections with wire nuts to avoid electrical hazards during operation. |
5. Test fan operation thoroughly | After installation, test all fan functions for smooth operation and check for any unusual sounds or wobbling. |
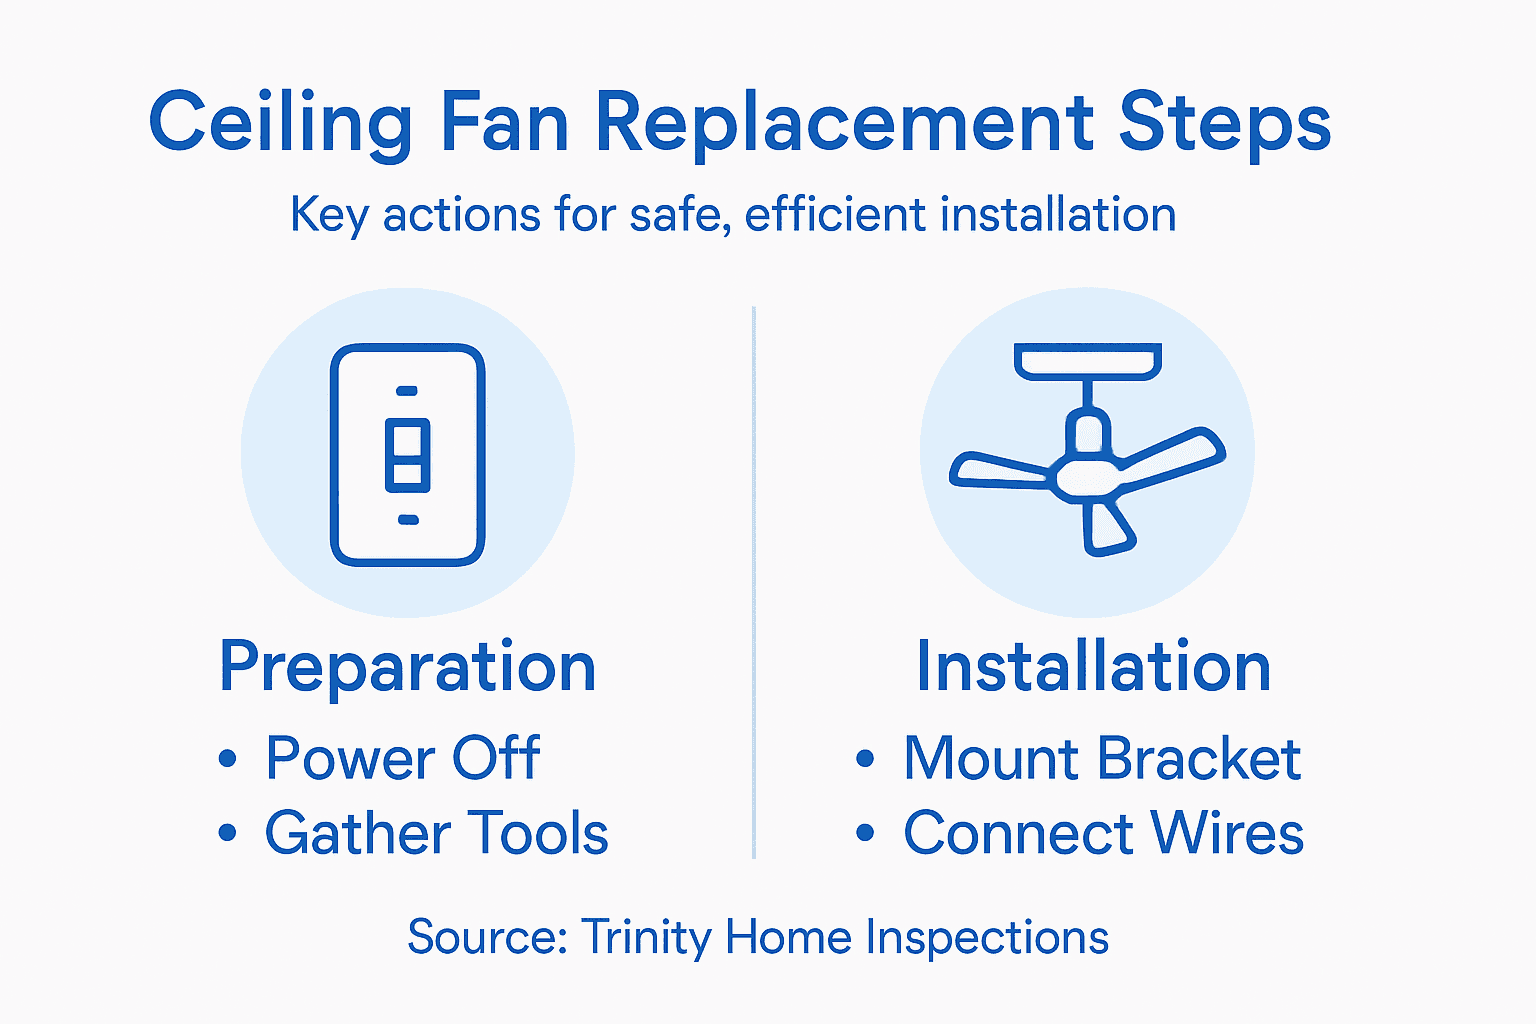
Step 1: Gather Tools and Turn Off Power
Before diving into your ceiling fan replacement project, you’ll need to collect the right tools and ensure electrical safety. Safety isn’t just a recommendation - it’s absolutely crucial when working with electrical components.
First, gather your essential tools and safety equipment:
Voltage tester
Screwdrivers (Phillips and flathead)
Wire strippers/cutters
Ladder
Work gloves
Safety glasses
Electrical tape
The most critical step is turning off power to prevent potential electrical shock. Head to your home’s electrical panel and locate the circuit breaker controlling the ceiling fan’s circuit. Completely shut off the power by switching the corresponding circuit breaker to the “off” position. Don’t rely on just turning off the wall switch - always disconnect power at the breaker.
Always test the circuit with a voltage tester before beginning work to confirm power is completely off.
Once you’ve confirmed the power is off by testing electrical circuits safely, you’re ready to proceed with the fan removal process.
Here’s a quick reference for electrical safety steps before ceiling fan installation:
Step | Reason | Effect if Missed |
Turn off circuit breaker | Prevents electrical shock | Risk of serious injury |
Use voltage tester | Verifies power is truly off | Accidental live-wire contact |
Wear gloves & glasses | Protects hands and eyes | Chance of minor injury |
Keep flashlight on hand | Ensures visibility in dark | Higher chance of mistakes |
Pro tip: Always keep a flashlight nearby when working on electrical projects to ensure clear visibility of your workspace.
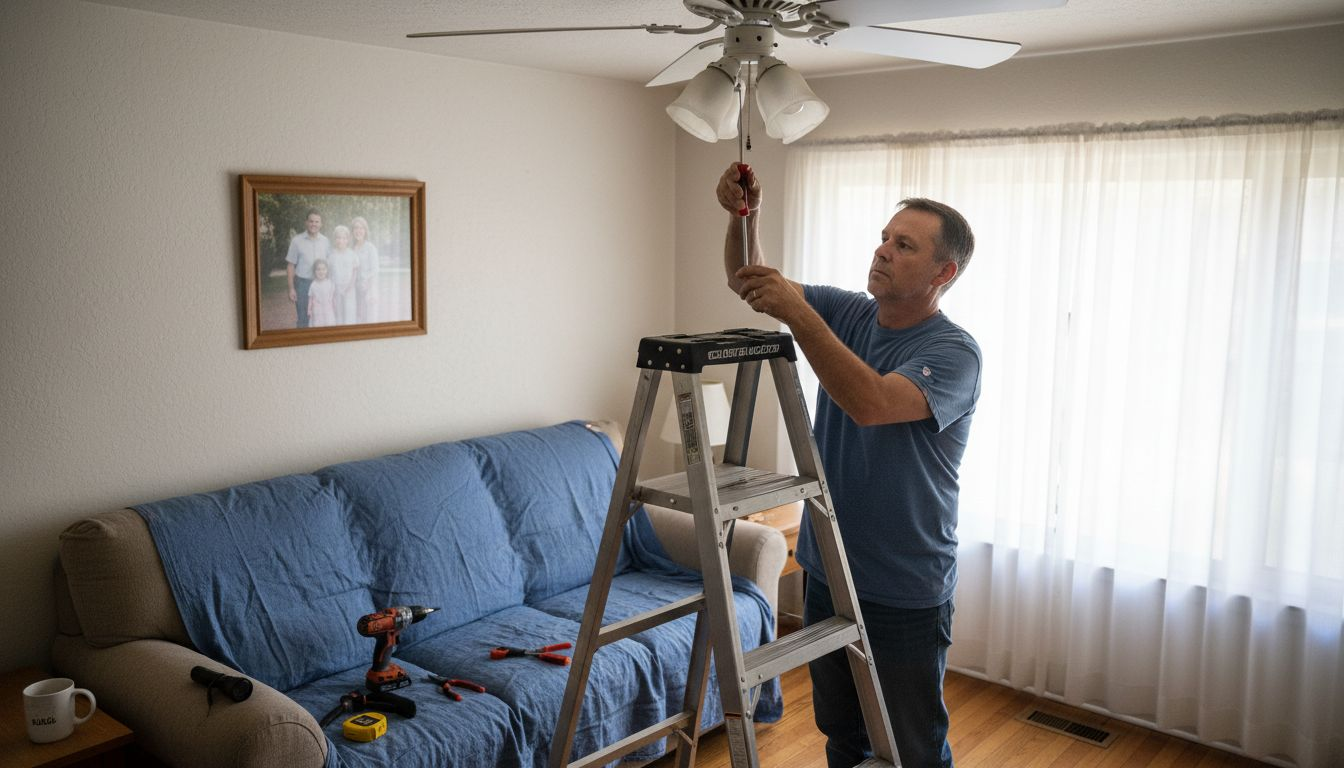
Step 2: Remove the Existing Ceiling Fan
Removing your old ceiling fan requires careful preparation and systematic dismantling to prevent damage to your electrical box or ceiling. Understanding the correct process will help you successfully remove the fan without causing unnecessary complications.
Start by setting up your ladder directly beneath the fan and carefully supporting yourself. Locate the mounting screws connecting the fan’s canopy to the electrical box. These are typically hidden behind a decorative cover that you’ll need to gently remove. You’ll want to follow systematic disassembly techniques to ensure clean removal.
Your removal process will involve these critical steps:
Remove fan blades by unscrewing them from the motor
Detach the mounting bracket from the electrical box
Carefully disconnect electrical connections
Lower the fan base slowly and steadily
Always support the fan’s weight entirely before completely disconnecting electrical wires to prevent unexpected drops.
Before fully removing the fan, place a drop cloth underneath to catch any dust or debris. Inspect the electrical box for any signs of damage or wear that might need attention before installing your new fan.
Pro tip: Take a quick smartphone photo of the existing wire connections before disconnecting to serve as a reference when installing your new fan.
Step 3: Install the New Mounting Bracket
Installing the new mounting bracket is a critical step that determines the stability and safety of your entire ceiling fan. Getting this right means ensuring a secure foundation for your new fan that will prevent future wobbling or potential accidents.
Carefully examine bracket installation techniques to guarantee a rock-solid connection. Start by checking that your electrical box is rated to support a ceiling fan - this isn’t just a recommendation, it’s a safety requirement. Verify the electrical box’s weight capacity and confirm it’s securely attached to a ceiling joist.
Here are the key steps for mounting bracket installation:
Position the new mounting bracket over the electrical box
Align the bracket precisely and evenly
Insert mounting screws through bracket holes
Tighten screws completely using a screwdriver
Ensure the bracket is level and rigid
A properly installed mounting bracket is the foundation of a safe and stable ceiling fan installation.
Double-check that all connections are tight and the bracket doesn’t move when you apply gentle pressure. Any slight movement now could lead to dangerous wobbling once the fan is fully installed.
Pro tip: Use a torpedo level to confirm your mounting bracket is perfectly horizontal before securing final screws.
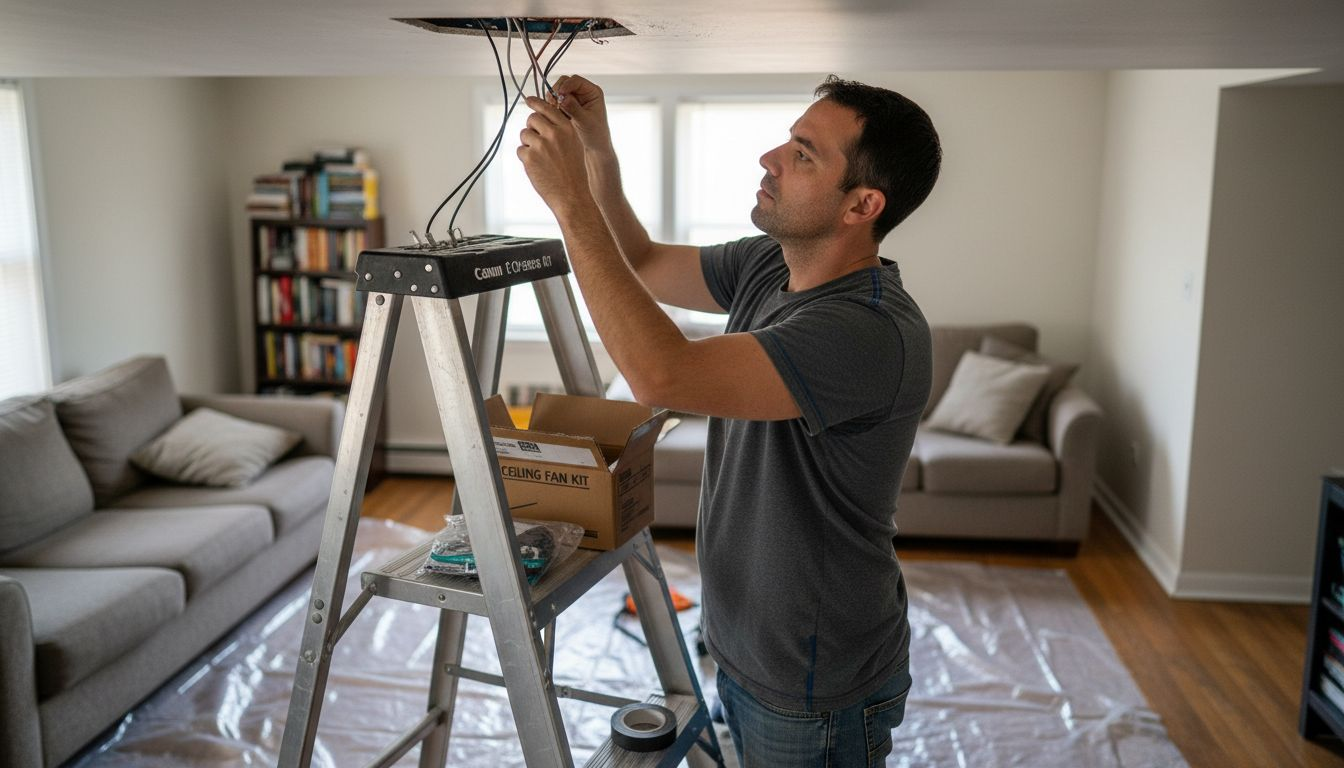
Step 4: Connect Wiring and Secure the New Fan
Wiring your new ceiling fan correctly is the most critical step between a successful installation and a potential electrical hazard. This phase requires careful attention to detail and precise wire matching to ensure safe, reliable operation.
Connecting fan wires safely involves matching each wire systematically. Identify and match wire colors carefully: black to black (hot), white to white (neutral), and connect the ground wire to the green or bare copper ground wire from your electrical box.
Here are the key wiring steps:
Separate and straighten wire ends
Strip about 1/2 inch of insulation from wire tips
Twist corresponding wires together
Secure connections with wire nuts
Wrap wire nuts with electrical tape for added security
Properly secured electrical connections are the foundation of a safe ceiling fan installation.
Carefully tuck wires into the electrical box, ensuring no wires are pinched or exposed. Once connections are secure, attach the fan’s canopy to the mounting bracket, double-checking that all screws are tight and the fan hangs level.
Pro tip: Use wire nuts one size larger than you think you need to ensure a more secure, comprehensive connection.
Step 5: Test the Ceiling Fan for Proper Operation
Now comes the moment of truth - verifying that your hard work has paid off with a perfectly functioning ceiling fan. Testing involves more than just turning on a switch; you’ll need to carefully assess multiple performance aspects to ensure safety and optimal operation.
Evaluate fan performance thoroughly by checking several critical components. Activate each fan speed setting systematically, starting from low and progressing to high, while observing its behavior closely.
Your comprehensive testing checklist includes:
Check all speed settings (low, medium, high)
Listen for unusual grinding or clicking sounds
Observe blade rotation for smooth, balanced movement
Test forward and reverse switch functionality
Confirm light kit (if applicable) works correctly
A properly installed ceiling fan should operate silently and without any noticeable vibration.
Inspect for potential issues like wobbling or unusual noises. If you detect any blade imbalance, you might need to adjust the blade alignment or use the included balancing kit. Slight adjustments can often resolve minor performance problems.
This table summarizes common ceiling fan installation issues and how to resolve them:
Problem | Symptom | Quick Solution |
Fan wobble | Uneven blade movement | Adjust blade alignment, use balancing kit |
Noisy operation | Grinding or clicking sounds | Tighten screws, inspect motor |
Poor airflow | Weak breeze at high speed | Verify blade orientation, check for obstructions |
Light kit not working | Lights won’t turn on | Recheck wire connections, replace bulbs |
Pro tip: Use a dollar bill or piece of paper to check blade alignment by placing it on top of each blade and noting any significant differences in height.
Ensure Your Ceiling Fan Replacement Is Safe with Professional Home Inspection
Replacing a ceiling fan involves important safety steps like turning off the circuit breaker, correctly wiring, and securely mounting the fan bracket—missteps in any of these can lead to electrical hazards or damage. If you want peace of mind that your home’s electrical system and ceiling support are in top condition before or after your ceiling fan installation, a professional home inspection can help you identify hidden issues such as faulty wiring, damaged electrical boxes, or structural concerns.

Partner with Trinity Home Inspections to get thorough, InterNACHI-certified inspections across Baldwin, Mobile, and surrounding Gulf Coast Alabama areas. Our inspections include thermal imaging to detect overheated components and moisture problems that might affect electrical safety. Don’t wait until small issues become costly repairs. Take the proactive step now to protect your home and family by scheduling your inspection today. Learn more about why homebuyers and homeowners trust Trinity for clear, same-day reports at Trinity Home Inspections.
Frequently Asked Questions
What tools do I need to change out a ceiling fan safely?
To change out a ceiling fan safely, you will need a voltage tester, screwdrivers (both Phillips and flathead), wire strippers or cutters, a ladder, work gloves, safety glasses, and electrical tape. Gather these tools before starting your project to ensure you are prepared for each step.
How do I ensure the power is completely off before removing the ceiling fan?
To ensure the power is completely off, locate the circuit breaker controlling the ceiling fan and switch it to the “off” position. Always use a voltage tester afterward to confirm that the power is indeed off before proceeding with disassembly.
What steps should I follow to remove the existing ceiling fan?
Start removing the existing ceiling fan by climbing up your ladder and locating the mounting screws that hold the fan’s canopy to the electrical box. Unscrew the fan blades first, then detach the mounting bracket and carefully disconnect the electrical wires before lowering the fan base steadily.
How do I install the new ceiling fan securely?
Install the new ceiling fan securely by first confirming that your electrical box is rated for fan support. Position the mounting bracket over the electrical box, insert the screws, and tighten them to ensure the bracket is level and rigid, preventing future wobbling.
What should I check after connecting the new fan’s wiring?
After connecting the new fan’s wiring, check each fan speed setting to ensure smooth operation and listen for any unusual sounds. Verify that there is no wobbling and that the light kit, if applicable, works properly, adjusting the blades or connections as needed for optimal performance.
How can I troubleshoot common issues with a newly installed ceiling fan?
To troubleshoot common issues like wobbling or noisy operation, first, adjust the blade alignment and tighten any loose screws. If problems persist, check the wire connections and blade orientations to resolve performance issues effectively.
Recommended


