
How To Replace A Ceiling Fan In Older Home: A Safety-First DIY Guide
- Matt Cameron
- a few seconds ago
- 15 min read
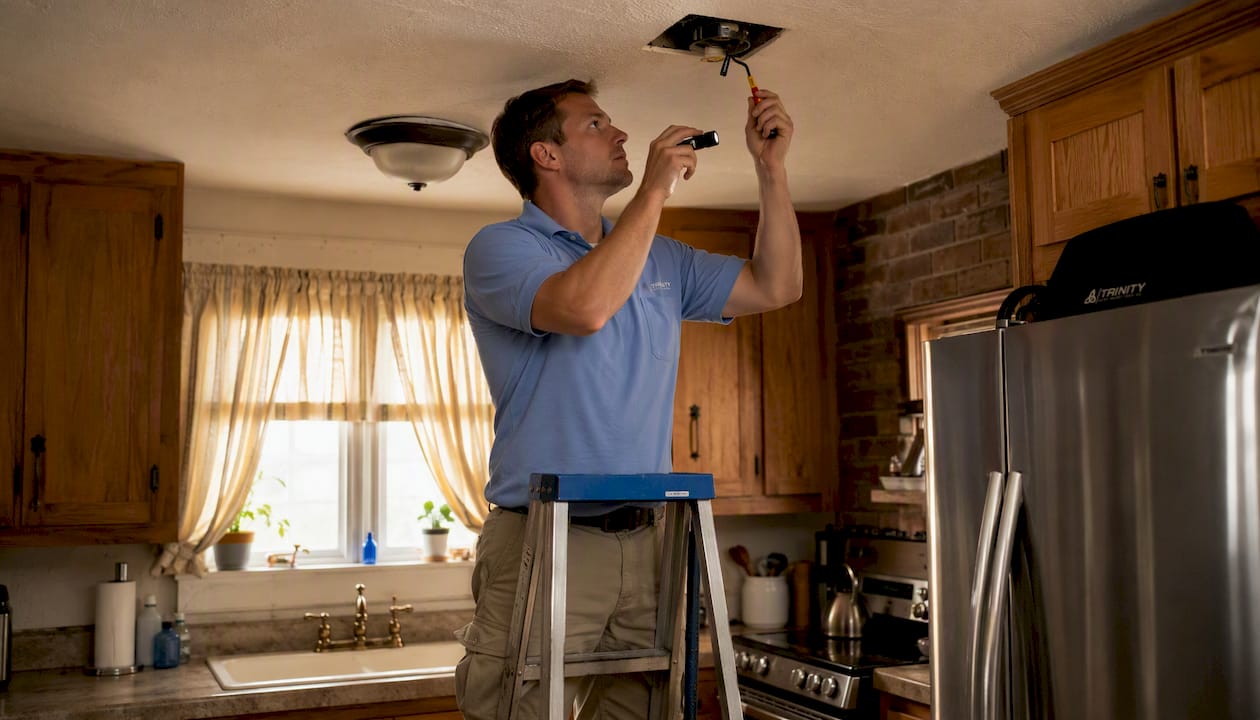
Meta description: Learn how to safely replace a ceiling fan in an older home — fan-rated box, wiring checks, and NEC code tips from Trinity Home Inspections. 251-210-7376
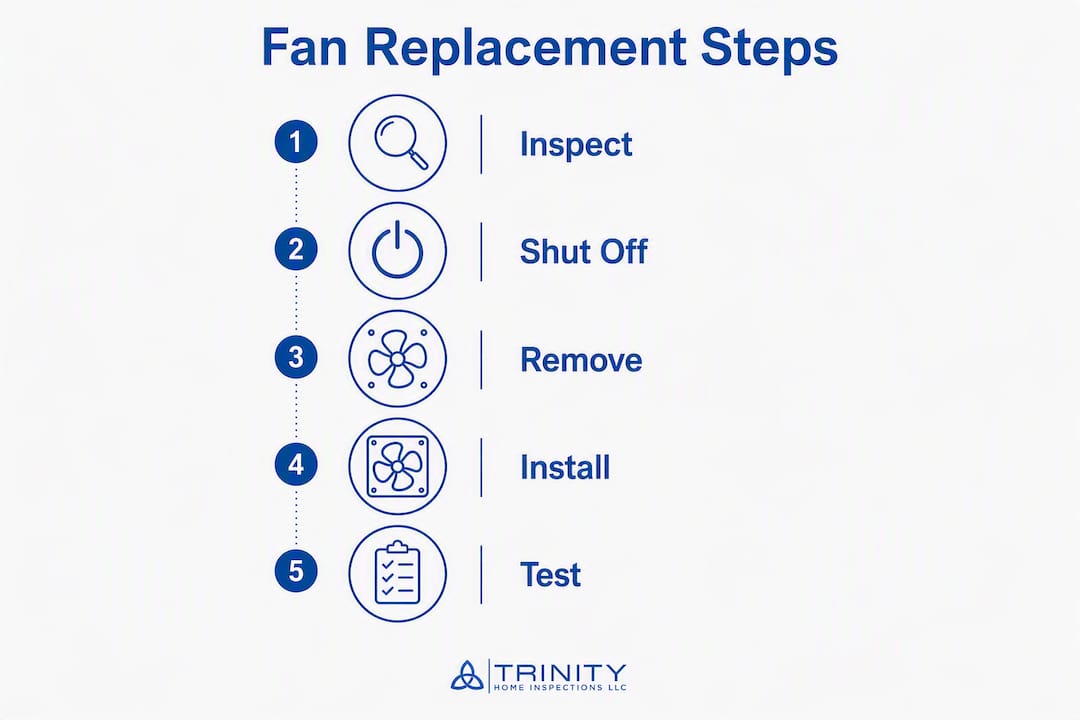
You can replace a ceiling fan in an older home, but only after confirming three things: the ceiling box is fan-rated and securely anchored, the wiring is identifiable and safe to work with, and the ceiling structure can carry the dynamic load of a spinning fan. Skip any one of those checks and you are not just risking a failed installation — you are risking a fan that falls.
Before you touch a single wire, run through this quick decision checklist:
Box rating and anchorage: Is there a listed, fan-rated outlet box? Is it anchored to a joist or a listed support brace — not just to plaster or strapping?
Wiring type and ground: Do you have identifiable conductors? Is there a dedicated ground, or are you working with a 2-wire system and cloth-insulated wiring?
Ceiling access and condition: Is the ceiling plaster/lath, multi-layer, or drywall? Can you access the attic or framing if you need to anchor a brace?
If any of those three items raises a red flag — loose neutrals, cloth insulation that flakes at a touch, a missing box, or no way to anchor to joists — stop and call a licensed electrician or schedule a pre-install inspection before proceeding.
Should You DIY This or Call an Electrician?
DIY is reasonable when the ceiling box is already fan-rated, the wiring is modern and grounded, and the ceiling structure is sound. If all three conditions are met, a competent homeowner with basic electrical experience can handle the swap safely.
The red flags that push this into professional territory are specific. Exposed or cloth-insulated wires that crumble when touched are one. A missing junction box, or a box that wobbles when you push on it, is another. Signs of overheating — discolored wire insulation, charred wood near the box, or melted wire nuts — mean you stop immediately. Multiple circuits sharing one box, or wiring you simply cannot trace, also belong on the “call a pro” list.
The decision flow is straightforward: verify the box and wiring first. If both check out, follow the step-by-step below. If either fails the check, hire a licensed electrician or book an inspection. Understanding electrical hazards like older panel issues can help you appreciate why that boundary matters.
Ask yourself these four questions before you start:
Is there a fan-rated box currently installed?
Is there a dedicated equipment ground conductor?
Can I access the attic or framing to anchor a retrofit brace if needed?
Can I identify every conductor in the box with confidence?
A “no” on any of these is a signal to get professional eyes on the job first.
What to Inspect Before You Remove Anything
Inspect first. Do not assume the existing setup is safe for a fan just because a light fixture has been hanging there for decades. A light fixture weighs a few pounds and sits still. A ceiling fan creates continuous dynamic load and vibration — a completely different demand on the box and framing.
Box type and rating
Look at the existing box. A fan-rated box will be stamped or labeled “Acceptable for Fan Support” or similar language. Light-rated boxes are not designed for the dynamic load and vibration of a ceiling fan; replacing them with a remodel fan-rated support box or brace that spans joists is required for a safe installation. If the box is plastic, small, and unmarked, assume it is light-rated only.
Wiring identification and ground
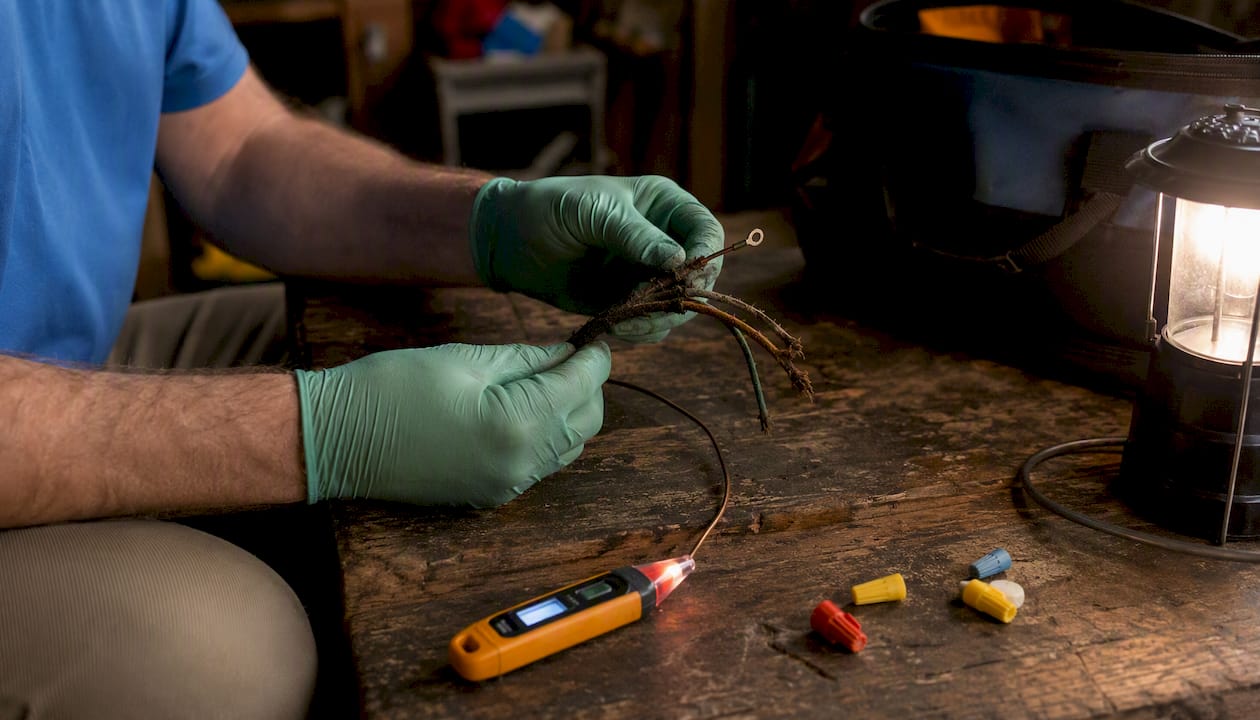
Wiring identification in older homes requires testing; spare wires and unusual color uses are common. White conductors are sometimes used as hot legs in older 2-wire runs. Use a non-contact voltage tester to confirm which conductors are live before touching anything. Photograph every connection before you disconnect a single wire. Mark each conductor with tape and a marker.
InspectApedia documents many older-wiring confusions — white used as hot, multiple splices, cloth-sheath wiring — and advises using a meter and professional help when wiring is ambiguous. That advice holds here.
Ceiling material and attic access
Plaster and lath ceilings are thicker and more fragile than drywall. Multi-layer ceilings (original plaster plus a later drywall overlay) add depth that can make standard retrofit braces too shallow. Probe the ceiling material gently and measure the depth of the existing box opening before ordering a replacement box.
Practical testing steps
Shut off the circuit at the breaker and tag it so no one flips it back on. Confirm the circuit is dead with a non-contact voltage tester at the box. Then photograph the existing wiring configuration from multiple angles. Label every conductor before disconnecting anything. These steps take five minutes and prevent most of the confusion that derails older-home installations.
Step-by-Step: How to Replace a Ceiling Fan in an Older Home
Follow these steps in order. Stop immediately if you encounter brittle insulation that flakes away, a missing or damaged box, or wiring you cannot confidently identify.
Shut off the circuit and verify. Turn off the breaker controlling the fixture. Use a non-contact voltage tester at the box to confirm no voltage is present. Tag the breaker.
Photograph and label everything. Take photos of the existing wiring from multiple angles before touching anything. Label each conductor with tape: hot (black), neutral (white), switched hot (often black or red on a two-switch setup), and ground (bare copper or green).
Remove the old fixture. Support the fixture as you disconnect it — do not let it hang by the wires. Set it aside and inspect the box.
Assess and replace the box if needed. Push on the existing box. If it moves, it is not properly anchored. DIY threads documenting pre-1950s installs repeatedly warn that leaving a light-rated or unanchored box creates a fire and falling-fan hazard. Install an old-work fan-rated support box or an adjustable retrofit brace that spans between joists. A fan-rated retrofit brace that spans joists is the preferred option when ceiling thickness allows; if not, moving the mount to a joist location or installing a block between joists accessed via a small attic opening provides a code-compliant anchor.
Confirm or add a ground. In older 2-wire systems, a dedicated ground conductor is often absent. If you can run a ground wire to the panel or to a grounded metal box, do so. If not, consult your local code authority about GFCI protection as an alternative. Using the box itself as a neutral or ground return is not advisable — trace and repair properly.
Make wire connections. Connect black (or blue) fan leads to the hot conductor, white to neutral, and green or bare copper to ground. In a two-switch setup, the switched hot (often red or a second black) controls the light kit separately. Never assume a white conductor is neutral in older wiring without testing it first.
Mount the canopy and motor assembly. Follow the manufacturer’s torque specs for the mounting screws. Do not overtighten on a plaster ceiling — you can crack the surface or strip the box threads.
Test before closing up. Restore power and test fan speed settings and light functions. Listen for wobble or unusual vibration. A fan that rocks at low speed often signals an anchorage problem, not a balance problem.
Tighten checks after 24–48 hours. Vibration can loosen screws during initial operation. Check the canopy screws, blade bracket screws, and the box mounting after the first day or two of use.
Photo checklist — take these before, during, and after:
Box interior before disconnection
Attic framing or joist location above the box
Wire splices and conductor labels
New box or brace installed and anchored
Final fan mount with canopy seated
Switched wiring at the wall switch
Pro Tip: Photograph the box’s weight-rating label and store it with the fan’s paperwork. If you ever sell the home, that documentation tells the next inspector or buyer exactly what was installed and why it meets code.
What Tools and Materials Do You Need?
Gather everything before you climb the ladder. Running up and down for a missing part mid-job is how mistakes happen.
Tools
A non-contact voltage tester is non-negotiable — use it before touching any conductor. A multimeter or continuity tester lets you confirm which conductor is the switched hot and verify ground continuity. You will also need an insulated screwdriver set, a drill with bits (for anchoring a brace or cutting a plaster collar), wire strippers, needle-nose pliers, a sturdy ladder, and safety glasses and gloves. If you are working with plaster, add a utility knife and drywall/plaster repair tools to the list.
Materials
The single most important material purchase is a fan-rated old-work ceiling box or retrofit brace. NEC 314.27© requires outlet boxes used as the sole support for a ceiling-suspended fan to be listed and marked for that use, and boxes must not support fans over 70 lb. Boxes for fans over 35 lb must specify the maximum supported weight. Buy a box or brace with a weight rating above your fan’s dry weight, and photograph the rating label.
You will also need grounding pigtails and modern wire (if adding a ground), wire nuts rated for the wire gauge and number of conductors, electrical tape, and the fan’s mounting hardware. For plaster ceilings, pick up a ceiling medallion or plaster patch materials to restore the finish around the new box opening.
Pro Tip: When working with cloth-insulated wires, prepare short pigtails of modern wire and make the splice inside a code-listed junction box. This minimizes handling of the brittle legacy conductors and keeps the connection contained and inspectable.
Common Older-Home Obstacles and How to Handle Them
Older homes create predictable mechanical and electrical challenges. Knowing them before you start saves you a second trip to the hardware store and prevents mid-project surprises.
Plaster and lath ceilings: Standard retrofit boxes may not seat properly in thicker plaster. Use a deep retrofit box, or enlarge the opening and install a wood block tied to the joists. A plaster collar ring can clean up the edge if you need to widen the hole.
Multi-layer ceilings: Deep retrofit boxes and adjustable braces exist for thicker or multi-layer ceilings, but improper installation to strapping instead of joists can still cause rocking and failure. Measure the ceiling depth before ordering. A brace mounted to strapping rather than joists will loosen over time.
Brittle cloth wiring: Minimize handling. Mark every conductor, photograph the configuration, and use short pigtails of modern wire spliced inside a listed junction box. Leave the original conductor with as little movement as possible. If the insulation flakes away at a touch, stop and call an electrician. For more on this specific hazard, the cloth wiring guide for older Alabama homes covers the risks in detail.
No ground in 2-wire systems: Install a ground where possible. If a ground wire cannot be run, bond the metal box and use a GFCI-protected circuit as a code-recognized alternative in many jurisdictions — but verify with your local building department first.
No attic access: If you cannot locate joists or anchor points from below and have no attic access, hire an electrician. An improperly anchored fan is a falling hazard, not just a code violation. Community reports confirm that fans rocking loose from boxes attached to strapping or thin plaster are a real failure mode.
When planning a broader historic-home renovation alongside this project, the 6-point historic home inspection checklist covers structural and electrical considerations that often surface together in older houses.
How Long Does This Take, and What Does It Cost?
A straightforward swap in a home with a fan-rated box and modern wiring can be done within a few hours by most competent DIYers. More complex situations involving attic access, retrofit brace installation, or plaster ceiling repair require additional time. Hiring an electrician for complicated older-home jobs with joist anchoring and plaster restoration may take substantially longer.
On cost, a DIY replacement with minimal new parts runs roughly $50–$150 for a fan-rated box or brace, wire nuts, pigtails, and small hardware. If you need a new ceiling fan as well, add the fan’s retail price. Electrician labor and parts for a straightforward swap typically runs $150–$500 depending on your local labor market and the complexity of the job. Attic framing work or plaster repair adds cost on top of that.
Permits are worth a brief note. Many jurisdictions do not require a permit for a like-for-like fixture swap, but significant electrical changes — adding a circuit, rewiring a box, or altering the panel — often do. Check with your local building department before starting. If you hire a pro, ask in writing whether a permit is required and whether they will pull it.
For homeowners in Baldwin, Mobile, or surrounding Gulf Coast Alabama counties, the permit and deed search tool can help you check whether past electrical work at the property was permitted.
Code and Safety Requirements You Cannot Skip
NEC 314.27© requires outlet boxes used as the sole support for a ceiling-suspended fan to be listed and marked for that use. Boxes must not support fans over 70 lb, and those supporting fans over 35 lb must specify the maximum supported weight. This is not a suggestion — it is the minimum legal standard for fan installations in the United States.
NEC 314.27© in plain terms: The outlet box at a ceiling fan location must be specifically listed for fan support. A standard light-fixture box does not qualify. The box must be anchored to structural framing or a listed support brace, and any fan weighing more than 35 lb requires a box that states its maximum weight capacity on the label.
Beyond the box requirement, these safety steps are non-negotiable:
Shut off and tag the breaker before touching any wiring.
Verify the circuit is dead with a non-contact voltage tester at the box.
Confirm which conductor is the switched hot with a multimeter before connecting fan leads.
Ensure a ground or a GFCI-protected circuit where a ground conductor is absent.
Keep all splices contained inside a listed junction box — no exposed splices in the ceiling cavity.
Test fan operation, light function, and remote controls before seating the canopy permanently.
Local jurisdictions sometimes adopt amendments to the NEC. Verify current local requirements with your building department before making significant electrical changes.
When Should You Stop and Call a Licensed Electrician?
Call a pro for anything beyond a visual confirmation and a straightforward swap with a verified fan-rated box and modern wiring. That boundary is clear.
Specific scenarios that require professional help:
Knob-and-tube or cloth-insulated wiring anywhere in the box
Fused or soldered splices that cannot be safely undone
Missing or damaged joist anchorage with no attic access
Multiple circuits sharing one box, or shared neutrals
No way to establish a ground or trace wiring confidently
Any sign of overheating: charring, discolored insulation, melted wire nuts
When you call an electrician, give them this information upfront: describe the existing box and whether it is fan-rated, confirm whether attic access is available, note whether you found cloth wiring or unusual splices, and provide the fan’s weight and model number. Tell them you need a fan-rated mounted box and a grounding evaluation.
Request a written estimate. Confirm in writing that all splices will be left inside a listed junction box and that a permit will be pulled if your jurisdiction requires one. For local electrical inspection guidance, Trinity Home Inspections can point you toward trusted resources in the Gulf Coast Alabama area.
How Trinity Home Inspections Can Help Before or After Installation
A pre- or post-install inspection from a certified inspector can catch unsafe wiring, insecure mounts, and finish or repair needs that non-specialists commonly miss. That is especially true in older homes where the wiring history is unknown and the ceiling construction is not always what it appears.
What’s included in a Trinity Home Inspections ceiling and electrical check:
Visual inspection of ceiling framing and box anchorage
Non-contact voltage and continuity checks at the fixture location
Thermal imaging to identify overheated components or hidden moisture near the opening
Photo documentation of the box, wiring, and ceiling condition
A written checklist of recommended fixes with plain-English priorities
Post-install safety sign-off recommendation
Trinity Home Inspections is led by Matt Cameron, an InterNACHI-certified home inspector serving Baldwin, Mobile, Escambia, Washington, Monroe, Clarke, and surrounding Gulf Coast Alabama counties. Matt uses thermal imaging, moisture meters, and specialty cameras on every inspection — tools that surface problems a visual check alone will miss. Trinity carries $1M in Errors & Omissions insurance and a $2M general liability policy, so you are covered if anything comes up.
For a broader pre-install or pre-listing safety review, the pre-listing inspection service covers electrical, structural, and finish conditions in one visit.
Call 251-210-7376 or visit TrinityInspectionsLLC.com to schedule.
Key Takeaways
Replacing a ceiling fan in an older home is safe and achievable when you verify the fan-rated box, confirm wiring and grounding, and anchor the support to structural framing before energizing anything.
Point | Details |
Fan-rated box is mandatory | NEC 314.27© requires a listed, marked box; a standard light-fixture box does not qualify. |
Anchor to joists, not plaster | A retrofit brace mounted to strapping or plaster will loosen over time and can cause the fan to fall. |
Cloth wiring means stop or proceed carefully | Brittle cloth-insulated conductors require pigtails, minimal handling, and often a licensed electrician. |
DIY time runs 2–8 hours | Simple swaps take 2–4 hours; retrofit with difficult ceilings or wiring runs 4–8 hours. |
Check local permits | Significant electrical changes may require a permit — verify with your building department before starting. |
Trinity Home Inspections | Trinity Home Inspections offers pre- and post-install inspections with thermal imaging and same-day reports across Gulf Coast Alabama. |
What Inspectors Actually See in Older Homes
The scenario that comes up most often in older Gulf Coast Alabama homes is a ceiling fan that was installed years ago without anyone checking the box. The fan works fine at first. Then, after a season or two of regular use, the canopy starts to wobble. By the time a homeowner notices the movement, the box has already loosened from whatever it was attached to — sometimes just plaster, sometimes a single screw into strapping.
The fix is almost always the same: a proper fan-rated retrofit brace anchored to the joists. But the cost and disruption are higher than they would have been if the right box had gone in from the start. Document your work with photos and keep them with the home’s records. If you ever sell, that documentation tells the next inspector exactly what was done and why it was done right. Trinity Home Inspections sees this pattern regularly and can verify your installation before it becomes a problem.
Get a Professional Verification Before You Energize
Replacing a ceiling fan in a vintage home is a project where the difference between a safe installation and a hazard often comes down to one item: the box. Trinity Home Inspections provides pre- and post-install inspections that cover ceiling framing, box anchorage, wiring condition, and electrical safety — all documented with photos and delivered the same day.
[

Alt text: Trinity Home Inspections inspector in khaki pants and blue shirt with white pocket logo checking ceiling fan box in older Gulf Coast Alabama home
If you have any doubt about your wiring, your box, or your ceiling structure, a single inspection visit is the lowest-cost way to get a clear answer. Trinity is InterNACHI-certified, carries $2M in general liability coverage, and serves Mobile, Baldwin, Escambia, and surrounding Gulf Coast Alabama counties. The pre-listing inspection service covers electrical and structural conditions in one visit and is a natural fit for homeowners doing renovation work before a sale.
Call 251-210-7376 or visit TrinityInspectionsLLC.com to book your inspection.
This article provides general educational information about ceiling fan replacement. It is not a substitute for advice from a licensed electrician or building inspector. Verify current NEC requirements and local code amendments with your building department or a qualified professional before beginning electrical work.
Useful Sources
National Fire Protection Association (NFPA) — NEC 314.27©: The primary source for fan-support box listing and weight-limit requirements under the National Electrical Code.
Electrical License Renewal — NEC 314.27© Explained: Plain-language breakdown of what the code section requires and why fan-rated boxes differ from standard outlet boxes.
ECmag — Existing Homes Without Overhead Lighting and Fans: Electrical contractor perspective on retrofit fan installations, fan-rated support systems, and the history of NEC fan-box requirements.
DIY StackExchange — Installing a ceiling fan in a house built pre-1950s: Real-world Q&A covering missing boxes, insecure mounts, and wiring practices common in older homes.
DIYChatRoom — Retrofit ceiling fan box for multi-layer ceiling: Community thread documenting failures from braces mounted to strapping rather than joists in multi-layer plaster ceilings.
Ask the Electrician — Wiring a ceiling fan in an older home: Practical wiring identification steps and safety cautions specific to older residential wiring.
InspectApedia — Old electrical system wiring FAQs: Detailed reference on cloth wiring, white-as-hot conductor use, and older-home wiring identification.
Always check local amendments to the NEC through your municipal or county building department — local jurisdictions may have requirements that go beyond the base code.
FAQ
Is it hard to replace a ceiling fan in an older home?
It is more involved than a modern home swap, mainly because of the ceiling box and wiring. If the existing box is fan-rated and the wiring is identifiable, the job is manageable for a competent DIYer in 2–4 hours; older homes with plaster ceilings or cloth wiring add complexity and time.
Can I replace a ceiling fan myself, or do I need an electrician?
DIY is reasonable when the box is fan-rated, wiring is grounded and identifiable, and the ceiling structure is sound. Cloth-insulated wiring, missing boxes, or unclear splices are signals to hire a licensed electrician instead.
Does replacing a ceiling fan require a permit?
A like-for-like fixture swap often does not require a permit, but significant electrical changes — rewiring, adding a circuit, or altering the panel — typically do. Check with your local building department before starting.
Can you replace a ceiling fan with any other ceiling fan?
You can swap one fan for another as long as the new fan’s weight does not exceed the ceiling box’s rated capacity. NEC 314.27© requires the box to be listed for fan support; boxes must not support fans over 70 lb, and fans over 35 lb require a box that states its maximum weight rating on the label.
How do I know if my ceiling box is fan-rated?
Look for a label or stamp on the box that reads “Acceptable for Fan Support” or similar language. If the box is unmarked, small, or plastic, assume it is light-rated only and replace it with a listed fan-rated box or retrofit brace before installing the fan.
Recommended