How Thermal Imaging Detects Hidden Moisture
- Matt Cameron
- Apr 28
- 7 min read

Updated: Apr 29
Thermal imaging is a powerful tool for finding hidden moisture in your home without tearing into walls or floors. It works by detecting temperature differences on surfaces, revealing cooler spots caused by moisture. This method helps identify leaks, condensation, or water intrusion early - before they lead to mold growth or costly structural damage.
Key Points:
How It Works: Infrared cameras detect temperature variations. Wet areas appear cooler due to evaporative cooling.
Benefits: Early detection prevents mold, protects structural elements, and reduces repair costs.
Limitations: Thermal imaging doesn't directly detect water. Professionals confirm findings with moisture meters for accuracy.
Common Problem Areas: Behind walls, under floors, ceilings, and attics are hotspots for hidden moisture.
Thermal imaging, combined with expert analysis, ensures accurate results and helps you address problems at their source.
How Thermal Imaging Works for Moisture Detection
The Science of Heat and Moisture
Thermal imaging plays a crucial role in identifying moisture early, helping to avoid costly repairs. But how does it work? It all comes down to detecting heat - and the way moisture behaves.
Thermal cameras pick up infrared heat signals, translating small temperature changes into a color-coded image called a thermogram. On these images, warmer areas typically appear as reds or oranges, while cooler spots show up in blues, purples, or blacks.
The secret to spotting moisture lies in evaporative cooling. When materials are wet, they cool as moisture evaporates, creating distinct cold spots on the thermogram. Peter Hopkins, a Level II Thermographer at United Infrared, explains:
Wet or moist areas and objects usually have a different temperature than dry areas due to evaporative cooling, increased conductance or thermal capacitance.
These temperature differences make hidden moisture visible on thermal images, even if it’s tucked behind walls or under floors.
It’s worth noting that thermal cameras don’t "see through" walls like you might see in movies. Instead, they detect temperature variations on the surface, which reflect what’s happening underneath. For example, moisture often shows up as irregular dark blue or purple patterns, while issues like missing insulation might create more structured, rectangular shapes.
While this technology is incredibly useful, it does have its boundaries.
What Thermal Imaging Can and Cannot Detect
Thermal imaging is excellent for identifying temperature irregularities, but it’s not a magic tool for pinpointing water itself. These anomalies could come from moisture, drafts, or even insulation gaps. Because of this, professionals always confirm their findings with moisture meters before making any final assessments.
Environmental factors can also interfere with readings. Wind, sunlight, and reflective surfaces may distort results, making proper training essential for accurate interpretation. To get the clearest images, inspectors often prepare the environment by running HVAC systems for about four hours to create a 20°F temperature difference. They may also activate water sources to uncover active leaks.
Thermal imaging offers powerful insights, but it works best when combined with other tools and expertise.
sbb-itb-3aaca89
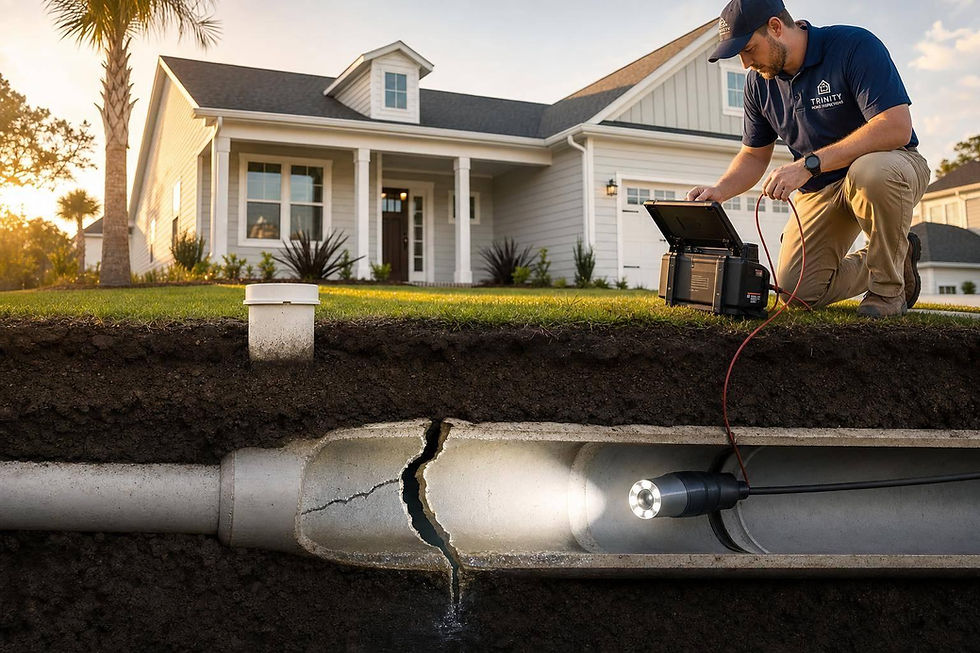
Common Areas Where Moisture Hides
Behind Walls and Drywall
Moisture often hides behind walls and drywall, sneaking in through plumbing leaks or poorly sealed exteriors. Plumbing drips can saturate insulation long before any visible stains appear. Similarly, gaps around windows or damaged siding allow rainwater to seep in, often spreading damage far beyond the initial entry point. On thermal images, these damp areas show up as irregular dark patches, making them easier to spot.
Under Floors and Carpeting
Moisture doesn't just stay in walls - it also finds its way under floors. Leaks can saturate subfloors and even weaken joists, especially in regions with clay-heavy soil, like the Gulf Coast. Here, water often gets trapped near foundations, eventually seeping into the spaces where walls and floors meet.
Thermal imaging comes in handy by detecting the cooling effect of evaporation beneath flooring materials. What looks fine to the naked eye might reveal cold spots on an infrared camera, signaling potential structural issues. Ceilings and attics, too, face their own hidden moisture challenges, requiring careful inspection.
In Ceilings and Attics
Roof leaks and plumbing problems from upper floors can cause water to drip onto ceiling joists unnoticed. On thermograms, these leaks often appear as linear cooling patterns. Attics, on the other hand, face the added risk of condensation. When warm, humid air hits cold surfaces - like HVAC lines or areas with missing insulation - condensation forms, mimicking the effects of an active leak. This is particularly concerning because mold can begin to grow within just 24 to 48 hours.
These examples highlight how thermal imaging can be a game-changer for spotting moisture early, helping to protect both your home's structure and your family’s health.
How Professionals Conduct Thermal Imaging Inspections
Preparation and Inspection Process
To get accurate thermal readings, professionals ensure the environment is properly conditioned before starting. They create a temperature difference of 18°F to 20°F between indoor and outdoor spaces, which helps the infrared camera detect meaningful patterns. A key part of this preparation involves running your heating or cooling system for at least four hours before the inspection. Additionally, inspectors run water through plumbing fixtures shortly before scanning, making it easier to spot leaks in the thermal images.
When everything is set, inspectors use the infrared camera to scan walls, ceilings, floors, and windows. They also consider external factors like sunlight, wind, or reflective surfaces, which can distort readings. To help the process go smoothly, homeowners should clear clutter from walls and ensure easy access to attics, basements, and crawl spaces before the inspection begins. By following these steps, inspectors can reliably detect hidden moisture before it causes structural damage. Any anomalies found in the thermograms are then verified with precise moisture measurements.
Verification with Moisture Meters
After completing the thermal scan, inspectors follow a three-step process to confirm the presence of moisture. First, they identify the anomaly using the infrared camera. Next, they use a pinless moisture meter to verify the findings. Finally, a pin-type meter is used for confirmation. This thorough process helps differentiate actual moisture issues from other factors like drafts, missing insulation, or thermal bridging in the building materials. At Trinity Home Inspections, thermal imaging is included in every inspection, and this verification ensures that all findings are accurately documented in the same-day digital report.
Benefits of Early Moisture Detection with Thermal Imaging
Preventing Mold and Health Issues
When moisture sneaks behind walls, floors, or ceilings, it creates the perfect environment for mold to grow. Since mold thrives on moisture, thermal imaging is a game-changer - it spots cold areas caused by evaporative cooling before mold has a chance to take hold. This means you can tackle leaks from roofs, plumbing, or condensation early, stopping them before they turn into serious health hazards.
Take humid places like Alabama's Gulf Coast, for example. Moisture can hide for months without leaving visible clues, causing damage long before you notice stains or other signs. The best part? Thermal imaging is non-invasive. Inspectors can pinpoint hidden moisture sources without ripping out drywall or pulling up carpets. This not only keeps repair costs down but also helps maintain good indoor air quality and protects your home’s structure.
Avoiding Costly Structural Repairs
Catching moisture issues early with thermal imaging can save you from expensive structural repairs. A single leak or insulation gap might seem minor, but it can lead to wood rot, damaged drywall, and even weakened foundations if left unchecked.
"A single undetected leak or insulation gap can cost thousands in repairs and wasted energy each year." - Trinity Home Inspections
Thermal imaging reports don’t just reveal hidden problems - they provide solid proof of defects. This can give you the upper hand in negotiations, whether you're seeking price adjustments or pushing for repairs before closing a deal. And here’s a bonus: Trinity Home Inspections includes thermal imaging with every inspection, so you get this added layer of protection without any extra cost.
How To Detect Moisture with a Thermal Camera
Conclusion
Thermal imaging plays a crucial role in uncovering hidden moisture issues in your home. By identifying the cooling effects caused by evaporation, it can reveal leaks well before visible signs like stains or mold appear. Catching these problems early can save you from costly repairs down the line.
The true power of thermal imaging lies in the hands of skilled professionals. Experts not only confirm findings with moisture meters but also pinpoint the source of the issue - addressing the root cause, not just the symptoms. Plus, they provide clear, color-coded thermograms as documented evidence, which can simplify repair processes and even strengthen your position during real estate negotiations or insurance claims.
For the best results, schedule your thermal inspection when there’s a temperature difference of 18°F to 20°F between indoor and outdoor environments. This contrast makes it easier to uncover hidden issues throughout your property.
With a thorough inspection, you’re not just identifying potential problems - you’re also gaining peace of mind. At Trinity Home Inspections, thermal imaging is included with every inspection at no extra cost. Along with same-day digital reports and easy-to-understand explanations, you’ll have the clarity you need to prioritize repairs and make informed decisions about your home and budget.
FAQs
Can thermal imaging tell the difference between a leak and missing insulation?
Thermal imaging is a helpful tool for spotting moisture and insulation gaps, but it has its limits. It can't definitively tell you if a temperature anomaly is caused by a leak or missing insulation without further investigation. Since both issues can create similar patterns in infrared images, additional analysis is needed to pinpoint the exact cause.
How soon should I act if thermal imaging shows a cold spot?
If a thermal imaging scan shows a cold spot, it's important to look into it right away. Cold spots can indicate issues like moisture intrusion or gaps in insulation. Tackling these problems early can save you from dealing with bigger damage and expensive repairs later on.
What should I do to prepare my home for a thermal imaging inspection?
To get ready for a thermal imaging inspection, it's crucial to create conditions that support accurate temperature readings. Start by minimizing extreme temperature differences between indoor and outdoor spaces. Temporarily switch off heating or cooling systems to avoid interference. Ensure that walls, ceilings, and floors are easily accessible and not blocked by furniture or other obstacles. Avoid cleaning or sealing surfaces just before the inspection, as this can distort the results. Taking these steps ensures the inspection can effectively identify issues like hidden moisture, insulation gaps, or electrical problems.