
Roof-to-Wall Connections: A Homeowner's Guide

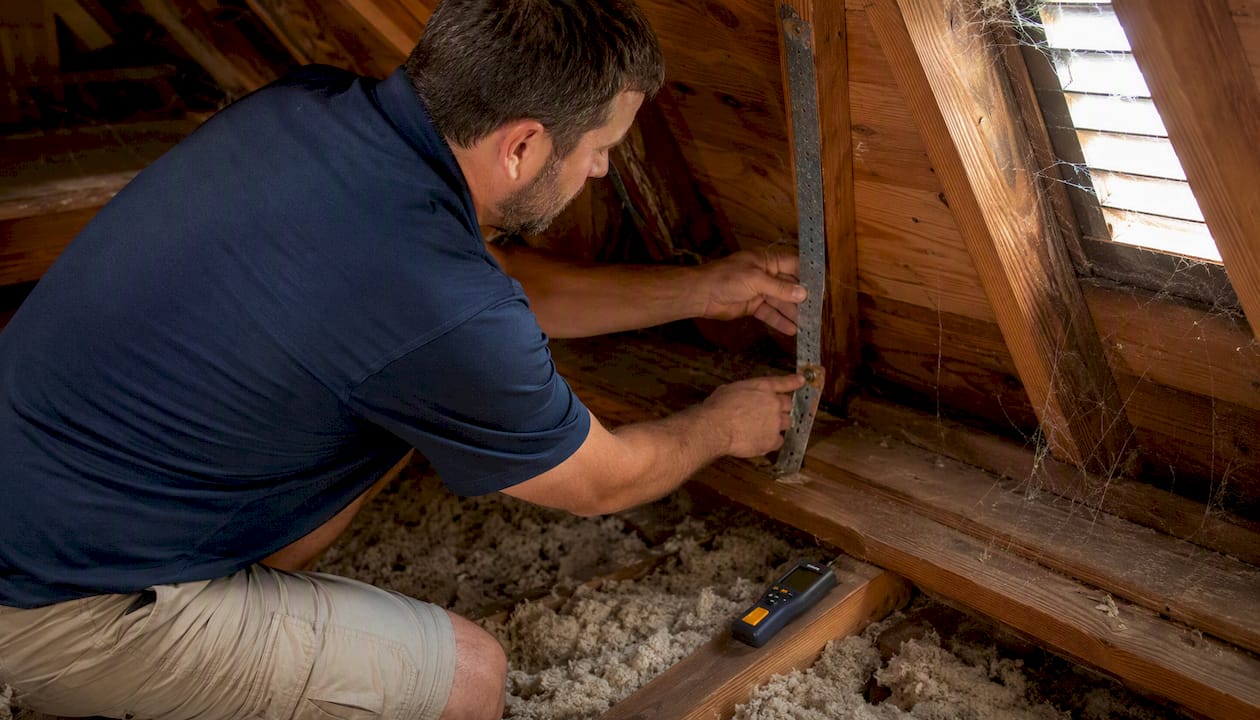
Roof-to-wall connections are the structural hardware and fastening details that physically tie your roof framing — rafters or trusses — to the top plates of your walls, so wind uplift and lateral forces travel down through the entire structure to the foundation. They are a required link in what engineers call the continuous load path: a chain of connections from roof sheathing all the way to the ground that keeps your home intact when a storm hits. When that chain has a weak link, the roof can lift off the walls before the walls themselves fail.
Here are the common forms you will find on U.S. homes:
Toe-nails (slant nails): nails driven at an angle through the rafter or truss into the top plate — the most common and the weakest
Clips: small metal brackets nailed to the side of the rafter and the top plate, offering more uplift resistance than toe-nails
Single-wrap straps: a metal strap that wraps around one side of the rafter and nails to the wall framing below
Double-wrap straps: straps on both sides of the rafter, providing the highest uplift capacity of the strap family
Hurricane ties / engineered anchors: purpose-built connectors (such as those made by Simpson Strong-Tie) that provide tested, rated uplift resistance for new construction and retrofits
The practical takeaway: homes with only toe-nails at the roof-wall joint are more vulnerable to roof uplift in high winds. Upgrading to metal straps or hurricane ties reduces that risk and often improves your wind-mitigation insurance rating.
Key Takeaways
Roof-to-wall connections are the most critical link in the continuous load path, and upgrading from toe-nails to metal straps or hurricane ties is the single highest-impact structural improvement most older Gulf Coast homes can make.
Point | Details |
Know your connection type | Check the attic: toe-nails only means higher wind risk; metal straps or clips mean better uplift resistance. |
Prioritize edges and corners | Connections within roughly 8 feet of the roof perimeter carry the highest uplift loads and fail first. |
Upgrade toe-nails to metal hardware | Strap assemblies can provide several times the uplift resistance of slant nails in laboratory tests. |
Use corrosion-resistant materials | Coastal homes need hot-dipped galvanized G-185 or stainless steel; standard G-60 corrodes faster in salt air. |
Document everything | Photos of connection type and condition support insurance wind-mitigation credits and protect you at resale. |
Get a professional inspection | Trinity Home Inspections provides same-day, photo-rich reports with drone access across Gulf Coast Alabama. |
Why Roof-to-Wall Connections Are the Most Critical Link in Your Home’s Structure
Roof-to-wall connections are not just one part of a larger system — they are often the single point where that system breaks. The continuous load path works only when every link holds: roof sheathing connects to framing, framing connects to the wall top plate, the wall transfers load to the foundation. One failed connection can trigger progressive failure across the entire roof.
ASCE 7 sets the wind load design requirements that govern how much uplift force a connection must resist. The International Residential Code (IRC) requires a continuous load path in residential construction, meaning the connection at the roof-wall joint must be designed and installed to carry those calculated loads. In high-wind and hurricane-prone areas — including much of coastal Alabama — those requirements are stricter, and the margin for error is smaller.
When connections fail, the consequences follow a predictable pattern:
Roof framing lifts off the wall, breaking the weather barrier
Water intrusion begins immediately, often before the storm ends
Structural damage spreads to wall framing, sheathing, and interior finishes
Insurance claims may be complicated or denied if the connection type was inadequate for the wind zone
Repair costs escalate because secondary damage compounds the original failure
Pro Tip: Uplift forces are not uniform across a roof. Edges, corners, and gable ends — generally within about 8 feet of the roof perimeter — experience the highest uplift loads. Prioritize those locations first when inspecting or planning upgrades.
Wall of Wind large-scale aerodynamic testing confirmed that force coefficients at roof-to-wall connections vary significantly with wind direction and building opening configuration, reinforcing why perimeter connections deserve the most attention.
Common Roof-to-Wall Connection Types You Will Find on U.S. Homes
Five connection types cover the vast majority of U.S. residential construction. Understanding which one your home has tells you a lot about its wind resistance before a single test is run.
The five types, from weakest to strongest in relative uplift capacity: toe-nails, clips, single-wrap straps, double-wrap straps, and engineered structural anchors or hold-downs.
Connection Type | Relative Uplift Capacity | Best Use | Corrosion Guidance | Typical Access | Approximate Cost Shape |
Toe-nail (slant nail) | Weakest | Existing construction, low-wind zones | Standard galvanized nails | Attic or soffit view | Low (already installed) |
Clip | Low-moderate | New construction or attic retrofit | Hot-dipped galvanized | Attic | Low-medium |
Single-wrap strap | Moderate | Attic or soffit retrofit | Hot-dipped galvanized; G-185 or stainless coastal | Attic or soffit | Medium |
Double-wrap strap | High | New construction; reroof access | Stainless or G-185 in coastal areas | Attic or during reroof | Medium-high |
Engineered anchor / hold-down | Highest | New construction; engineered retrofit | Stainless for coastal; hot-dipped galvanized inland | During construction or reroof | High |
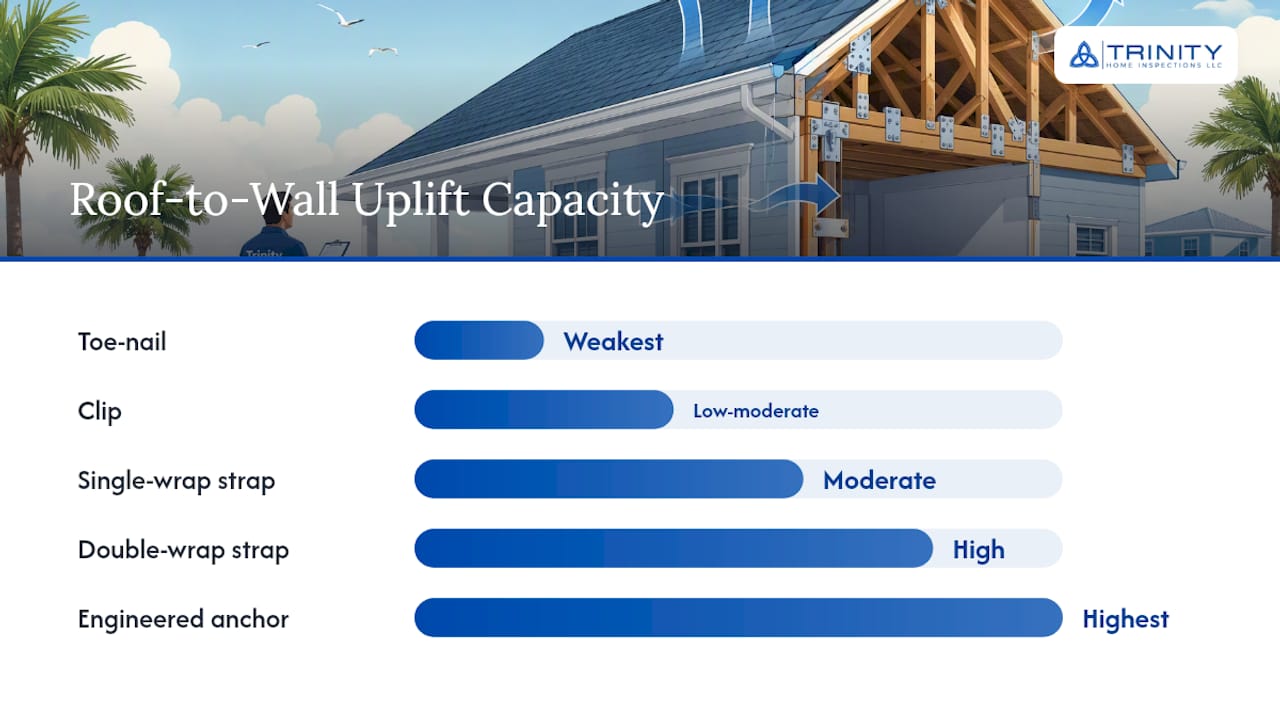
Structural connection research shows that strap assemblies can provide several times the uplift resistance of slant nails in laboratory tests — a meaningful difference when a Gulf Coast storm pushes wind speeds above 100 mph.
Simpson Strong-Tie is one of the most widely used manufacturers of hurricane ties and metal connectors in the U.S. Their product installation instructions specify fastener type, count, and placement — details that matter as much as the hardware itself. ASTM D1761 is the standard test method used to evaluate mechanical fasteners and connectors in wood, providing the testing framework behind published load ratings.
Key identification cues when you look at your own framing:
Toe-nails: look for two or three nail heads driven at roughly 45° angles into the side of the rafter where it meets the top plate — no metal hardware visible
Clips: a small L-shaped or U-shaped metal bracket nailed flat against the rafter side and the top plate
Straps: a metal strap (typically 1.25–1.5 inches wide) that wraps over or around the rafter and nails into the wall framing below the top plate
Double-wrap: two straps, one on each side of the rafter, both nailed into the wall framing
A clip with three or more nails on each leg already outperforms a standard two-nail toe-nail in most uplift tests. That gap widens considerably once you move to straps.
Where Connections Are Most Critical and What Building Codes Require
The corners and edges of your roof carry the highest wind uplift loads. Connections within roughly 8 feet of the roof edge — especially at gable ends and corners — are where failures typically begin. Interior field connections matter too, but they are rarely the first to go.
Code and standard references every homeowner in a wind-prone area should know:
IRC (International Residential Code): requires a continuous load path from roof to foundation; specific fastener schedules depend on wind speed zone and exposure category
ASCE 7: the wind load standard that sets design uplift forces; local jurisdictions adopt specific editions, and coastal Alabama falls in a high-wind design zone
ASTM D1761: the fastener and connector test standard that underpins published uplift ratings for products like Simpson Strong-Tie hurricane ties
Florida Building Code: requires specific product approvals and connection types in high-velocity hurricane zones; relevant to homes near the Florida-Alabama border and a useful benchmark for Gulf Coast construction generally
Regional variation is real. Coastal and hurricane-prone jurisdictions often require product-approved connectors with documented uplift ratings, not just any metal strap. Inland areas with lower design wind speeds may still permit toe-nailing under the IRC, though that does not make it the best choice for an older home you plan to keep long-term.
Statistic callout: Wall of Wind large-scale testing found that in some partially enclosed building configurations with windward openings, measured uplift forces on roof-to-wall connections exceeded the ASCE 7 Component and Cladding provisions — meaning standard code calculations can underestimate real-world loads when a window or door fails during a storm.
How to Inspect Roof-to-Wall Connections: DIY Checks and What a Pro Will Do
The simplest check you can do yourself: go into the attic with a good flashlight and look at where each rafter or truss tail meets the top plate of the exterior wall. What you see there tells you a lot.
DIY inspection steps:
Access the attic safely — use a proper ladder and wear a dust mask if insulation is present
Move to the perimeter of the attic where rafters or trusses meet the exterior wall top plate
Look for metal hardware: clips, straps, or hurricane ties attached to the rafter and the wall framing
If you see only nail heads driven at an angle with no metal hardware, those are toe-nails
Photograph every connection type you find, including the nail count if visible
Check for corrosion on any metal hardware — orange rust staining or flaking metal on straps or clips
Look for signs of separation: gaps between the rafter and top plate, torn sheathing, or daylight visible at the roof edge
A professional inspection goes further. An InterNACHI-certified inspector will document fastener counts, measure connection type at multiple locations, check for corrosion, and note whether insulation or drywall is blocking access. When the attic is inaccessible, soffit removal or a brief roof-deck cut during a reroof can expose the connection. Drone inspection covers the exterior roof-wall juncture for visible separation or displaced flashing.
Pro Tip: If blown-in insulation covers the top plate area, a professional can sometimes use a probe or carefully move insulation to expose the connection without damaging anything. Do not attempt to remove insulation yourself without knowing what is underneath — electrical wiring and HVAC ducts often run along that same perimeter.
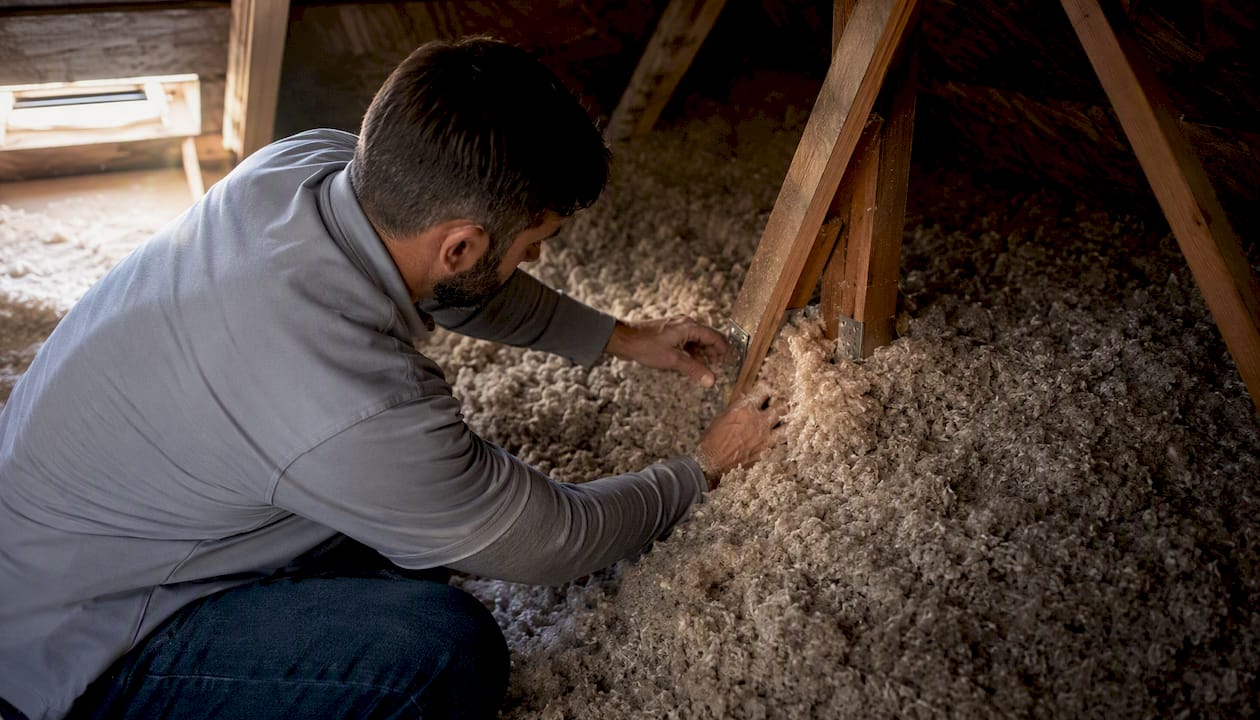
For a step-by-step roof inspection checklist tailored to Alabama homes, Trinity Home Inspections has published a practical guide covering what to look for from the attic to the ridge.
Alt text suggestion for attic inspection image: “Inspector examining roof-to-wall connection hardware in attic, Mobile County, Alabama”
Retrofit and Upgrade Options: Hurricane Ties, Straps, and Installation Access
The main retrofit routes are: install hurricane ties from the attic, install straps from the soffit side, replace connections during a reroof by accessing from the roof deck, or use structural screws and through-bolts for engineered anchors where standard straps cannot reach.
Each method has real trade-offs:
Attic installation of hurricane ties: the most common retrofit approach; a contractor or qualified installer works from inside the attic, nailing metal ties to each rafter and the top plate. Requires adequate attic height (typically at least 30 inches of working space) and clear access past insulation. Strength gain is significant over toe-nails alone.
Soffit-side strap installation: used when attic access is limited; the soffit panel is removed to expose the connection from outside. More labor-intensive but effective for homes with low-pitch roofs or finished attic spaces.
Reroof access: the most thorough option. When the roof deck is removed during a full reroof, connections are fully exposed and double-wrap straps or engineered anchors can be installed with no access constraints. If you are planning a reroof anyway, this is the time to upgrade.
Structural screws / through-bolts: used for engineered anchor retrofits or masonry wall connections; strap and bracket installation on masonry walls follows manufacturer or engineer specifications and typically requires right-angle gusset brackets connecting rafters to the top plate or bond beam.
For coastal homes in Gulf Shores, Orange Beach, or Foley, the NAHB retrofit guidance recommends hot-dipped galvanized (G-185 coating or heavier) or stainless steel hardware. Standard electro-galvanized connectors corrode faster in salt-air environments, sometimes within a few years.
Cost shapes vary widely by home size, number of connections, and access difficulty. Attic retrofits on a typical single-story home generally fall in the low-to-medium range per connection; soffit-access or reroof-integrated work runs higher due to labor. Always get a written scope and per-connection count before agreeing to a price.
Pro Tip: Start retrofits at corners and gable ends — the highest-uplift locations — before working toward the interior field. Homes with any opening on the windward wall (a broken window, a garage door without bracing) face dramatically higher uplift forces during a storm, so those houses benefit most from perimeter upgrades. Documented upgrades can also qualify for wind-mitigation insurance credits in Alabama.
For Gulf Coast-specific storm preparation steps, Trinity Home Inspections has published a guide on protecting your roof from Gulf Coast storms that covers both pre-storm prep and post-storm inspection.
Materials, Corrosion Resistance, and Ongoing Maintenance for Connectors
For coastal Alabama homes, hot-dipped galvanized connectors with a G-185 coating or heavier, or stainless steel, are the right choice. Standard G-60 or G-90 galvanized hardware corrodes faster in high-humidity, salt-air environments and can fail structurally before the roof framing shows any other sign of wear.
Key material and maintenance points:
Hot-dipped galvanized (G-185 or heavier): suitable for most Gulf Coast applications; the thicker zinc coating resists salt air better than lighter coatings
Stainless steel (Type 304 or 316): the best choice within a few miles of the coast or in direct salt-spray exposure; costs more but lasts significantly longer
Fastener compatibility: always use the nail type and size specified by the connector manufacturer. Mixing stainless connectors with standard bright nails, or using electro-galvanized nails with hot-dipped hardware, can accelerate galvanic corrosion at the fastener hole
Treated lumber compatibility: pressure-treated lumber (ACQ or CA treatments) is more corrosive to metal than untreated wood; connectors used with treated lumber must be rated for that exposure — check the manufacturer’s installation instructions before purchasing
Manufacturer installation instructions: Simpson Strong-Tie and other manufacturers publish specific fastener schedules for each connector model. Following those instructions exactly is not optional — using fewer nails or the wrong nail diameter reduces the published uplift rating
Routine maintenance checklist:
Visually inspect accessible attic connections every 2–3 years, or after any significant storm
Photograph hardware and note any orange rust staining, white zinc bloom, or flaking metal
Check nail heads for pull-out or corrosion at the nail shank
If corrosion is advanced (metal is pitting or flaking), call a contractor — corroded hardware should be replaced, not painted over
Pro Tip: Never mix metal types in the same connection assembly. A stainless strap nailed with standard galvanized nails creates a galvanic couple that corrodes the nail shank faster than either metal would corrode alone. Use the fastener the manufacturer specifies, in the material grade the manufacturer specifies.
For a seasonal maintenance schedule specific to Alabama homes, the Alabama roof maintenance checklist from Trinity Home Inspections covers inspection timing and what to document each year.
What the Research Actually Shows About Connection Performance
Lab tests and large-scale wind studies tell a consistent story: metal connectors outperform toe-nails by a wide margin, and the details of installation matter as much as the hardware choice.
BioResources uplift experiments comparing connector types across multiple wood species found meaningful differences in both load capacity and failure mode. Metal connector type A outperformed type B in that multi-species study, and Douglas fir specimens showed high load capacity but sometimes brittle failure under uplift — a reminder that wood species and connector design interact in ways that are not always intuitive.
Structural connection studies show that strap assemblies can provide several times the uplift resistance of slant nails in laboratory configurations. That gap is what makes toe-nail-only construction a genuine vulnerability in hurricane-prone regions, not just a theoretical concern.
Research callout: Wall of Wind large-scale aerodynamic testing demonstrated that RTWC force coefficients vary with wind direction and building enclosure configuration. Partially enclosed buildings — those with a windward opening from a broken window or failed garage door — experienced significantly increased total uplift forces in some test cases, exceeding what standard ASCE 7 Component and Cladding calculations would predict.
Practical implications for homeowners:
Fastener count matters as much as connector type — a hurricane tie installed with half the specified nails performs far below its rated capacity
The continuous load path is a system; upgrading one connection without addressing adjacent weak links limits the benefit
Wood species and moisture content affect performance, which is why inspectors look at the condition of framing, not just the hardware
When to Call an Inspector or Contractor
Call a professional when you see visible separation at the roof-wall juncture, missing or corroded hardware, recent storm damage, plans to reroof, a pending refinance, or an insurance wind-mitigation inspection requirement.
Questions to ask any inspector or contractor before hiring:
Do you use manufacturer-specified hardware and fastener counts, or do you substitute based on availability?
Can you document the connection type, fastener count, and location for each rafter or truss?
Will the installation maintain the continuous load path from roof to foundation?
Do you provide a written report with photos showing before and after conditions?
Are you licensed, insured, and familiar with Alabama wind-zone requirements?
Red flags that should give you pause:
A contractor who cannot name the specific connector model or fastener schedule they plan to use
Anyone who offers a flat per-house price without first counting the connections and assessing access
Hardware that is not rated for coastal exposure on a home within a few miles of the Gulf
Refusal to follow manufacturer fastener counts (“two nails is fine, we always do it that way”)
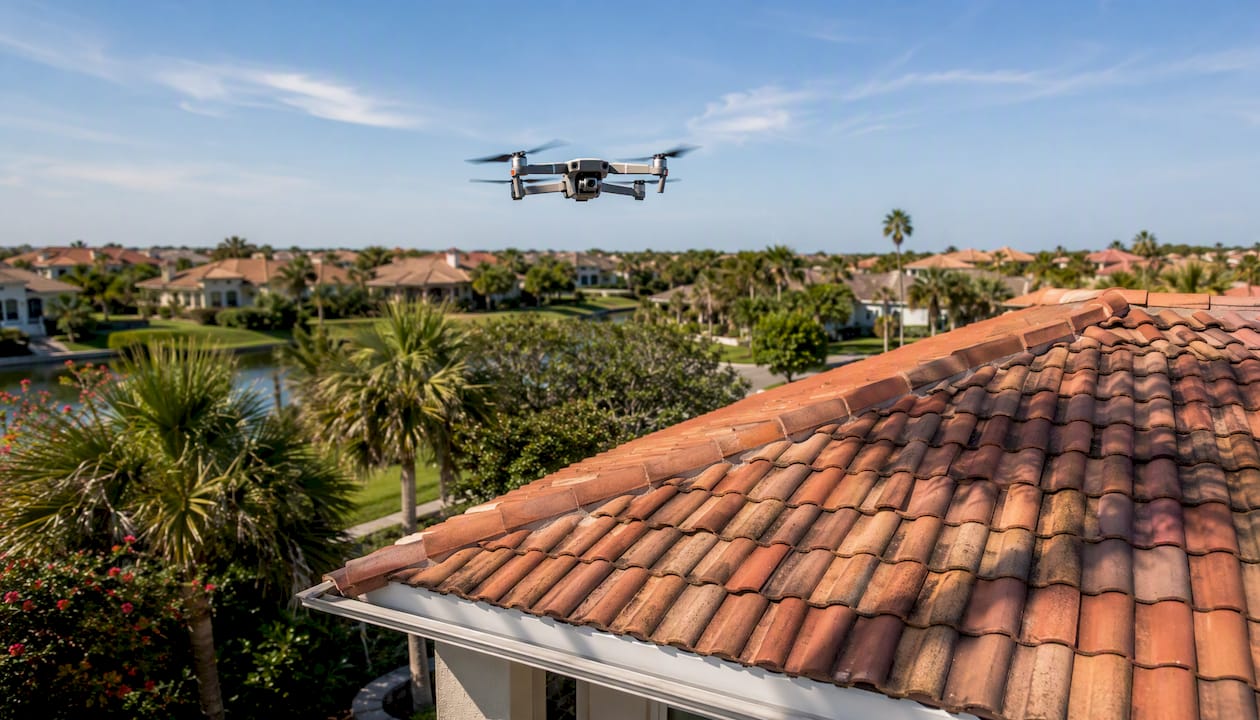
Trinity Home Inspections delivers photo and video-rich reports the same day as the inspection, with drone capability for roofs where walking is unsafe or access is limited. That documentation gives you a clear record of connection type and condition — exactly what you need before a reroof, a sale, or an insurance wind-mitigation review.
What We Typically See in the Field on Gulf Coast Homes
Many older Gulf Coast homes — particularly those built before the mid-1990s code updates — still rely entirely on toe-nailing at the roof-wall joint. That is not a condemnation of those homes; it reflects what was standard practice and permitted by code at the time. The question is whether the connection is adequate for where the home sits today.
Common findings in the field:
Toe-nail-only connections on homes built before 1994, with no metal hardware visible from the attic
Clips or partial strap installations from a previous reroof that cover some rafters but not all — inconsistent coverage is almost as problematic as no coverage
Corroded straps on homes within a mile of the coast, where salt air has worked on G-60 or G-90 hardware for 15 to 20 years
Attic insulation blown over the top plate area, hiding the connection type entirely and requiring careful probing to document
Most upgrades we recommend happen during a reroof, when access is easiest and cost per connection is lowest. Separate attic retrofits are the right call when the roof is in good condition but the connections are clearly inadequate. Either way, the report documents what exists, what is recommended, and why — in plain English, with photos.
Matt Cameron is an InterNACHI-certified inspector and FAA-licensed drone pilot. Trinity Home Inspections serves Mobile, Baldwin, Escambia, and surrounding Gulf Coast Alabama counties, delivering same-day reports with thermal imaging included at no extra charge.
Ready to Know What’s Holding Your Roof On?
If you have been wondering about the connections between your roof and walls, the most direct answer is a professional attic inspection with documented findings. Trinity Home Inspections provides InterNACHI-certified inspections across Gulf Coast Alabama — Mobile, Baldwin, Escambia, and surrounding counties — with same-day photo and video reports, free thermal imaging, and drone access for roofs that cannot be safely walked.
[

Alt text: “Trinity Home Inspections inspector in khaki pants and blue shirt with white pocket logo examining roof framing, Gulf Coast Alabama”
What’s included with a roof-to-wall connection inspection:
Attic inspection with fastener documentation where accessible
Drone roof inspection when walking is unsafe or access is limited
Photo and video evidence of connection type and condition
Written recommendations in plain English, color-coded by priority
Same-day digital report delivered the day of the inspection
Ready to get a clear picture of your home’s wind resistance? Call 251-210-7376 or visit Trinityinspectionsllc to schedule. If you are preparing to sell, a pre-listing inspection documents connection condition before buyers or their inspectors find it first.
Sources
FAQ
What connects a roof to a wall?
Roof framing — rafters or trusses — connects to the wall’s top plate through fastening details such as toe-nails, metal clips, hurricane straps, or engineered anchors. These connections are part of the continuous load path that transfers wind uplift forces from the roof down to the foundation.
What is the weakest roof-to-wall connection?
Toe-nailing is the weakest common connection type.
How are roofs connected to walls in most U.S. homes?
Most U.S. homes built before the mid-1990s use toe-nailing as the primary roof-to-wall connection. Homes built or retrofitted after major code updates in hurricane-prone regions are more likely to have metal clips, single-wrap straps, double-wrap straps, or engineered hurricane ties.
What is it called where a roof meets a wall?
The junction where roof framing meets the wall top plate is called the roof-to-wall connection or roof-wall joint. In structural engineering terms, it is a required node in the continuous load path. The specific hardware installed there determines the connection’s uplift capacity.
Can siding be flush with the grade?
No. Industry standard requires siding to maintain a clearance of 6–8 inches above finished grade and 2–4 inches above horizontal roof decks or flashings. Siding installed flush with the ground wicks moisture, accelerates decay, and can compromise the wall assembly directly below the roof-wall junction.
Recommended

