
Room by Room Electrical Checklist Backed by CPSC and InterNACHI

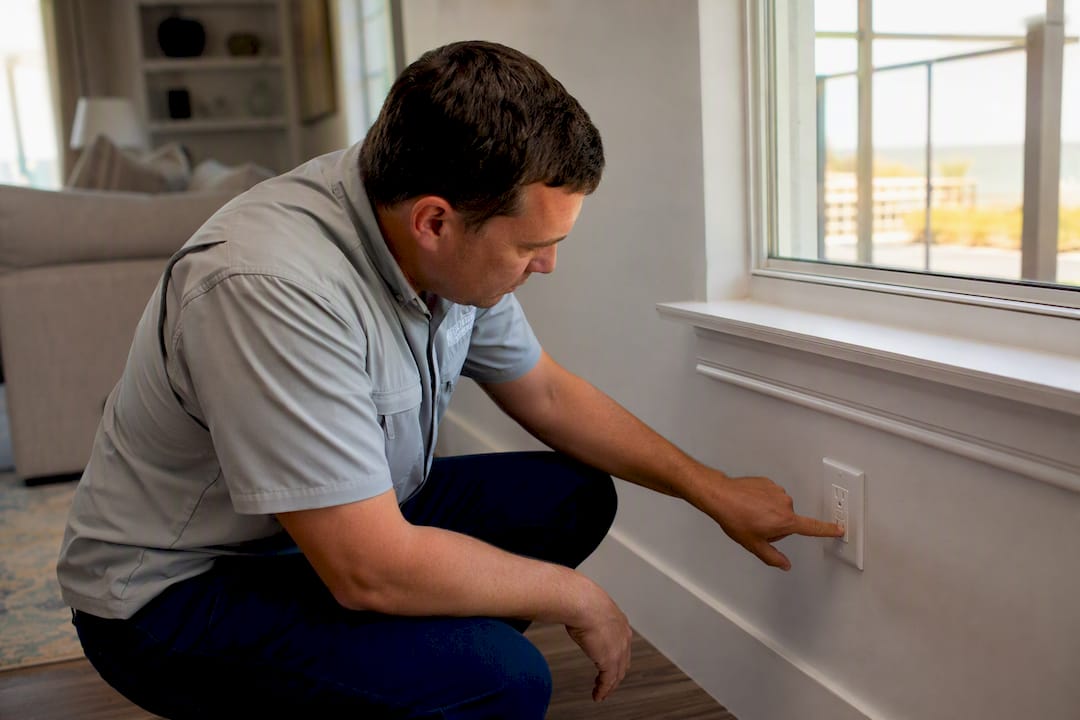
An electrical home inspection checklist lets you quickly find safety hazards and prioritize repairs before they become expensive problems. If you notice signs of overheating, a burning smell, or visible arcing anywhere in your home, stop using that circuit immediately and call a licensed electrician. Organizations like the Consumer Product Safety Commission and InterNACHI-certified inspectors like Trinity Home Inspections both build their safety recommendations around exactly this kind of prioritized, room-by-room approach.
TL;DR:
Homes with older panels, such as Federal Pacific or Zinsco, pose higher failure risks and should be replaced before using the system extensively.
GFCI protection is mandatory in kitchens, bathrooms, and outdoor outlets, and must be tested monthly to ensure proper functioning.
Repeated breaker trips, scorch marks, or signs of overheating require immediate professional inspection to prevent fire or shock hazards.
Proper labeling of panels is often inaccurate in 31% of homes, which can delay emergency responses and complicate repairs.
Routine homeowner checks should be done every six months, focusing on GFCI and AFCI testing, outlet condition, and documentation of any issues.
What Should a Room-by-Room Electrical Inspection Cover?
Every room in your house has a different electrical risk profile, which is exactly why a generic once-over misses so much. Kitchens deal with water and heavy appliance loads. Bathrooms combine water and skin contact, the two ingredients that turn a minor fault into a shock hazard. Bedrooms and living spaces carry the highest fire risk from aging wiring behind walls. A proper electrical safety checklist from the Electrical Safety Foundation International walks through each zone with a different set of priorities, and that’s the model worth following room by room.
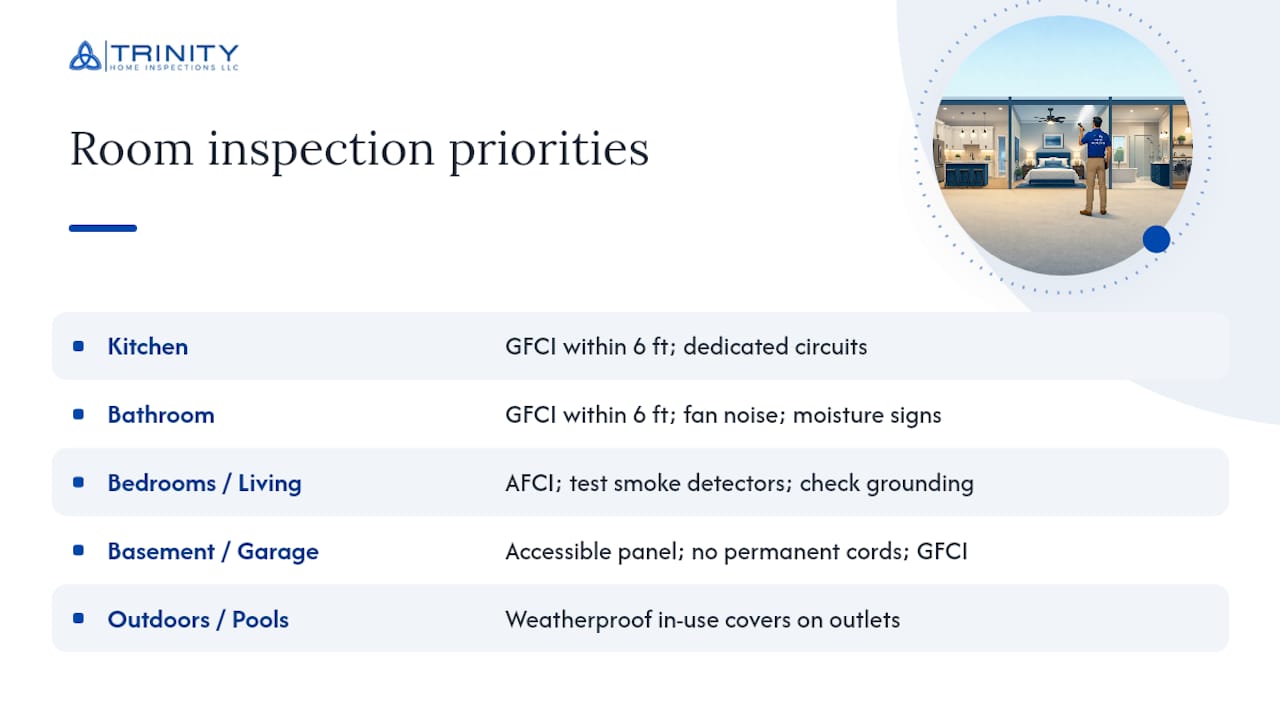
In the kitchen, check that every countertop outlet within 6 feet of the sink has ground-fault circuit interrupter (GFCI) protection. Press the “test” button on each outlet. It should trip and cut power immediately. Confirm your refrigerator, microwave, and dishwasher sit on dedicated circuits rather than sharing a breaker with half the kitchen. Look closely at outlets near the range and sink for scorch marks, melted plastic, or a loose fit when you plug something in. A loose-fitting outlet is often an early warning sign of a worn internal connection.
In bathrooms, GFCI protection is non-negotiable at every outlet within 6 feet of a water source, and most bathrooms only need one or two outlets total. Check the exhaust fan for unusual noise, which can indicate a failing motor or loose wiring at the fixture box. Moisture is the enemy here: look for rust streaks around light fixtures, discoloration on switch plates, or a faint musty smell near an outlet, all of which point toward water intrusion into the wiring.
In bedrooms and living areas, arc-fault circuit interrupter (AFCI) protection is now expected in most sleeping areas under current code cycles, and it’s designed to catch the kind of arcing that starts wall fires. Confirm smoke detectors are present and test them monthly. Check a sample of outlets for tamper-resistant slots, especially in homes with young children, and use a simple plug-in outlet tester to confirm correct polarity and grounding. A reversed or open ground reads instantly on a $10 tester.
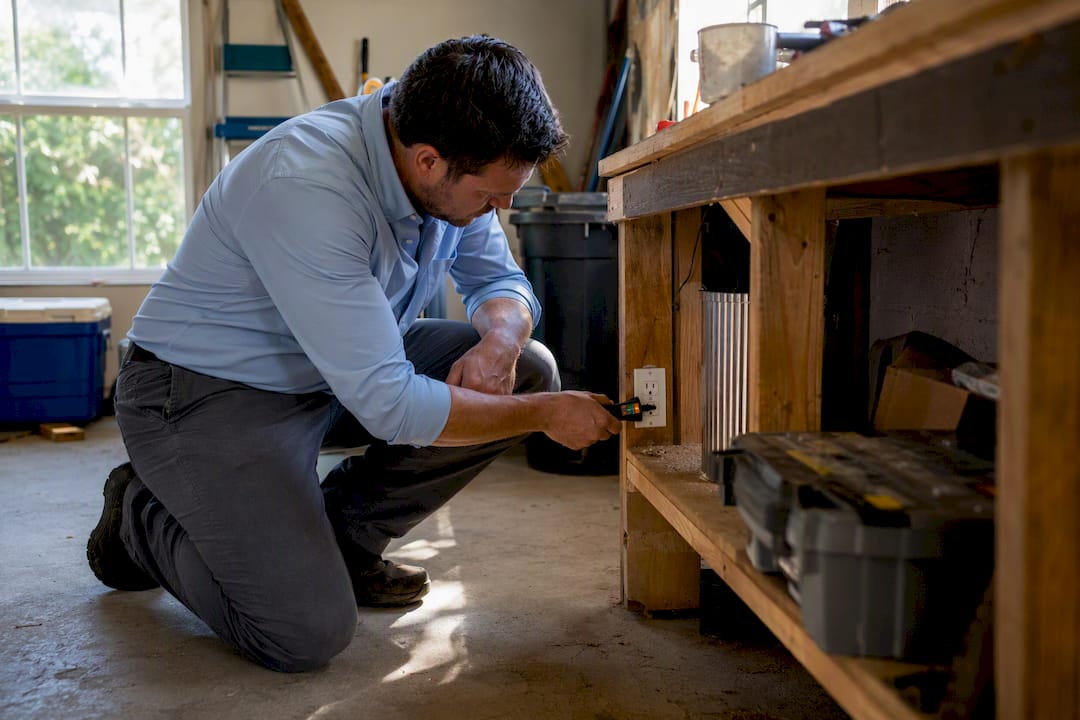
In the basement, garage, and any workshop space, look for the service entrance point where power comes into the house and confirm the panel is accessible, not blocked by storage. Garages and workshops see the heaviest misuse of extension cords, often run permanently to power tools instead of a proper outlet. That’s a fire risk the National Fire Protection Association has flagged repeatedly. Check that any receptacles near a workbench, sink, or garage door have GFCI protection and that power tool cords aren’t frayed, spliced, or taped instead of replaced.
Outdoors, pools, and spas need weatherproof “in-use” covers on every exterior outlet, meaning the cover stays closed even with a cord plugged in. Every outdoor outlet needs GFCI protection, and pool or spa equipment needs its own dedicated, bonded circuit. Exterior light fixtures should be mounted securely with no exposed wiring at the junction box. If you have pool or spa equipment, a pool maintenance checklist that covers electrical bonding and outlet protection pairs well with your home’s broader inspection routine.
As you move room to room, photograph anything questionable and note the room, outlet location, and what you observed. This documentation becomes valuable if you’re negotiating repairs during a home sale or just tracking maintenance over time.
Pro Tip: Test outlets in the same order every time (kitchen, then bathrooms, then bedrooms) so you build a habit and never accidentally skip a room during your semiannual check.
How Do You Check Your Electrical Panel and Service Entrance?
Your electrical panel tells you more about your home’s electrical health than almost any other single component, and reading it doesn’t require special tools. Start with the sticker on the inside of the panel door, which lists the main service amperage, usually 100, 150, or 200 amps for most modern homes. Older homes with 60-amp service often struggle to support today’s appliance loads and are a common reason electricians recommend an upgrade.
Open the panel cover (with the main breaker still off if you’re not comfortable, or simply leave this step to a professional) and look for these red flags:
Burnt, blackened, or melted areas around any breaker terminal
Rust or corrosion inside the panel box
Faded, missing, or handwritten labels that don’t match your actual circuits
Two wires connected to a single breaker terminal not rated for double-tapping
Panel brands with known histories of failure, including Federal Pacific Electric (FPE) and Zinsco panels
If you spot any of these, especially a known hazardous brand, stop opening the panel further and call a licensed electrician before doing anything else. These older panel types have documented failure rates for breakers that don’t trip when they should, which defeats the entire purpose of a circuit breaker.
For labeling accuracy, a simple one-person method works well: turn on a radio or lamp in a room, then flip breakers one at a time until the power cuts, writing down which breaker controls which space. According to ESFI’s inspection guidance, accurate labeling and panel condition are two of the core items every homeowner checklist should confirm, since mislabeled panels slow down emergency response when every second matters.
Surveyed field inspectors found that circuit labeling issues show up in 31% of homes inspected, making it one of the most common violations found during any residential wiring checklist review.
What Wiring Types and Warning Signs Should You Watch For?
Not all wiring behind your walls carries the same risk, and being able to identify what you’re looking at changes how urgently you should act. Knob-and-tube wiring, found in homes built before the 1940s, uses ceramic knobs and tubes to route individual wires and lacks a ground wire entirely. Aluminum wiring, common in homes built between 1965 and 1973, expands and contracts differently than copper and can loosen at connection points over time. Modern non-metallic (NM) copper cable, often called Romex, is the standard in most homes built after the mid-1980s.
Warning signs of wiring problems that any homeowner can spot without special training include:
Discolored or warm-to-the-touch outlet and switch covers
A persistent burning or “hot plastic” smell near outlets or the panel
Flickering lights that aren’t tied to a dimmer switch
Breakers that trip repeatedly under normal loads
Open splices visible in attics, crawl spaces, or basements without a proper junction box
A plug-in outlet tester, sold for under $15 at any hardware store, checks for open grounds, reversed polarity, and open neutrals in seconds. That’s the extent of safe DIY testing. Load calculations, torque-checking internal panel connections, and testing wire insulation integrity all require a licensed electrician with proper equipment. Wiring identification also matters beyond safety: many homeowner insurance carriers charge higher premiums or deny coverage entirely for homes with active knob-and-tube or aluminum branch wiring, so knowing what you have shapes both your safety plan and your policy options.
Are Your GFCI, AFCI, and Detectors Actually Working?
Testing your home’s safety devices takes about 20 minutes and catches failures that would otherwise go unnoticed until it’s too late.
Test every GFCI outlet by pressing “test,” confirming it cuts power, then pressing “reset.” If it doesn’t trip or won’t reset, it needs replacement.
Test AFCI breakers at the panel using the built-in test button; these protect bedroom and living area circuits from arc faults that GFCIs don’t catch.
Test smoke detectors monthly using the test button, and replace batteries at least once a year, or immediately if you hear the low-battery chirp.
Test carbon monoxide detectors the same way, placing them near sleeping areas and on every level of the home per NFPA guidance.
Check surge protection, especially if you’ve had multiple power outages or lightning strikes nearby. A whole-house surge arrester installed at the panel protects everything downstream, unlike a single power strip.
Keep in mind that code requirements shift over time, and what your local authority having jurisdiction (AHJ) requires today may exceed what was standard when your house was built. That’s not a reason to panic. It’s a reason to check rather than assume.
Pro Tip: Write the test date on a sticky note inside your breaker panel door after each check. It takes ten seconds and settles any argument about whether “someone already did that.”
What Are the Most Common Electrical Code Violations?
Field surveys of residential electrical inspections consistently point to the same handful of issues, and knowing them helps you focus your energy where it counts. According to the ICC-NAHB research survey, the most frequently cited violations are:
Grounding and bonding issues — found in 37% of inspections, and the single most common defect
Circuit labeling problems — 31% of homes have mislabeled or unlabeled panels
Working space and clearance violations — 30% of panels lack the required clear space in front for safe access
Missing GFCI protection — 29% of homes are missing GFCI coverage somewhere it’s required
Grounding and bonding failures matter most because they’re what allow a fault current to travel through a person instead of safely back to the panel. Working clearance issues matter because a cramped panel location slows down anyone trying to shut off power during an emergency, including firefighters. Missing GFCI protection is a straightforward shock hazard in wet areas.
For triage: treat grounding failures and missing GFCI protection as immediate priorities, schedule labeling and clearance fixes within a few weeks, and treat purely cosmetic issues, like a cracked but functional cover plate, as low priority. Unresolved violations can also complicate a home sale, since many buyers’ inspectors will flag the same issues and use them as negotiating leverage.
When Should You Call a Licensed Electrician?
A room-by-room checklist catches a lot, but some findings mean it’s time to stop DIY-ing and bring in a professional. Call an electrician right away if you find a hazardous panel brand like FPE or Zinsco, any knob-and-tube or aluminum branch wiring, evidence of burning or scorching, breakers that trip repeatedly, or if anyone in the home has experienced a shock from an outlet or appliance.
A dedicated electrical inspection goes further than a general home inspection by including load calculations for the whole panel, internal inspection of panel connections, grounding system tests, and full wiring identification throughout the house. According to AJLongelectric’s guidance on electrical inspections, these focused inspections often catch issues a general walkthrough misses entirely, and dedicated inspections typically run in the low hundreds of dollars in most markets, usually completed within a few hours.
Dedicated electrical inspections: typically a few hours on-site
Panel upgrades: often one to two days depending on utility coordination
Minor repairs (outlet swaps, GFCI installs): usually same-day
If you’re buying a home and the inspection turns up electrical issues, ask for a repair credit at closing rather than letting the seller arrange the repairs themselves. You control the quality and timeline that way, instead of hoping the seller hired someone competent.
How Do You Turn This Checklist Into an Ongoing Habit?
A checklist only helps if you actually use it more than once. Here’s a simple process:
Walk each room and photograph every outlet, switch, and fixture you check.
Record your panel’s amperage, brand, and any breaker labels that need correcting.
Note model numbers for smoke detectors, CO detectors, and any AFCI/GFCI breakers.
Build a basic circuit map by shutting off one breaker at a time and noting what loses power.
File your photos and notes together, dated, so you can compare over time.
Do a quick homeowner check every six months, matching the CPSC’s recommended cadence.
Schedule a full professional inspection whenever a trigger event happens: a renovation, a new appliance circuit, or a home purchase.
Keep photos organized by room so they’re ready to hand over during a sale negotiation, since documented findings tend to speed up repair credit discussions.
A printable checklist template makes this process faster since you’re filling in blanks instead of trying to remember every item from memory.
Why Trust This Checklist?
This guide reflects the same room-by-room framework InterNACHI-certified inspectors use in the field, matched against the CPSC and ESFI’s public safety checklists. Matt Cameron, lead inspector at Trinity Home Inspections, holds InterNACHI certification, FAA drone licensing, and has passed the National Home Inspectors Exam, with ongoing annual education required to maintain that standing.
On actual inspections, Trinity Home Inspections uses tools that go beyond what a homeowner checklist can catch on its own:
Thermal imaging to spot overheating connections before they fail (included free on every inspection)
Moisture meters to confirm water intrusion near electrical components
CO and combustible gas detectors to catch hazards a visual check would miss entirely
Drones and specialty cameras for hard-to-access areas like rooflines and attic runs
Every inspection comes with a same-day photo and video report, and Trinity carries insurance well above state minimums, giving clients real protection if something unexpected happens during the visit.
Do HVAC Electrical Connections Need Checking Too?
Your HVAC system pulls more current than almost anything else in your home, which makes its electrical connections worth a specific look rather than a passing glance. Check the disconnect box next to your outdoor condenser unit for a secure cover, no rust, and no scorch marks around the switch. Inside, the wiring should be free of chew marks (a surprisingly common issue where rodents nest near outdoor units) and connections should be tight, not loose enough to rattle.
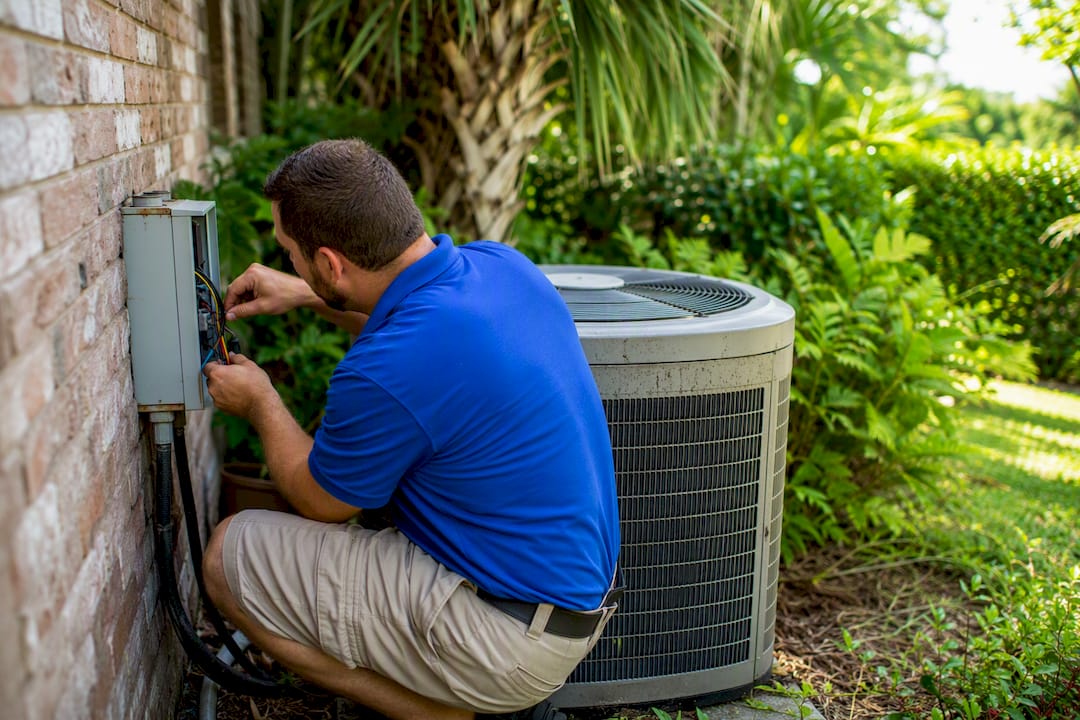
Your furnace or air handler has its own dedicated circuit that should never share a breaker with anything else. If your HVAC system trips its breaker repeatedly, that’s not a breaker problem to work around by resetting it. It’s usually a sign of a failing capacitor, a shorted motor winding, or a loose connection generating excess heat, and any of those needs a licensed electrician or HVAC technician before you run the system again.
Thermostat wiring rarely causes serious hazards since it runs on low voltage, but the connection where it meets the higher-voltage side at the air handler is worth a visual check for scorching or melted insulation. If your home has a heat pump with backup electric resistance heat strips, those draw significant current and deserve the same scrutiny as your main panel breakers, since a loose connection there runs hot for extended periods every time the system kicks into backup mode.
An Inspector’s Take on What Homeowners Miss
After years of walking through Gulf Coast homes, the misses are almost always the same. Homeowners test their smoke detectors but never their GFCIs, assuming “it looks fine” means it works. Garages accumulate permanent extension-cord setups powering freezers or shop equipment that really need a dedicated outlet. And breaker panels go unlabeled for years because nobody wants to spend an afternoon flipping switches.
Do: test every GFCI and AFCI twice a year, photograph your panel, replace detector batteries on schedule. Don’t: open a panel you’re not comfortable with, use extension cords as permanent wiring, or ignore a breaker that trips more than once.
For a deeper look at what a full inspection covers beyond this checklist, our electrical inspection guide walks through what a licensed professional adds to the process.
— Matt
Book a Local Electrical and Home Inspection
There are DIY checklists, and then there’s knowing for certain. Trinity Home Inspections gives Gulf Coast homeowners and buyers the certainty a checklist alone can’t, backed by InterNACHI certification, free thermal imaging on every visit, and a same-day report instead of a days-long wait.
[

What’s included with every inspection:
Same-day digital report with high-resolution photos and video
Free thermal imaging to catch hidden overheating and moisture issues
Full panel and wiring inspection, including labeling and grounding checks
Optional add-ons: sewer scope, mold testing, indoor air quality sampling, pool/spa inspection
If you’re closing on a property soon, pairing your inspection with a permit and deed search gives you a fuller picture of the home’s history before you sign anything. Call 251-210-7376 or visit Trinityinspectionsllc to schedule your inspection, and ask about same-day availability in Baldwin, Mobile, Escambia, Washington, and Monroe counties.
Where This Checklist’s Guidance Comes From
This checklist draws directly from the CPSC’s Home Electrical Safety Checklist, which sets the room-by-room framework and semiannual check recommendation. The ESFI’s Indoor Electrical Safety Check Booklet provided the technical detail on panel, GFCI, and surge protection checks. The NAHB/ICC code violation survey supplied the violation percentages used for triage guidance, and NFPA informed the detector placement and testing recommendations. Each source publishes downloadable materials worth bookmarking alongside your own printable checklist.
Sources
FAQ
What Is Included in an Electrical Inspection?
A full electrical inspection covers the service panel, grounding and bonding, wiring condition, GFCI and AFCI protection, outlet and switch testing, and smoke/CO detector placement, following the framework in ESFI’s inspection checklist.
How Much Does a Full Electrical Inspection Cost?
A dedicated electrical inspection typically runs in the low hundreds of dollars in most markets, according to AJLongelectric, while a general home inspection that includes electrical review is often bundled into one flat rate, which Trinity Home Inspections can quote directly at 251-210-7376.
What Does an Electrical Inspection Look Like in Practice?
An inspector walks room by room testing outlets and switches, opens the panel to check labeling and connections, tests every GFCI and AFCI, and often uses thermal imaging to spot hidden overheating, all documented in a same-day photo and video report.
What Is a Basic Electrical Safety Checklist for Homeowners?
A basic four-step check includes testing all GFCI outlets, verifying smoke and CO detectors work, visually inspecting cords and outlets for damage, and confirming your panel is labeled and accessible, matching the core items in CPSC’s checklist.
How Often Should I Run Through This Checklist?
Run the full room-by-room check every six months, matching CPSC’s recommended cadence, and schedule a professional inspection whenever you notice a red flag or before a home purchase closes.
Recommended
