Healthy Homes Inspection Checklist: Your Complete Guide


A healthy homes inspection checklist gives you a clear, room-by-room framework to find and fix the conditions that quietly affect your family’s health. Based on HUD and National Center for Healthy Housing standards, a healthy home follows eight core principles: keep it dry, clean, pest-free, well-ventilated, contaminant-free, safe, well-maintained, and temperature-controlled. Those eight principles are not abstract goals. They translate directly into specific things you can see, test, and fix in every room of your home.
Whether you own, rent, or manage a property, this guide walks you through every major area, from the living room to the crawlspace, with practical checks you can do yourself and clear signals for when a professional needs to step in.
What Does a Healthy Homes Inspection Checklist Cover?
The short answer: every system and space that affects the air you breathe, the water you drink, and the safety of the people living there. A home wellness inspection covers far more than structural conditions. It addresses moisture, air quality, chemical hazards, pests, fire safety, and maintenance gaps that compound over time.
Here is a high-level overview of the major checklist categories you need to address:
Moisture and mold control
Check under sinks, around windows, and in basements for water stains or soft drywall
Look for visible mold or musty odors in any room
Confirm indoor humidity stays low; run a dehumidifier if condensation appears on windows
Indoor air quality
Test exhaust fans in bathrooms and kitchens to confirm they vent air outdoors
Replace furnace filters with a MERV 8 or higher rating every three months
Keep all gas appliances properly vented and serviced annually
Pest prevention
Seal gaps around pipes, windows, and foundation walls
Remove clutter in attics, basements, and garages where rodents nest
Avoid leaving food or standing water out overnight
Chemical and hazardous material safety
Lock away cleaning supplies, pesticides, and medications out of children’s reach
Post the Poison Control Hotline number (800-222-1222) in the kitchen and every room
In homes built before 1978, check painted surfaces for peeling or cracking and follow lead-safe work practices for any renovation work
Safety and security
Test smoke detectors and carbon monoxide detectors monthly
Secure heavy furniture (bookcases, televisions) to walls
Install no-slip mats in tubs and showers; check stair railings for stability
Ventilation and HVAC
Confirm all combustion appliances vent to the outside
Inspect HVAC filters, coils, and drain pans seasonally
Check that bathroom and kitchen exhaust fans are clear and functional
Water quality
Flush cold taps for 30 seconds to 2 minutes before drinking if lead pipes are a concern
Test private well water at least once a year
Keep water heater temperature below 120°F
Radon and carbon monoxide
Test for radon; if levels exceed the EPA action level, contact a certified radon specialist
Install CO detectors near sleeping areas and test them regularly
Maintenance and repairs
Address small leaks, cracks, and worn seals before they become costly problems
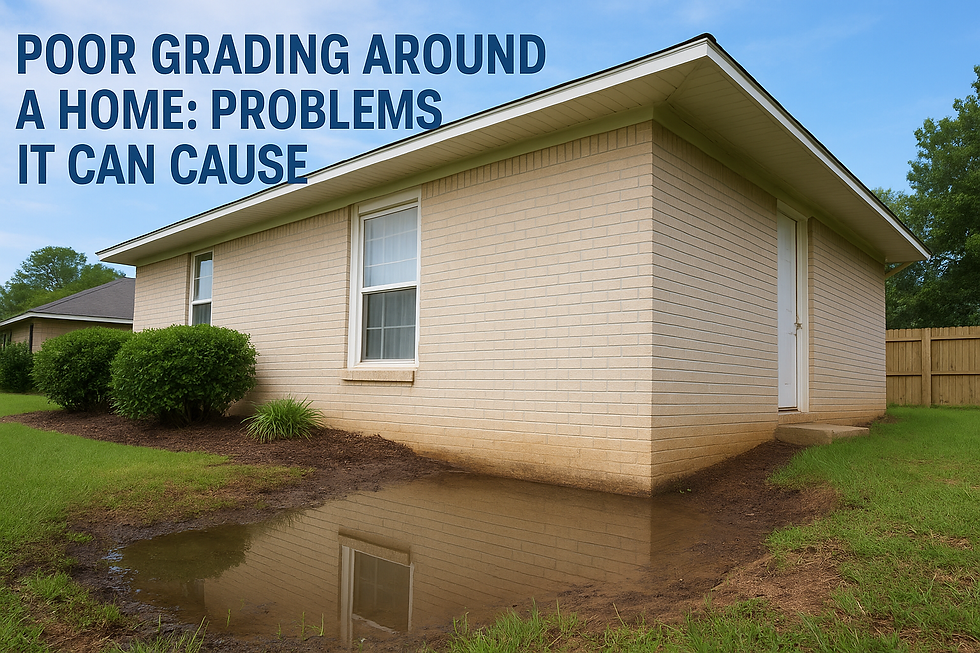
Clean gutters and extend downspouts away from the foundation
Replace missing or broken shingles and check flashing around chimneys and skylights
Room-by-Room Healthy Home Inspection Guide
Knowing the categories is a start. Knowing exactly what to look for in each room is where the real work happens. The checklist below follows the path a professional inspector takes through a home, from the spaces you use every day to the ones you rarely think about.
Living room and common areas
Lead paint is the first concern in any home built before 1978. Check painted doors, windows, trim, and walls for peeling or cracking, and test for lead before doing any sanding or renovation work. Vacuum carpets regularly to reduce dust mites and asthma triggers. Replace window blinds with cordless versions or ensure cords are out of reach of children.
Confirm smoke and CO detectors are working; fireplaces require a detector in the same room
Check extension cords and lighting cords for fraying or bare wires; keep them out of floor pathways
Secure televisions, bookcases, and other heavy items to walls with anti-tip hardware
Discard children’s toys with small parts or any that may contain lead paint
Bedrooms
Bedrooms deserve particular attention because people spend more time there than anywhere else in the home. Use allergen-proof, zippered covers on mattresses and pillows to reduce dust mite exposure. Wash sheets and blankets weekly in hot water.
Confirm a working smoke detector is present in the room
Place a CO detector in the hallway outside bedrooms
Replace corded blinds with cordless alternatives
Check for mold or mildew around windows, especially in humid climates
Dry-cleaned items should air out before being brought into the bedroom; chemical odors from dry cleaning are a real irritant
Kitchen
The kitchen produces more moisture and combustion byproducts than any other room. Use a range hood that vents to the outside (not just a recirculating filter) when cooking. An unvented gas stove releases nitrogen dioxide and particulates directly into your living space.
Check painted surfaces for lead if the home was built before 1978
Clean up spills immediately; mop floors at least weekly
Keep matches, knives, glassware, and cleaning products out of children’s reach
Never leave food or water out overnight; sealed containers reduce pest attraction
Post the Poison Control Hotline (800-222-1222) on the refrigerator
Room | Key Hazards | Priority Checks |
Living room | Lead paint, CO, fire | Detectors, cord safety, heavy furniture anchoring |
Bedroom | Dust mites, CO, mold | Mattress covers, detectors, window condensation |
Kitchen | Combustion byproducts, pests | Vented range hood, sealed food, spill cleanup |
Bathroom | Mold, slips, chemicals | Exhaust fan, non-slip mats, locked medicine cabinet |
Basement | Radon, moisture, pests | Radon test, crack sealing, clutter removal |
Attic | Asbestos, pests, leaks | Insulation check, vent clearance, rodent signs |
Garage | CO, chemical storage | No idling indoors, locked chemical storage |
Bathroom
Moisture is the primary threat in bathrooms. Run the exhaust fan during and after every shower; if you are not sure the fan actually moves air outdoors, hold a tissue near the grille. If it flutters toward the fan, air is moving. If it does not, the duct may be disconnected or blocked.
Use slip-resistant mats in tubs and showers
Fix any plumbing leaks promptly; even slow drips create mold conditions within 24–48 hours
Keep medicines and cleaning supplies locked away
Check caulking around the tub and shower surround for cracks or gaps
Basement and crawlspace
These spaces hide the most serious problems. Radon, moisture intrusion, structural pests, and mold all tend to originate here. Test your home for radon; the EPA recommends action when levels reach 4 pCi/L or higher. Seal all cracks in slabs and foundation walls to block radon, moisture, and pests simultaneously.
Check for signs of rodents, roaches, or termites (droppings, gnaw marks, mud tubes)
Confirm the sump pump and floor drain are working
Keep pesticides and cleaning supplies locked away
Remove clutter that gives pests nesting material
Verify the water main and well pump connections show no signs of sweating or leaks
Attic
Most homeowners skip the attic entirely. That is a mistake. Check exposed insulation for signs of asbestos if the home was built before the 1980s, and consult a professional before disturbing it. Make sure eave and roof vents are not blocked by insulation, which can trap heat and moisture and accelerate roof deterioration.
Look for signs of roof leaks: staining, soft sheathing, or daylight visible through the roof deck
Check for rodent or bat activity
Remove clutter that creates nesting opportunities
Confirm attic ventilation fans still exhaust to the outdoors by checking ductwork connections
Garage and outdoor areas
Never run a car, lawnmower, or any combustion equipment inside the garage, even with the door open. Carbon monoxide accumulates faster than most people expect. Store gasoline, pesticides, and cleaning supplies in locked cabinets out of children’s reach.
Outside the home, clean gutters regularly and extend downspouts so water drains away from the foundation. Replace missing or broken shingles and check flashing around chimneys, skylights, and plumbing vents. If the home was built before 1978, keep children away from peeling exterior paint and the soil immediately beside painted walls.
How Often Should You Inspect, and What Can You Do Yourself?
Most healthy home inspection steps are accessible to non-professionals. You do not need specialized training to check under a sink for moisture, test a smoke detector, or look for pest droppings in the basement. What you do need is a consistent schedule.
Monthly tasks
Test smoke and CO detectors
Check under sinks and around appliances for drips or moisture
Inspect the kitchen range hood filter and clean if needed
Quarterly tasks
Replace the furnace filter (MERV 8 or higher)
Check attics and crawlspaces for moisture, pests, and deterioration
Clean bathroom and kitchen exhaust fan outlets
Exercise plumbing shutoff valves by turning them off and back on to prevent them from seizing during an emergency
Clean dryer vents and confirm the dryer exhausts to the outside
Annually
Have all gas appliances professionally inspected and checked for CO leaks
Test for radon (especially after any major weatherization work)
Clean air conditioning coils and drain pans
Inspect the roof, gutters, and downspouts
Check washer hoses, dishwasher connections, and the water heater for leaks
Test private well water for contaminants
DIY water conservation tips that also protect your home
Fixing leaks and reducing water use go hand in hand with moisture control. A five-minute shower uses 10–25 gallons of water, compared to up to 70 gallons for a full bath. Turning off the faucet while brushing your teeth can save 8 gallons a day. Beyond conservation, fixing leaky faucets and showerheads removes the slow moisture source that feeds mold growth behind walls.
Pro Tip: When you find a small issue, fix it the same week. A dripping faucet, a cracked caulk line, or a slightly loose exhaust duct connection costs almost nothing to address early. Left alone for a season, each one can create a moisture or air quality problem that costs hundreds to remediate.
For a detailed maintenance schedule built around Alabama’s Gulf Coast climate, the home maintenance inspection guide from Trinity Home Inspections covers seasonal tasks specific to the humidity and heat conditions in this region.
Expert Insights on Keeping Your Home Genuinely Healthy
A one-time inspection is a snapshot. A healthy home requires ongoing attention, and the areas most people overlook are often the ones that cause the most trouble.
The attic and crawlspace problem
Most homeowners check the spaces they live in and ignore the ones they do not. Attics and crawlspaces are where moisture problems, pest infestations, and insulation failures quietly develop. Quarterly checks of these areas catch problems while they are still inexpensive to fix. Plumbing shutoff valves deserve the same attention. A valve that has not been operated in years can fail to close when you need it most, turning a minor leak into a flooded room.
Lead paint and asbestos: what standard checks miss
Homes built before 1978 likely contain lead-based paint. Standard visual inspections can identify peeling or damaged paint, but they cannot detect lead dust on surfaces that look clean. If your home falls in that age range, lead-safe work practices are required for any renovation, repair, or painting work. Painting over deteriorated lead paint without proper preparation does not make it safe. Similarly, attic insulation in homes built before the early 1980s may contain asbestos; never disturb it without consulting a certified asbestos professional.
Ventilation is more specific than most people think
Opening a window helps, but it is not ventilation in the technical sense. Effective ventilation means exhausting stale, humid, or polluted air to the outside through dedicated fans and ducts. The tissue test for bathroom exhaust fans (described in the bathroom section above) is a simple way to confirm your fan is actually doing its job. Whole-house approaches matter too: weatherizing a home without assessing ventilation can trap pollutants and carbon monoxide indoors, worsening air quality even as it lowers energy bills.
What to watch for in indoor air quality
Reducing indoor pollutants takes more than cleaning products and open windows. Sources like pressed-wood cabinetry, new carpet, and certain paints release volatile organic compounds (VOCs) that accumulate in poorly ventilated spaces. For a deeper look at minimizing these sources, reducing indoor pollutants is a practical resource covering air quality strategies room by room.
Key indicators that warrant professional attention
Visible mold covering more than a small area (roughly 10 square feet or more)
Radon test results at or above the EPA action level, approximately 4 pCi/L
Suspected asbestos-containing materials in attic insulation or floor tiles
Lead paint in deteriorated condition in a home with young children
Persistent CO detector alarms or unexplained flu-like symptoms in occupants
Moisture staining in the attic or crawlspace with no obvious source
Healthy home inspection is most effective as a continuous process. Finding and correcting small issues early prevents them from becoming health hazards or expensive structural repairs. The goal is not a perfect home. It is a home that is consistently monitored and maintained.
How to Assess Fire Hazards and Plan for Emergencies
Fire safety and emergency preparedness are areas where a few specific actions make a measurable difference. Smoke detectors cut the risk of dying in a home fire significantly, but only when they are working and placed correctly. Install detectors on every level of the home, inside each bedroom, and outside sleeping areas. Test them monthly and replace batteries at least once a year. Detectors older than 10 years should be replaced entirely, since the sensing elements degrade over time.
Carbon monoxide detectors belong near sleeping areas because CO poisoning symptoms (dizziness, headache, nausea) often appear at night and can be mistaken for illness. If a CO alarm sounds, leave the home immediately and call 911 before re-entering. Never idle a vehicle, generator, or lawnmower in an attached garage, even with the door open.
Fire hazard checklist
Check electrical cords for fraying; replace any cord with exposed wiring
Avoid overloading outlets or power strips
Keep a fire extinguisher in the kitchen and check its pressure gauge annually
Store flammable liquids (gasoline, paint thinner) in approved containers away from heat sources
Keep the area around the furnace, water heater, and dryer clear of combustibles
Clean the dryer lint trap before every load; a clogged vent is a leading cause of home fires
Have the chimney inspected and cleaned annually if you use a fireplace or wood stove
Open the fireplace flue before lighting any fire and confirm it closes fully when not in use
Emergency preparedness basics
Every household should have a written evacuation plan with two exits from each room and a designated meeting point outside. Keep a basic emergency kit with water, non-perishable food, a flashlight, and a first-aid kit. Know where your main water shutoff, gas shutoff, and electrical panel are located before you need them. Post emergency numbers (including the Poison Control Hotline at 800-222-1222) in a visible location in the kitchen.
How to Identify and Reduce Noise Pollution in Your Home
Noise is one of the least-discussed factors in home health, but chronic exposure to elevated indoor noise levels affects sleep quality, stress, and concentration. The sources are often a mix of outdoor traffic, neighbors, and mechanical systems inside the home itself.
Identifying the sources
Walk through your home at different times of day and note where noise is most noticeable. Common indoor sources include HVAC systems with loose components, plumbing that rattles or hammers when valves close quickly (water hammer), and appliances with worn bearings. Outdoor noise enters most readily through single-pane windows, gaps around doors, and thin wall assemblies.
Practical mitigation steps
Add weatherstripping around exterior doors and windows to reduce both drafts and sound transmission
Use heavy curtains or cellular shades on windows facing busy streets; they absorb sound better than standard blinds
Place area rugs on hard floors in rooms above living spaces to reduce impact noise between floors
Check HVAC ductwork for loose connections or panels that vibrate during operation; tighten or add insulation wrap
Address water hammer by installing hammer arrestors on supply lines near washing machines and dishwashers
Use door sweeps on interior doors between noisy and quiet areas of the home
For renters and property managers, documenting noise issues with time-stamped recordings can support requests for repairs or improvements. Structural changes like adding mass-loaded vinyl to shared walls are more involved but effective for persistent noise problems between units.
Trinity Home Inspections Gives You a Clearer Picture of Your Home’s Health
[

A DIY checklist gets you far. A professional inspection gets you the rest of the picture. Trinity Home Inspections is an InterNACHI-certified inspection service serving Mobile, Baldwin, Escambia, Washington, Monroe, and Clarke counties across Gulf Coast Alabama, and the difference between a checklist and a professional report is the equipment and trained eye behind it.
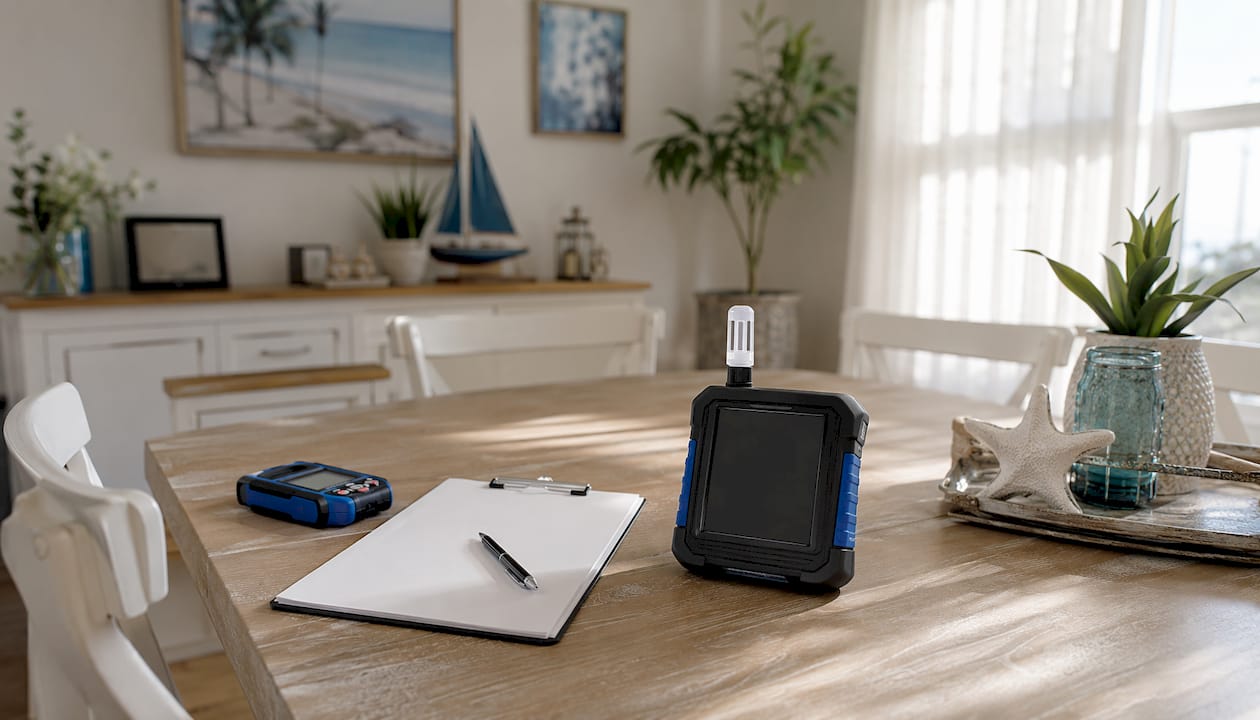
Every inspection includes free thermal imaging to detect hidden moisture, missing insulation, and overheated electrical components that no visual check can find. Moisture meters verify suspected leaks. A combustible gas detector checks for natural gas or propane issues. CO detectors confirm safe conditions around fuel-burning appliances. Reports are delivered the same day, color-coded by severity, and written in plain English so you know exactly what needs attention now, what can wait, and what you can handle yourself.
When a checklist turns up something that needs a closer look, Trinity Home Inspections offers professional mold testing and inspection services, indoor air quality sampling with certified lab reports, sewer scope inspections, and pool checks. You do not need to schedule multiple vendors. One call covers it.
What’s included with every inspection:
Same-day digital report with photos and video
Free thermal imaging (no added charge)
Color-coded findings: DIY/Minor, Issues/Defects, Safety/Major
Post-inspection walkthrough by phone or in person
Trusted contractor referrals for any repairs needed
Call 251-210-7376 or visit TrinityInspectionsLLC.com to schedule your inspection. If you are buying, selling, or just want to know where your home stands, Trinity Home Inspections gives you the honest, detailed report you need to make a confident decision.
Key Takeaways
A healthy home is not a one-time achievement. It is the result of consistent inspection, early repairs, and attention to the systems and spaces most people overlook.
Point | Details |
Eight core principles guide every check | HUD and NCHH standards define a healthy home as dry, clean, pest-free, ventilated, contaminant-free, safe, maintained, and temperature-controlled. |
Attics and crawlspaces need quarterly attention | These hidden areas are where moisture, pests, and structural deterioration develop before they become visible or costly. |
Radon action level is 4 pCi/L | Test every home for radon; if results reach 4 pCi/L or higher, a certified specialist should implement a mitigation system. |
Five-minute showers use 10–25 gallons | Shorter showers and fixed leaks reduce both water waste and the moisture that feeds mold growth inside walls. |
Trinity Home Inspections covers what checklists miss | Professional inspections with thermal imaging, moisture meters, and same-day reports identify hidden hazards a visual check cannot find. |
FAQ
What are the 8 principles for healthy homes?
The eight principles, developed by HUD and the National Center for Healthy Housing, are: keep the home dry, clean, pest-free, well-ventilated, contaminant-free, safe, well-maintained, and temperature-controlled. Each principle addresses a specific category of health and safety risk.
How do you test for a healthy home?
Start with a room-by-room visual check using a structured checklist, then use specific tests: a radon test kit for radon levels, a tissue test for exhaust fan function, and a CO detector near sleeping areas. For hidden moisture, lead dust, mold, or air quality concerns, a professional inspection with thermal imaging and certified lab testing provides results a visual check cannot.
What is a home safety checklist?
A home safety checklist is a structured list of conditions to inspect across every room and system in a home, covering fire hazards, chemical storage, fall risks, electrical safety, and detector function. The HHS Healthy Homes Checklist is a widely used federal resource that covers these areas in accessible, non-technical language.
What is the HUD Healthy Homes program?
HUD’s Healthy Homes program is a federal initiative that funds research, education, and housing improvements to reduce health hazards in residential properties, with a focus on lead, mold, pests, and indoor air quality. It produced the eight healthy home principles and supports training for housing professionals and inspectors across the country.
How often should a home be professionally inspected for health and safety?
An annual maintenance inspection covers most ongoing health and safety concerns, with quarterly DIY checks for high-risk areas like HVAC filters, attics, crawlspaces, and smoke and CO detectors. Homes with known issues such as older construction, prior water damage, or suspected mold benefit from professional mold inspection services on a more frequent basis.
Recommended