
Downloadable Roof Inspection Forms for Property Owners
- Matt Cameron
- 35 minutes ago
- 9 min read


Download fillable roof inspection forms and checklists you can use today — plus a field-tested workflow to document every finding accurately.
Here are the top ready-to-use templates, matched to common use cases:
Citizens Property Insurance Roof Inspection Form (PDF) — Best when your insurer requires their specific form; requires a Florida-licensed inspector signature.
JotForm Roofing Inspection Template (fillable web form) — Quick mobile capture for field teams; no software install needed.
SET SEG Commercial Roof Inspection Form (PDF) — Structured safety pre-check for commercial properties.
VSBIT Commercial Roof Inspection Form (PDF) — Multi-zone fields for buildings with several roof areas.
Trinity Home Inspections Sample — Request a copy through the promo section below; InterNACHI-aligned and photo-reference ready.
When your insurance carrier or warranty provider specifies their own form, use that form. No generic template overrides an insurer’s required document.
Key Takeaways
A complete roof inspection form paired with slope-by-slope photo documentation and a clear priority system gives you the most defensible, actionable record of any roof’s condition.
Point | Details |
Download the right template first | Match the form to your use case: insurer PDF, fillable web form, or commercial template. |
Core fields matter | Every form needs inspection date, inspector license, system type, severity priority, and photo reference numbers. |
Inspect twice a year | Commercial roofs benefit from spring and fall inspections; residential roofs need at least one annual check. |
Photo naming prevents confusion | Use a consistent convention (Address_SlopeA_01.jpg) to link every image to its form entry. |
Trinity Home Inspections | Serving Gulf Coast Alabama with InterNACHI-certified, drone-equipped, same-day roof inspections. |
Where to Download Ready-Made Roof Inspection Forms
Not every template fits every job. Here is a quick rundown of the most reliable sources, with honest notes on where each one shines and where it falls short.
Citizens Property Insurance PDF — A real-world example of an insurer-specific roof inspection form. It requires completion and a verifiable signature from a Florida-licensed inspector. Thorough and legally grounded, but only appropriate for Citizens policyholders in Florida; do not substitute it for a general-purpose checklist.
JotForm Roofing Inspection Template — A fillable web form you can complete on a phone or tablet in the field. Easy to share and submit digitally, though you may need to customize fields for commercial systems or multi-slope roofs.
SET SEG Commercial Roof Inspection Form — A downloadable PDF built for commercial evaluations. It opens with a safety pre-check, which is a feature many generic templates skip entirely. Less suited for residential single-family roofs.
VSBIT Commercial Roof Inspection Form — Captures building ID, roof application year, and zone-specific fields for multi-area systems. Useful for facility managers overseeing several roof sections on one building.
Trinity Home Inspections Sample — An InterNACHI-aligned template with photo reference fields built in. Designed for Gulf Coast Alabama conditions, including high-humidity and wind-driven rain scenarios common to Mobile and Baldwin counties.
State licensing note: Some states require an inspector’s license number on any signed roof assessment report. The Citizens form makes this explicit. Check your state’s requirements before using any template for insurance or legal purposes.
Core Fields Every Roof Inspection Form Should Include
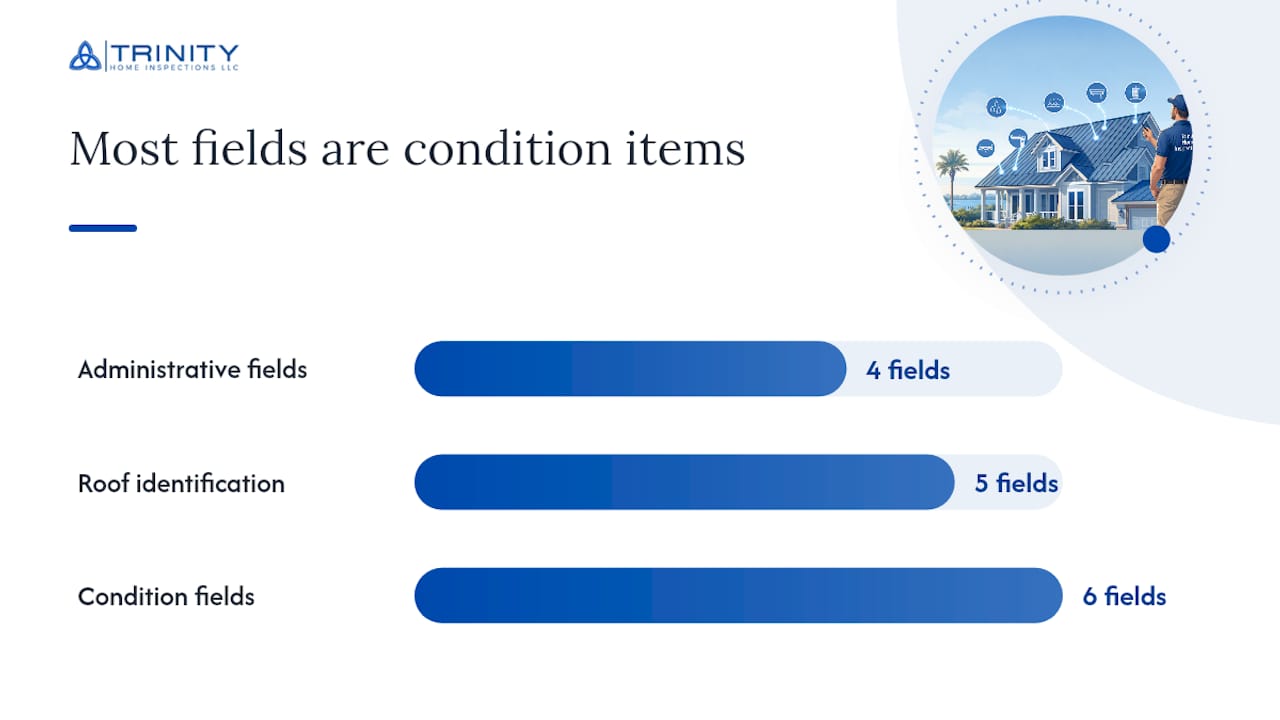
A well-built roof inspection checklist captures three layers of information: who performed the inspection, what they found, and what needs to happen next. Here is the field structure that covers all three.
Administrative fields
Inspection date and time
Inspector name, license number (state-specific), and company
Client name, property address, and contact information
Inspector signature and client/owner signature lines
Roof identification fields
Roof area or plane ID (Slope A, Slope B, Flat Section 1, etc.)
Approximate square footage per area
System type (asphalt shingle, TPO, EPDM, modified bitumen, metal, slate, tile)
Estimated installation date or known age
Manufacturer name and warranty expiration
FacilitiesNet recommends maintaining a roof log that includes system type, manufacturer, warranty, area, and installation date, updated at least twice per year. Those same fields belong on every formal inspection record.
Condition fields (one row per finding)
Observed condition (plain-language description)
Location (slope/plane and zone)
Severity/priority: 1 = Immediate, 2 = Schedule, 3 = Monitor
Recommended action
Photo reference number
Follow-up or repair verification checkbox
Pro Tip: Add a “Photo Ref #” column directly beside each finding row. When you pull up the report six months later, that number ties the written note to the exact image without any guesswork.
How to Inspect a Roof Using a Form, Step by Step
A professional roof inspection typically takes 45–90 minutes on site. Running that time against a structured form keeps findings organized and defensible.
Pre-inspection prep. Pull any previous inspection reports, warranty documents, and roof plans. Confirm safe access. If your insurer or warranty provider requires a specific form, print or load it before you arrive.
Perimeter walk and system ID. Walk the building perimeter at ground level first. Identify roof slopes, drainage points, and system type. Record these on the identification fields before climbing.
Slope-by-slope photo overviews. Capture one wide-angle photo of each slope or roof section before moving in for detail shots. The Inspector Roofing Protocols evidence-first method organizes findings slope by slope, which makes third-party review far cleaner.
Detail photos of high-risk areas. Photograph penetrations, flashings, edges, drains, and any visible damage. Use a consistent naming convention: Address_SlopeA_01.jpg, Address_Drain_01.jpg. This links your photos to form entries without ambiguity.
Interior and attic check (when accessible). Look for water staining, daylight through the deck, and signs of poor attic ventilation that can accelerate roof deterioration. Record findings with the same slope/zone labels used on the exterior.
Record each finding on the form. Write a plain-language observation, assign a priority (1/2/3), note the recommended action, and enter the photo reference number. One row per finding keeps the report scannable.
Capture signatures and license numbers. Complete all administrative fields before leaving the site. For insurance-grade documentation, the Inspector Roofing Protocols approach separates storm-consistent findings from routine deterioration — a distinction that matters when a claim is under review.
Pro Tip: On steep or unsafe roofs, an FAA-certified drone operator can capture slope-by-slope overviews safely. Aerial photo-first documentation delivers wide overviews plus annotated close-ups of high-risk areas, though hands-on verification is still needed for suspected moisture or deck damage.
Safety reminders: Set ladders on firm, level ground at a 4:1 angle ratio. Never work on a wet or frost-covered surface. Use fall-arrest equipment on slopes above 6:12 pitch.
Common Roof Deficiencies and How to Record Them on Your Form
The NSPIRE Roof Assembly standard identifies six categories of deficiencies that appear on most residential and commercial roofs. Here is how to translate each one into a clean form entry.
Restricted drainage / blocked drains. Observation: “Roof drain at northeast corner blocked with debris; standing water visible.” Action: Clear drain and recheck within 30 days. Refer to roofer if drain collar shows cracking or separation.
Damaged or missing gutters. Observation: “East-facing gutter section detached at fascia; approximately 6 feet unsupported.” Action: Reattach or replace section; check fascia board for rot. Priority 2.
Ponding water. Observation: “Standing water on flat section, northwest quadrant, approximately 10 sq ft area, 48 hours post-rain.” Action: Evaluate slope and drainage; refer to roofing contractor for re-slope assessment.
Exposed substrate. Observation: “Granule loss exposing felt underlayment on south slope, mid-field, approx. 3 sq ft.” Action: Priority 1 if deck is visible; refer to structural engineer if decking is compromised.
Holes or penetrations through assembly. Observation: “Open hole at abandoned pipe boot, rear slope.” Action: Immediate repair required; refer to licensed roofer. Priority 1.
Damaged roof assembly (lifted or missing shingles). Observation: “Three tab shingles lifted at ridge, west slope; sealant tabs failed.” Action: Re-seal or replace affected shingles before next rain event. Priority 2.
Always record the slope or zone label and the corresponding photo reference number alongside each entry. A finding without a location is nearly impossible to verify during a follow-up visit.
Fillable vs. Printable: Choosing the Right Format for Your Workflow
The format you choose affects how quickly you can complete the form, how well it stores, and whether it meets compliance requirements.
Format | Best For | Key Limitation |
Fillable PDF | Insurer-required forms, archivable records | Requires PDF software; not ideal for real-time sync |
Web form (JotForm) | Mobile field teams, instant sharing | Needs internet access; customization takes setup time |
Spreadsheet / CSV | Bulk data, multi-building portfolios | No photo embedding; not suitable for insurance submission |
Inspection app | Enterprise tracking, media-rich reports | Higher cost; overkill for single-property owners |
For a single-family homeowner doing an annual check, a printable PDF or simple fillable form covers everything you need. Facility managers running recurring commercial inspections — which the Commercial Roof Guide recommends scheduling each spring and fall — benefit most from a web form or inspection app that logs history automatically. Insurance-grade documentation almost always requires a PDF with a signed, licensed inspector credential.
A 4-point home inspection often accompanies insurance renewals and uses a condensed form scope, so matching your roof form format to that workflow saves time during underwriting.
How to Complete a Sample Entry and Customize Your Template
A completed finding entry should read clearly to anyone who picks up the report, not just the person who wrote it. Here is a short example:
Photo Ref: SlopeB_04 | Location: South slope, upper left quadrant | Observed Condition: Missing shingle at ridge; underlayment exposed, approx. 1 sq ft | Severity: Priority 1 — Immediate | Recommended Action: Replace shingle and inspect underlayment for moisture intrusion | Inspector: Matt Cameron, License #[state-issued] | Date: March 14, 2026
That single row gives a repair contractor everything needed to find the spot, assess the scope, and quote the work.
Customization tips for different audiences:
Commercial roofs: Add warranty compliance checkboxes and a field for the manufacturer’s warranty number. Many commercial warranties require documented biannual inspections to stay valid.
Multi-building portfolios: Include a tenant or asset ID field so findings can be sorted by property in a spreadsheet or database.
New construction: Add a pre-close verification checkbox tied to the builder’s punch list, which pairs well with a blue tape walkthrough checklist.
Mobile homes: Roof assembly types and attachment methods differ; adapt system-type fields accordingly.
Pro Tip: When adding images to a template, write alt text that includes the deficiency and location naturally, for example: “Asphalt shingle lift at rear slope, Mobile, AL.” This keeps digital records searchable and accessible.
The Trinity Home Inspections sample template includes pre-built photo reference fields and a priority key aligned with InterNACHI standards. Request it through the section below.
Why the Form Is Only as Good as the Person Holding It
Most disputes after a roof claim or repair come down to one thing: the original inspection record did not clearly separate what was observed from what was interpreted. I have seen reports where a photo shows granule loss but the written entry says “roof in fair condition” — and that gap is exactly where disagreements start.

A structured roof inspection form forces you to commit to specifics: the slope, the photo number, the priority level. That discipline protects you whether you are a homeowner negotiating a repair credit, a facility manager defending a warranty claim, or an inspector whose report ends up in front of an adjuster.
Trinity Home Inspections uses drones for roofs that cannot be safely walked, thermal imaging to catch moisture before it becomes visible damage, and same-day photo-rich reports that cross-reference every finding to a numbered image. The form is the foundation, but the tools and training behind it are what make the findings hold up.
Get a Professional Roof Inspection Across Gulf Coast Alabama
A well-documented roof inspection starts with the right form, but it delivers real value when a trained inspector is behind it.
[

Trinity Home Inspections serves Mobile, Baldwin, Escambia, Washington, and Monroe counties, including Daphne, Fairhope, Gulf Shores, Orange Beach, and Spanish Fort.
What’s included in every Trinity roof inspection:
Slope-by-slope photo documentation with numbered references
Drone capture when roof access is unsafe or limited (FAA-certified)
Thermal imaging scan option to identify moisture and insulation gaps
Written summary with priority ratings (Immediate / Schedule / Monitor)
Inspector license number and signature in the final report
Same-day digital delivery in most cases
If you are preparing to sell, a pre-listing inspection that includes a thorough roof evaluation gives you a clear picture before buyers start asking questions. If moisture findings point toward the attic or interior, Trinity also offers mold testing services to confirm whether water intrusion has gone further.
Call 251-210-7376 or visit Trinityinspectionsllc to schedule or request a sample roof inspection template.
Sources
Note: Always verify your state’s inspector licensing requirements and confirm with your insurer before using any third-party form for insurance or warranty purposes.
FAQ
What does a roof inspection include?
A standard roof inspection covers the roof deck and framing, surface materials, flashings, penetrations, drainage, and gutters, and typically includes an attic check when accessible. A professional inspection produces photo documentation, condition ratings, and recommended actions for each finding.
How do you write a roof inspection report?
Organize findings slope by slope, record each observation with a plain-language description, assign a priority level (Immediate, Schedule, or Monitor), and link every entry to a numbered photo. The Inspector Roofing Protocols approach also separates storm-consistent damage from routine wear to improve clarity for insurers.
Can you do your own roof inspection?
A property owner can perform a basic visual check using a printable roof inspection checklist, but a licensed inspector is needed for insurance submissions, warranty claims, or any report requiring a credentialed signature. Safety is also a real consideration on steep or aging roofs.
Is a roof inspection the same as a roof certification?
No. A roof inspection documents current conditions and identifies deficiencies. A roof certification is a separate document, typically issued by a licensed roofing contractor, that states the roof is in acceptable condition and has a defined remaining lifespan, often required by insurers at the time of a home sale.
How often should a roof be inspected?
Commercial Roof Guide recommends biannual inspections for commercial roofs, typically in spring and fall. Residential roofs benefit from at least one inspection per year, plus a check after any major storm event.
Recommended
