
Homeowners: Diagnose a Running Toilet Before Replacing Parts

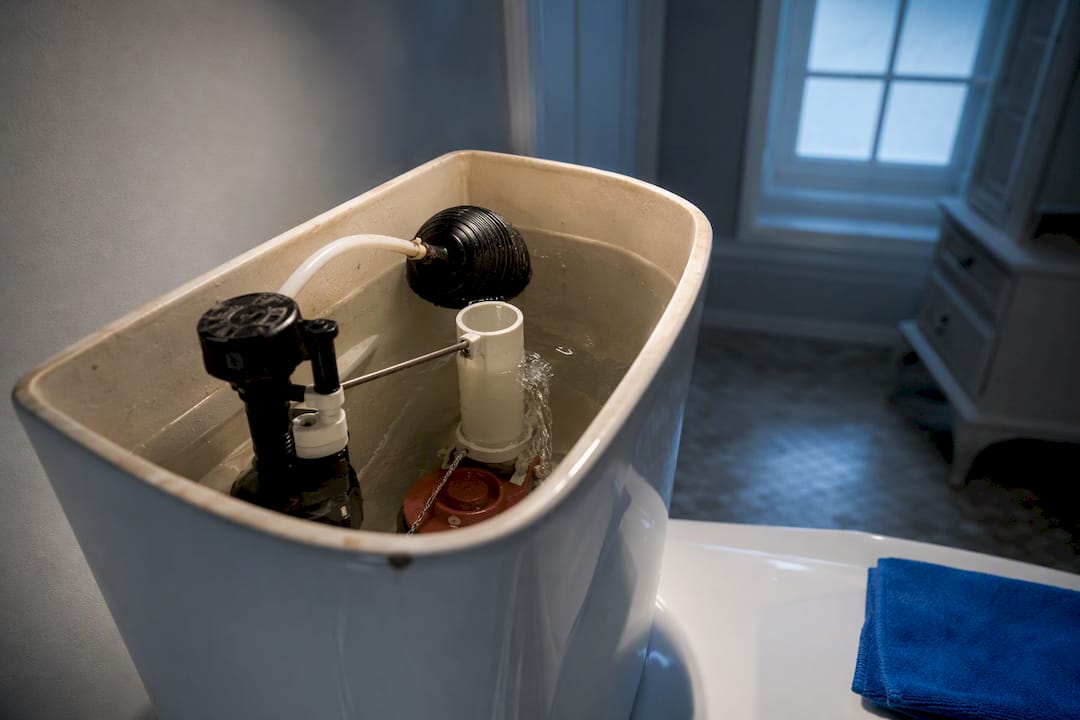
A toilet that won’t stop running almost always traces back to one of four culprits: a worn flapper, a fill valve or float set too high, a snagged chain, or a refill tube that’s siphoning water. Start by lifting the tank lid and watching whether water is flowing into the overflow tube. If it isn’t, run a quick dye test. Most fixes involve parts costing $5 to $25 and take under an hour, even for a first-timer.
TL;DR:
A worn flapper or faulty flush valve is the most common cause of a continuously running toilet, confirmed by dye tests and visual inspections.
Incorrect chain slack, typically around half an inch, can prevent the flapper from sealing properly, often fixable with minimal adjustments.
Adjusting a float or repositioning the refill tube usually resolves issues caused by fill valve or siphoning problems without needing new parts.
Running toilets can waste 200 to 400 liters of water daily, significantly impacting water bills and septic system stress if left unaddressed.
Most repairs are inexpensive and quick, but persistent issues or signs of damage should prompt professional inspection to prevent further damage or water waste.
Quick Checklist: Diagnose a Running Toilet in Under 5 Minutes
Before you buy a single part, spend five minutes gathering evidence. This is the same approach we use during a home inspection: look first, replace second.
Listen closely. A steady hiss usually means the fill valve is stuck open; occasional refill cycles point toward a slow flapper leak.
Watch the overflow tube. Water flowing into it while the tank looks full signals a fill valve or float problem, not the flapper.
Check for bowl ripples. Faint movement in the bowl water with the tank quiet suggests the flapper isn’t sealing.
Inspect the chain. You want about half an inch of slack, roughly one to two links.
Check the refill tube position. Its outlet needs to sit above the water line inside the overflow tube.
The Most Common Causes of a Toilet That Won’t Stop Running
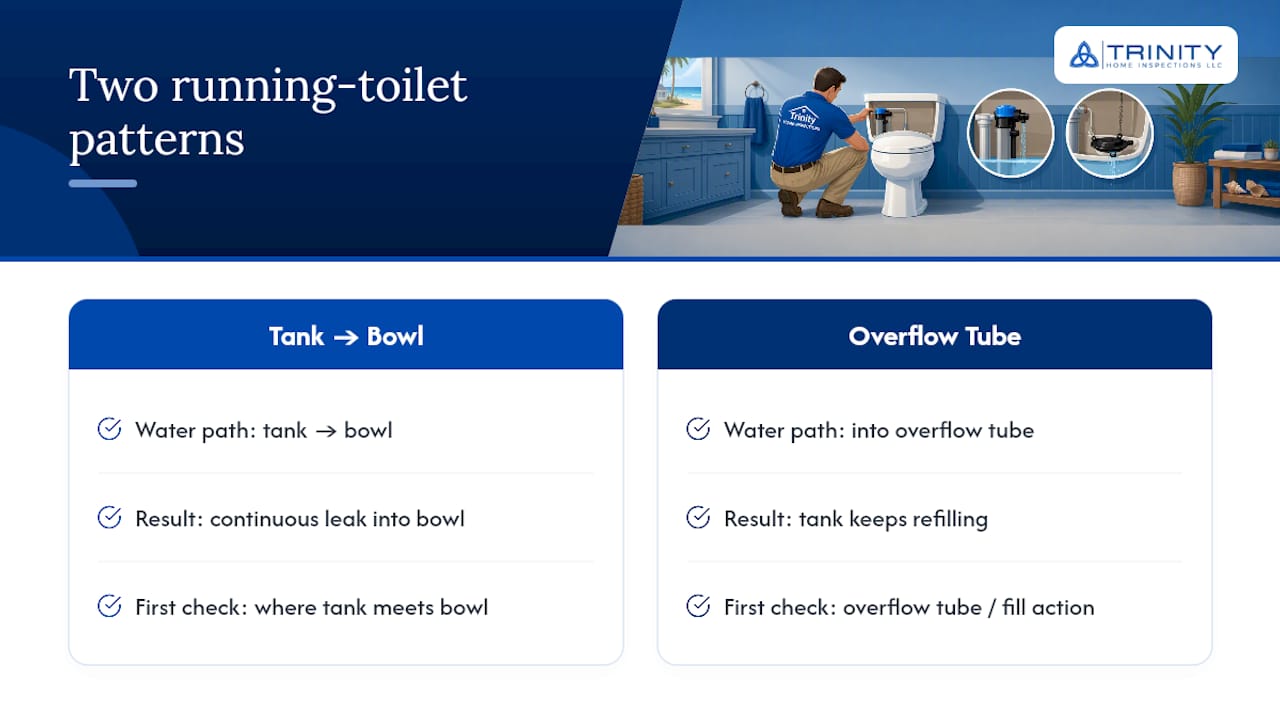
Every running toilet fits one of two patterns: water leaking from the tank into the bowl, or water leaking out through the overflow tube because the tank keeps refilling. Knowing which pattern you have saved you from buying the wrong part.
Worn Flapper or Canister Seal
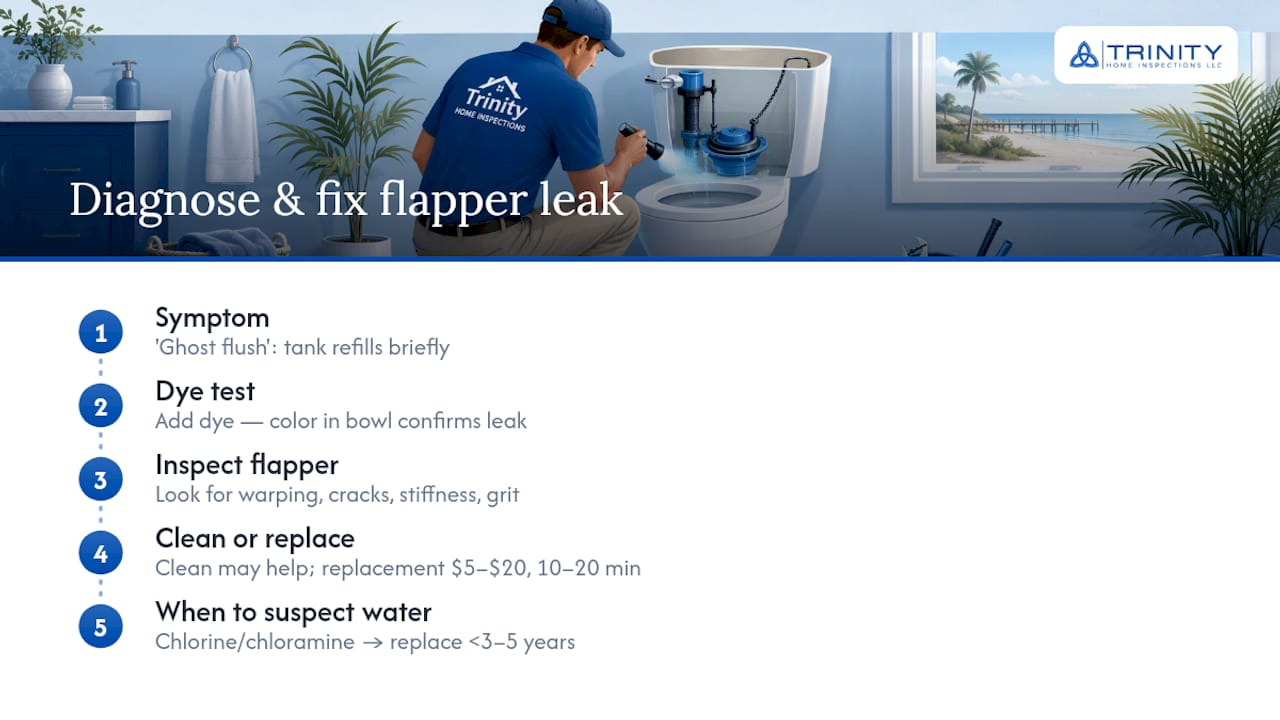
The rubber flapper at the bottom of the tank is the most frequent offender, and it produces a distinctive symptom plumbers call a “ghost flush.” The toilet sits quiet for a while, then the fill valve kicks on briefly to top off the tank, even though nobody used it. That happens because the flapper has warped, cracked, or built up mineral deposits and no longer seals the flush valve completely.
The dye test confirms this in minutes. If color seeps into the bowl, pull the old flapper and inspect it for stiffness or grit along the seal edge. Cleaning it sometimes buys a little time, but a replacement flapper costs $5 to $20 and installs in 10 to 20 minutes with no tools beyond your hands. One detail worth knowing: chloramine and chlorine levels in certain municipal water supplies can accelerate rubber flapper degradation, so if you’re replacing flappers more often than every three to five years, that’s likely why.
Snagged or Misadjusted Chain
Sometimes the fix costs nothing at all. If the chain connecting the flush handle to the flapper is too short, tangled, or caught under the flapper’s edge, it holds the seal open just enough to leak. Look for roughly half an inch of slack, about one to two links. Too much slack and the flapper won’t lift fully on flush; too little and it never seats closed. Re-hook the chain to a different link or trim the excess with wire cutters and you’re done.
Fill Valve or Float Set Too High
If your dye test came back clean but the toilet still runs, or you noticed water spilling into the overflow tube during your checklist, the fill valve is your problem. Either the float is set too high, keeping the valve open longer than necessary, or internal valve components have worn out and won’t shut fully. Try lowering the float first, since that’s a free fix and solves the issue more often than homeowners expect. A useful guide on adjusting a toilet float walks through the adjustment for both ballcock and cup-style valves.
If adjustment doesn’t stop the flow, flush debris from the valve or replace it outright. A new fill valve runs $10 to $35 and takes 20 to 40 minutes to swap, including shutting off the supply line and draining the tank.
Refill Tube Siphoning Water
This one gets missed constantly because it looks like normal operation. The small refill tube runs from the fill valve into the overflow tube, topping off the bowl after each flush. If that tube is pushed too far down into the overflow tube, it can create a siphon effect that continuously pulls tank water down the drain. The fix is simply repositioning the tube so its outlet sits above the water line, or clipping it to the overflow tube’s rim with the small clip most valves include. This refill tube siphoning issue is one of the few causes that has nothing to do with worn parts at all.
Damaged Flush-Valve Seat
Occasionally you’ll replace the flapper, run the dye test again, and still see leakage. That points to the flush-valve seat itself, the ring the flapper seals against. Run a finger along the rim and feel for mineral ridges, nicks, or cracks. A flush-valve repair kit (around $15) can resurface the seat without replacing the whole valve assembly.
Tank Cracks or Supply-Line Leaks
Not every water problem is a “running” problem. If you’re seeing standing water on the bathroom floor rather than just hearing the tank refill, you’re dealing with a different issue entirely: a cracked tank, a failing wax ring at the base, or a leaking supply line connection. Our post on caulking around the toilet base explains why inspectors leave a rear gap specifically so a base leak stays visible instead of hiding under caulk. Floor water is a shutoff-and-call-a-pro situation, not a weekend project.
Step-by-Step Troubleshooting Sequence
Work through these steps in order. Skipping ahead is the number one reason homeowners buy the wrong part twice.
Lift the tank lid and observe. Is water flowing into the overflow tube, or is the tank level stable but the bowl still shows movement?
Run the dye test. Add 5 to 10 drops of food coloring, wait 10 to 15 minutes, and check the bowl for color.
For suspected slow leaks, do a mark-and-wait test. Shut off the supply valve, mark the water line with a pencil, and check it again in an hour.
Check the chain. Adjust for about half an inch of slack and remove any tangles.
Test the float and flush debris. Lower the float slightly and flush any sediment out of the fill valve cap.
Replace the flapper if the dye test was positive, then retest. If the leak persists, move to the flush-valve seat or fill valve.
Shut off the supply and call a professional if you find floor water, a cracked tank, or a leak that won’t resolve after these steps.
Pro Tip: Plumbing guides consistently note that homeowners often replace the flapper first simply because it’s the cheapest, most familiar part, even when the fill valve is the actual cause. The dye test in step 2 prevents that guesswork.
What Repairs Cost and How Much Water You’re Wasting
Most running-toilet repairs are inexpensive and quick, which is good news since letting the problem sit costs more than fixing it.
Repair | Typical Parts Cost | DIY Time |
Flapper replacement | $5–$20 | 10–20 minutes |
Chain adjustment | Free–$5 | 5 minutes |
Fill valve replacement | $10–$35 | 20–40 minutes |
Flush-valve repair kit | $10–$25 | 20 to 40 minutes |
Refill tube reposition | Free | 5 minutes |
A toilet that runs continuously can waste 200 to 400 liters (roughly 50 to 100 gallons) of water per day, which adds up to thousands of gallons a month on a municipal water bill or extra strain on a septic system. If your toilet is older than 20 years and you’re facing repeated fill valve or flapper failures every year, replacing the entire unit sometimes pencils out cheaper than continually chasing parts. If multiple toilets in the house are failing around the same time, that pattern can point to high incoming water pressure damaging valve seals across the whole plumbing system, which is worth a professional look rather than repeated part swaps.
When to Call a Professional Plumber or Inspector
Most running toilets are a homeowner-fixable job, but a few signs mean it’s time to bring in help rather than keep guessing.
The toilet keeps running after you’ve replaced the flapper, adjusted the chain, and checked the fill valve.
You see standing water on the floor around the base, which suggests a cracked tank, failed wax ring, or supply-line leak.
The home is on a septic system and the continuous water flow risks overloading the tank.
You’ve replaced the same part more than once in a year, which often points to a pressure or water-chemistry issue beyond the toilet itself.
Before a professional arrives, snap a few photos or a short video of the issue, and note the times of day the running happens. That small bit of documentation, paired with a same-day photo and video report, speeds up an accurate quote considerably. If you’re already having a broader inspection done, thermal imaging can spot hidden moisture behind walls or under flooring that a running toilet may have caused over time.
An Inspector’s Take on Chasing Down Running Toilets
During home inspections, a common pattern emerges: homeowners replace a flapper, the toilet still runs, and they assume the new part was defective. It’s rarely the part. It’s almost always a fill valve or refill tube nobody checked first.
We photograph tank internals during every inspection, partly because a picture of a misaligned refill tube explains the problem faster than any written description ever could. Same-day photo and video reports matter here because a plumber quoting a repair from a clear image works faster and more accurately than one guessing over the phone. An image labeled something like “running toilet diagnostic, Gulf Coast Alabama” tells a repair contractor exactly what they’re walking into before they even step through the door.
— Matt
How Trinity Home Inspections Helps You Catch Plumbing Issues Early
A running toilet is a small problem, but it’s often a preview of what an inspection catches before you sign on a house at all. Trinity Home Inspections gives you InterNACHI certified eyes on the whole plumbing system, not just the fixture that’s making noise, with free thermal imaging included at no extra charge and a same-day photo and video report you can hand straight to a contractor.
[

What’s included:
Full plumbing and fixture review as part of your home inspection, with photo and video documentation
Add-on sewer scope inspection if drain-line issues are suspected alongside a running toilet
Clear, color-coded priorities so you know what’s urgent versus what can wait, plus trusted contractor referrals
If your toilet troubles have you wondering what else might be hiding in the home’s systems, call 251-210-7376 or visit Trinityinspectionsllc to book an inspection and get answers in plain English, the same day.
Sources
FAQ
How Do You Fix a Toilet That Keeps Running?
Identify whether the leak is coming from the flapper (tank-to-bowl) or the fill valve (overflow tube) using a dye test, then replace or adjust the corresponding part. Most fixes involve parts costing $5 to $35 and take under 40 minutes.
Is It Bad if My Toilet Runs Continuously?
It won’t damage your home, but it wastes a surprising amount of water. A continuously running toilet can waste 200 to 400 liters (about 50 to 100 gallons) per day, which shows up on your water bill and can stress a septic system over time.
Why Does My Toilet Randomly Run for a Few Seconds?
Brief, occasional running is usually the flapper failing to seal completely, letting a little water seep into the bowl until the tank level drops enough to trigger a short refill cycle. This “ghost flush” pattern almost always points to a worn flapper rather than the fill valve.
Why Does My Toilet Run When No One Is Using It?
This is typically caused by a slow tank-to-bowl leak past a worn flapper or seat, or by a refill tube siphoning water into the overflow tube. A quick dye test narrows down which one you’re dealing with in under 15 minutes.
Should I Call a Plumber or Try to Fix It Myself First?
Try the DIY steps first if you’re only hearing running sounds with no floor water, since most fixes take under an hour and cost less than $35 in parts. Call a professional if you see standing water at the base, suspect a cracked tank, or have replaced parts more than once without solving the issue.
Recommended

