
Quick DIY Tests for Homeowners to Pinpoint Active Sink Leaks

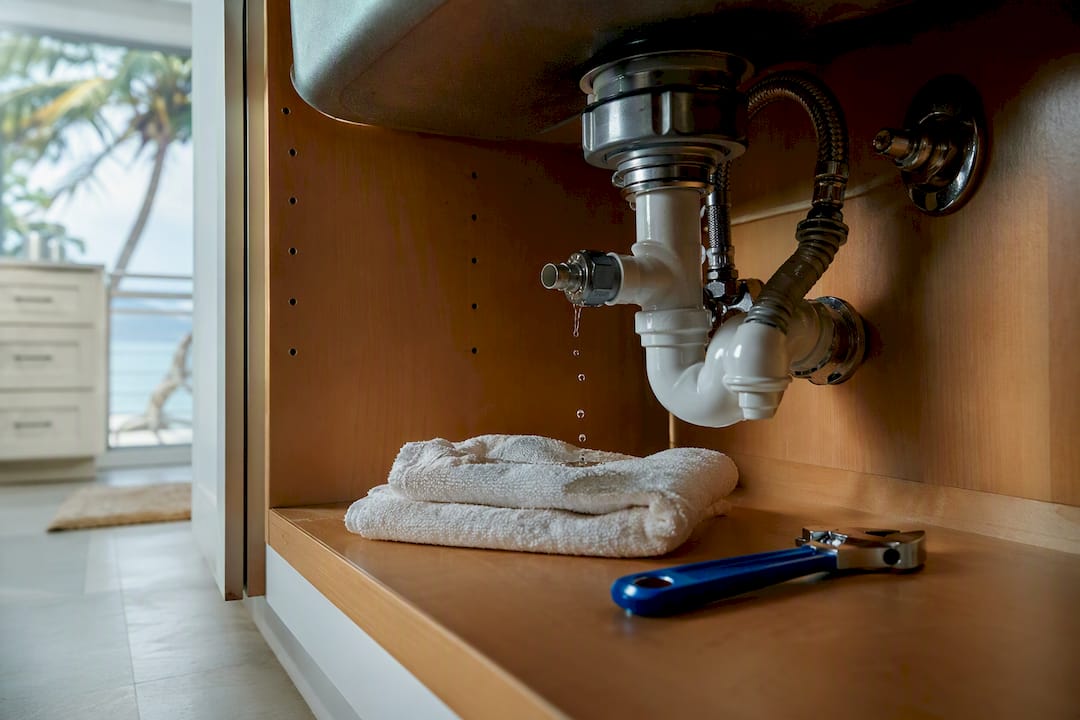
An active leak under a sink almost always traces to one of two systems: the pressurized supply lines feeding the faucet, or the gravity-fed drain assembly carrying water away. The usual suspects are a loose slip nut, a worn washer, a cracked supply hose, or dried-out plumber’s putty at the drain flange. Dry the cabinet floor completely, then run a quick isolation check (shut off supply first, then test the drain) to know which side you’re dealing with before you touch a wrench.
TL;DR:
Most leaks originate from either the pressurized supply lines or the gravity-fed drain assembly, with common causes including loose fittings, worn washers, or dried-up plumber’s putty.
Conducting isolation and surge tests helps identify if the leak is on the supply side or drain side, especially since supply leaks appear constantly while drain leaks only during use.
DIY repairs typically cost between $10 and $60 for parts, but over-tightening plastic fittings or forcing corroded parts can cause more damage, making professional inspection advisable for stubborn issues.
Persistent leaks, active spraying, or water near electrical outlets require immediate shutoff and professional intervention to prevent further damage.
Hidden moisture behind cabinetry or under flooring often escapes detection with flashlight checks alone, making thermal imaging and moisture testing essential for thorough diagnosis.
Common Causes of Active Leaks Under Sinks
Once you know whether you’re chasing a supply leak or a drain leak, the list of likely culprits gets a lot shorter. Most under-sink leaks fall into three categories: the pressurized water coming in, the drain carrying water out, and the appliances tied into that drain line.

Supply-side failures
Supply lines run under constant water pressure, so even a small crack or loose connection shows up fast. According to Benjamin Franklin Plumbing, supply-line leaks often appear while the system is pressurized and may even register on your water meter, unlike drain leaks that only show up during use.
Cracked or aging flexible hoses. The braided or vinyl lines connecting your shutoff valves to the faucet degrade over time, especially in humid coastal cabinets where heat and moisture speed up wear.
Loose compression fittings. These small brass connectors can work themselves loose from vibration, temperature swings, or simply age.
Stem-packing leaks at the shutoff valve (angle stop). Older valves that haven’t been turned in years often seep around the valve stem the first time you operate them.
Corrosion at fittings. Older galvanized or brass fittings common in Gulf Coast homes built before the 1980s corrode from the inside out, creating pinhole leaks long before a full failure.
Drain-side failures
Drain leaks are gravity-fed, so they typically only appear when the sink is actually used, not while sitting idle. The most common origin point, according to Total Dry Restoration, is a slip joint, worn rubber washer, or a drain flange where the plumber’s putty seal has finally given out.
Loose sink flange or drain basket. The seal between the sink bowl and the drain assembly relies on putty or plumber’s silicone that shrinks and cracks with age.
Worn tailpiece or P-trap washers. These rubber gaskets compress over years of use and eventually stop sealing at full pressure.
Cracked trap or trap arm. Plastic P-traps become brittle with age and sun exposure through cabinet vents, and a small hairline crack can leak only during a full-volume drain.
Shifted assembly after storage moves. If you’ve reorganized under-sink storage or bumped the pipes moving bins around, slip nuts can loosen just enough to start a slow drip.
Appliance and accessory connections
Garbage disposals and dishwashers tie directly into the drain system, and their connection points fail independently of the sink’s own plumbing. A worn discharge gasket where the dishwasher drain hose meets the disposal, a loosened mounting ring holding the disposal to the sink flange, or a slipped hose clamp on the dishwasher inlet line can all mimic a “mystery” sink leak that’s actually coming from an appliance a foot away.
Material failure and hidden migration
Dried-out plumber’s putty, brittle PVC, and mineral scale buildup around fittings are the quiet failure modes. A slow weep hidden behind scale deposits can go unnoticed for months. Cold-water supply lines also sweat in humid weather, producing condensation that pools and looks exactly like a leak. Water can also travel along a pipe or cabinet floor and drip several feet from its actual source, so the puddle you find is rarely marking the leak’s true origin, according to Homestery’s plumbing leak guide.
How to Diagnose the Source of a Sink Leak
Diagnosing a leak is a process of elimination, not guesswork. Working through it in order saves you from tightening every fitting under the sink when only one is actually failing.
What you’ll need: a flashlight, dry towels or paper towels, a bucket, an adjustable wrench, and a basin wrench if you’ll be checking flange or faucet connections.
Clear the cabinet and dry everything. Remove stored items, lay towels down, and wipe every pipe, joint, and surface completely dry with paper towels.
Run the dry-area test. Leave the cabinet untouched and the water unused for 30 to 60 minutes. If moisture reappears without anyone running water, you’re likely looking at a supply-side leak, since that system stays pressurized around the clock.
Wrap suspect joints in paper towels. Wrap a dry paper towel around each connection you suspect, then run the faucet normally. A damp spot pinpoints the exact joint, according to Homestery, and this same trick works hours later to confirm a repair actually held.
Run the full-drain surge test. Fill the sink basin most of the way, then pull the stopper and let it drain all at once. Slip joints and flange leaks often stay dry during a light trickle but leak the moment they’re hit with a full volume surge.
Isolate supply from drain. Shut off both angle stops under the sink. If the leak stops completely, it’s supply-side. If it continues only when you run water, it’s drain-side.
Test the disposal and dishwasher separately. Run the disposal for a few seconds with a bucket underneath, then run a short dishwasher cycle while watching the inlet hose clamp and mounting ring for drips.
Rule out condensation. A supply line “sweating” evenly along its whole length in humid weather is condensation, not a leak. A dry, humid Gulf Coast summer will make cold copper or PEX lines bead up fast.
Pro Tip: Do the paper towel check again the next morning after any repair, not just right after you tighten something. Slow weeps often need a full day of normal use before they show themselves again, and checking too soon is the most common reason people think a fix worked when it didn’t.
If a shutoff valve won’t close all the way, or water keeps flowing after you’ve shut both angle stops, stop and call a plumber. A valve that won’t fully seat means you may need to shut off the main line, and that’s not a moment to improvise.
Fixing a Sink Leak Yourself: Parts, Steps, and Pitfalls
Most under-sink leaks are genuinely fixable with basic tools, as long as you match the fix to the actual failure instead of just cranking down on every nut you can reach. Speedee Drains and Plumbing notes that the most common repairs are replacing trap washers, tightening slip nuts, and swapping out flexible supply lines, but overtightening or forcing corroded parts causes more damage than it fixes.
Tightening slip nuts. Hand tighten first, then give it a quarter turn with a wrench. If it still leaks after that, the washer inside is worn and needs replacing, not more torque.
Replacing a flexible supply hose. Shut off the angle stop, disconnect both ends, and install a new braided stainless line. Braided lines hold up far longer than plastic or rubber hoses and cost only a few dollars more.
Reseating or replacing the sink flange. Remove the old putty completely, apply a fresh rope of plumber’s putty (or silicone sealant if the manufacturer specifies it), and reseat the basket strainer with even pressure before tightening from below.
Fixing garbage disposal leaks. Check the mounting ring for gaps, replace the rubber discharge gasket if it’s cracked, and make sure the dishwasher hose clamp is snug, not just resting in place.
Knowing when to stop and replace. Corroded metal fittings and brittle plastic that’s already cracked won’t hold a repair. Replace the part instead of forcing it, since stripped plastic threads usually mean buying a whole new fitting anyway.
Pro Tip: Plastic slip nuts only need to be snug, not tight. The single most common DIY mistake under a kitchen sink is over-torquing a plastic nut with a wrench meant for metal, which cracks the threads and turns a five-minute fix into a full P-trap replacement.
After any repair, verify it properly. Run the full-drain surge test again, then leave paper towels wrapped around the joint for several hours or overnight before declaring victory. A repair that looks dry after five minutes can still be seeping slowly enough to reappear by morning.
For readers tackling supply-line work specifically, our PEX plumbing repair guide walks through swapping sections of line, and our drain unclogging guide covers the safest way to clear a slow drain without damaging aging PVC.
When a Sink Leak Becomes an Emergency
Most under-sink leaks are minor and fixable on your own schedule. Benjamin Franklin Plumbing points out that most leaks start small and get repaired before real damage happens, but left alone, a persistent leak can swell cabinet wood, feed mold growth, and eventually weaken the subfloor.
A few signs mean you shouldn’t wait:
Active spraying or a steady stream rather than a slow drip
Standing water spreading across the cabinet floor toward outlets or nearby electrical
A sewage smell or discolored water, which points to a drain or backflow issue rather than a simple supply leak
A shutoff valve that won’t close, leaving you unable to stop the flow
If you spot any of these, shut off the main water supply, set out towels and a bucket, and call an emergency plumber rather than attempting a fix under pressure.
Cost varies a lot by region and by what actually failed. Parts-only DIY repairs (washers, a supply hose, a P-trap kit) typically run in the range of $10 to $60 in materials. Hiring a plumber for the same repairs, or for anything involving a stuck shutoff valve or drain-line replacement, generally costs more once labor is included, and prices vary by market and by the plumber’s rates. If a leak keeps returning after repair, or you suspect it’s connected to a larger drain or sewer issue, that’s a sign to schedule a proper inspection or sewer scope rather than repeating the same fix.
Why a Professional Inspection Catches What DIY Checks Miss
A flashlight and a paper towel can only tell you so much. Hidden moisture behind a cabinet wall, inside subfloor material, or migrating along a joist rarely announces itself with a visible puddle. Detecting that kind of hidden leak typically calls for tools like moisture meters and thermal cameras, and for stubborn drain-side mysteries, a sewer scope camera can trace the problem well past what’s visible under the sink.
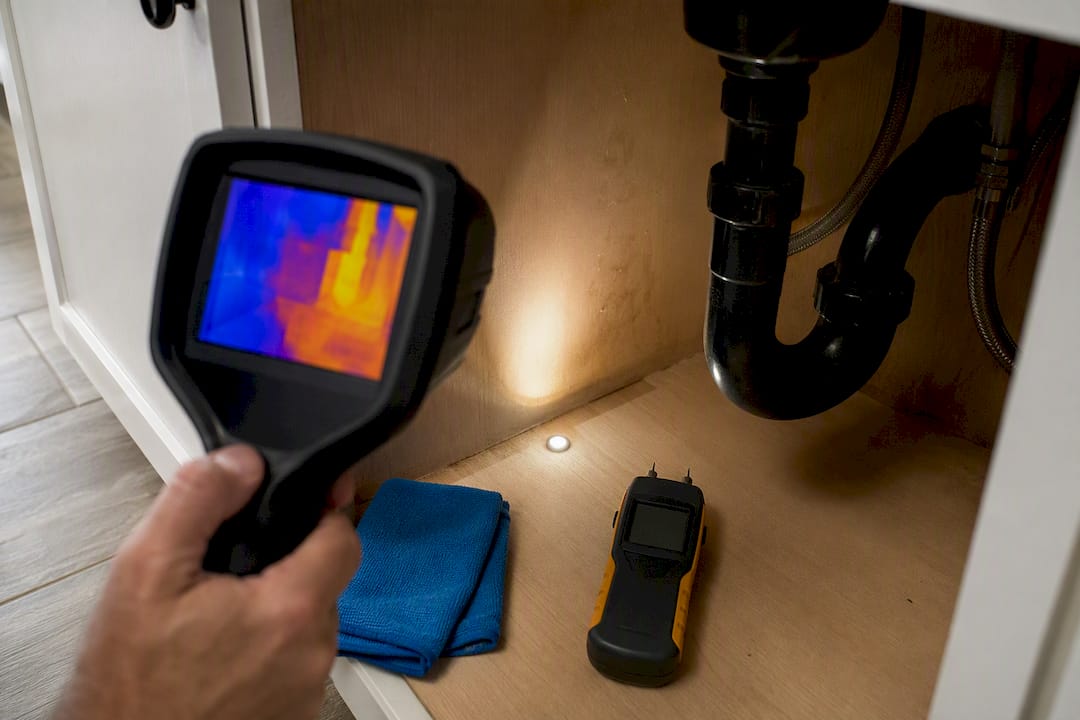
Every inspection includes thermal imaging and moisture meter checks, so hidden dampness behind cabinetry or under flooring gets flagged before it becomes a mold problem or a structural repair. Our thermal leak detection guide explains how infrared imaging spots moisture that’s already traveled well past the original leak point.
Inspections come with a same-day, photo and video-rich report with color-coded priorities, so you know exactly what’s urgent, what can wait, and what to budget for, plus a list of trusted contractors if repairs are needed. Inspectors are InterNACHI certified and FAA licensed for drone work, with insurance coverage beyond Alabama requirements. Visit Trinity Home Inspections to see how that level of documentation compares to a quick under-sink flashlight check.
What Homeowners Get Wrong About Sink Leaks
Most advice about sink leaks treats every drip as an emergency or, worse, tells homeowners to ignore anything that isn’t actively spraying. Neither extreme holds up. The paper-towel and full-drain surge tests exist precisely because most leaks are intermittent. They hide from a five-minute inspection and only reveal themselves under real use, which is exactly why so many homeowners tighten a slip nut, declare victory, and find the same wet spot three weeks later.
The bigger blind spot is assuming a dry cabinet floor means no leak at all. Water migrates. It runs along a pipe, soaks into particleboard, and drips from a point several feet from where it actually originated. That’s where a flashlight check runs out of road and a moisture meter or thermal camera earns its keep. I’d rather see a homeowner run the isolation tests in this article first, since most fixes really are a $15 washer, and then bring in verification tools only when a leak keeps returning after a repair that should have worked.
— Matt
Get a Same-Day Leak Check From Trinity Home Inspections
If you’ve traced a leak back to a joint you can’t safely reach, or want a second set of eyes with real detection tools before it turns into a bigger repair, professional inspectors can bring thermal imaging and moisture meters used on full home inspections, at no extra charge, to spot what a flashlight can’t.
[

What’s included:
Free thermal imaging to catch hidden moisture behind cabinets or flooring
Moisture meter verification on any suspected damp area
Same-day photo and video-rich report with color-coded priorities
Optional add-ons like sewer scope camera inspection or mold testing if hidden damage is suspected
Whether you’re buying a home and want the plumbing checklist covered before closing, or you’re a current homeowner who’s tired of chasing the same wet spot under the sink, call 251-210-7376 or visit Trinityinspectionsllc to schedule a same-day inspection with a team that shows you exactly what’s found, in plain English, the same day we find it.
Sources
For readers who want to go deeper on leak detection methods, the SFPUC leak guide covers municipal water-service checks and when professional detection is required. Total Dry Restoration offers a solid DIY breakdown of common drain-side failures, and Homestery’s checklist is a clear walkthrough of tracing leaks that migrate before they puddle.
FAQ
Why is my sink suddenly leaking underneath?
A sudden leak usually means a slip nut worked loose, a supply hose finally cracked, or a shutoff valve started seeping after being turned for the first time in years. Running the dry-area and isolation tests will tell you within an hour whether it’s supply-side or drain-side.
Why is there water under my sink but no visible leak?
Water often travels along a pipe or cabinet floor and drips several feet from its actual source, so the puddle rarely marks the true origin point. Condensation on cold supply lines during humid weather can also mimic a leak without any actual failure in the plumbing, according to Homestery.
How much does it cost to fix a leaking pipe under a sink?
Parts-only DIY repairs like washers, hoses, or gaskets typically run about $10 to $60 in materials. Hiring a plumber costs more once labor is factored in, and pricing varies by region and by the specific repair needed.
Is a leak under the sink an emergency?
Most sink leaks are minor and can be scheduled on your own timeline rather than treated as an emergency. Active spraying, water reaching electrical outlets, a stuck shutoff valve, or a sewage smell are the signs that mean you should shut off the water and call a plumber right away.
Should I worry about old water damage under a sink?
Old water damage, like swollen cabinet wood or a musty smell, is worth investigating even if the leak itself is fixed, since persistent moisture can lead to mold growth or structural weakening if it went unnoticed for a while. A thermal imaging check during a home inspection can confirm whether moisture is still present behind the visible surface.
Recommended

