
Plumbing Home Inspection Checklist For Homebuyers

This plumbing home inspection checklist gives homeowners, buyers, and inspectors a room-by-room, test-driven template to find, document, and prioritize plumbing defects before they become expensive surprises. It covers every major system — supply lines, drains, water heater, toilets, sump pump, and exterior spigots — and aligns with InterNACHI Standards of Practice so you know exactly what a certified inspector will and will not test.
Download the checklist: Use the printable template linked in the promo section below, or build your own using the room-by-room structure in this guide.
Three things to do before you read further:
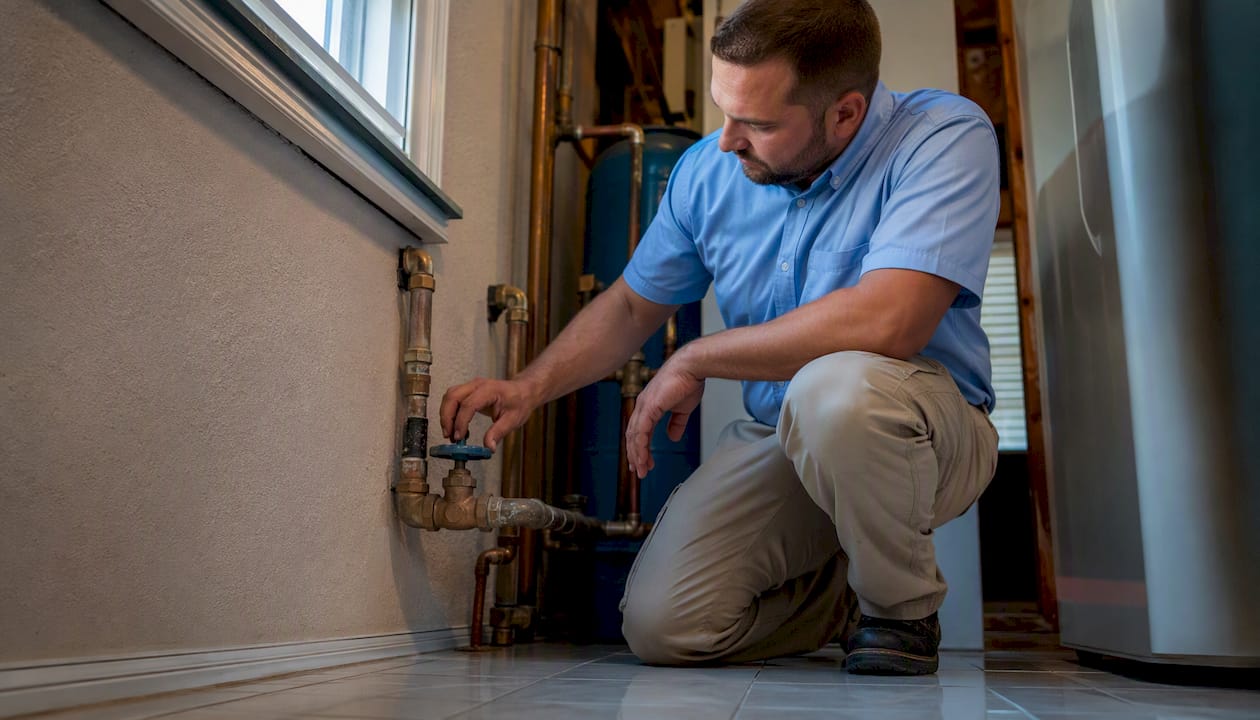
Locate the main water shut-off valve and confirm it turns freely. If you cannot find it or it is stuck, note it immediately.
Run two fixtures at the same time (a shower and a kitchen faucet, for example) and watch for a significant pressure drop.
Flush every toilet while a faucet runs nearby and listen for gurgling drains or slow bowl refills.
Pro Tip: Name every photo you take using this format: Location_Date_Item.jpg (example: MasterBath_2026-06-15_ToiletBase.jpg). That naming convention makes contractor bids faster and keeps your evidence organized if a dispute arises.
Key Takeaways
A complete plumbing home inspection checklist covers every room, tests supply and drain function simultaneously, codes defects by severity, and produces photo evidence a contractor can act on the same day.
Point | Details |
Start with the main shut-off | Locate and test the main valve first; an inaccessible or stuck valve is a Major finding. |
Run the two-fixture flow test | Simultaneous fixture flow reveals supply deficiencies that single-fixture tests miss. |
Code every defect by severity | Safety, Major, Minor, or Monitor — each level has a specific first action and timeline. |
Photo evidence naming matters | Use Location_Date_Item.jpg so contractors can quote repairs without a site visit. |
Trinity Home Inspections | Provides InterNACHI-certified plumbing inspections with same-day reports, free thermal imaging, and sewer scope add-ons across Gulf Coast Alabama. |
What Does a Plumbing Inspection Checklist Include?
A well-built residential plumbing inspection checklist is more than a list of things to look at. It is a structured form with columns that capture what you saw, what you tested, whether you photographed it, how serious the problem is, and what to do next. Practical checklist resources confirm that simple, repeatable functional tests — run water, flush toilets, check visible leaks and flow — are the backbone of any reliable plumbing inspection form.
Template structure at a glance
Each row on the checklist represents one inspectable item. The columns work like this:
Column | What to Record |
Location | Room or area (e.g., Master Bath, Kitchen, Exterior South) |
Visible Defect | What you can see without moving anything (corrosion, staining, drips) |
Functional Test | Result of running water, flushing, or operating the fixture |
Photo ID | File name of the photo taken (use Location_Date_Item.jpg format) |
Severity | Safety / Major / Minor / Monitor (see key below) |
Next Action | Immediate shut-off, licensed plumber, DIY repair, or re-inspect |
Severity key
Safety: Poses an immediate risk — active gas smell near water heater, sewage backup, or flooded area. Stop use and call a licensed plumber or emergency service.
Major: Significant defect requiring a licensed plumber before closing or within 30 days — active leak, failed TPR valve, corroded supply line.
Minor: Small issue a handyman or DIYer can address — dripping faucet, worn supply hose, slow drain.
Monitor: No defect now, but worth watching at the next inspection — aging water heater still within service life, minor mineral staining.
Photo naming matters beyond organization. Clear, labeled images give contractors enough context to quote repairs without a site visit, which often speeds up the negotiation process on a home purchase.
Room-By-Room Plumbing Inspection Checklist
Work through each area in order. Check the visual condition first, then perform the functional test, then take your photo before moving on. Inspectors confirm shut-off valve functionality and check fittings and visible pipes for leaks as a baseline at every location.
Kitchen
Inspect under-sink cabinet for moisture staining, active drips, or soft cabinet floors.
Check supply stop valves (hot and cold) under the sink — they should turn without force and show no corrosion at the stem.
Run the faucet and verify hot water arrives on the left handle and cold on the right.
Test drain flow: fill the sink halfway and release; water should drain without gurgling or backing up.
Operate the garbage disposal (if present) with water running and listen for unusual grinding or vibration.
Check the dishwasher drain connection at the disposal or drain tailpiece for secure attachment and no visible drips.
Bathrooms (repeat for each bathroom)
Turn on the faucet and check hot/cold orientation, flow rate, and whether the aerator restricts flow unusually.
Run the shower or tub at full flow for 60 seconds; note any pressure drop, temperature fluctuation, or slow drain.
Inspect tile and grout around the tub and shower surround for cracks, missing grout, or soft spots that suggest water intrusion behind the wall.
Check the overflow plate on the tub — it should be secure and the drain stopper should operate correctly.
Flush the toilet and watch the bowl: water should clear completely, the tank should refill within 60–90 seconds, and the fill valve should shut off cleanly.
Press gently on the toilet base and check for any rocking or soft flooring, which can indicate a failed wax ring or subfloor damage.
Sniff for sewer gas odor near floor drains and the toilet base. A faint odor from an unused drain often means a dried trap, which ASHI notes requires professional assessment rather than a quick homeowner fix.
Laundry and utility area
Inspect washer supply hoses (hot and cold) for bulging, cracking, or corrosion at the fittings.
Confirm the standpipe height is adequate (typically 18–30 inches above the trap) so the washer does not back up during the drain cycle.
Check the floor pan under the washer for standing water or rust staining.
If the water heater is located here, see the dedicated water heater checklist items in the next section.
Garage and utility room
Locate the main water supply shut-off valve and record its exact location on the checklist. Confirm it is accessible and turns without excessive force.
If a gas or propane supply shut-off is present, note its location and visible condition — do not operate it.
Inspect visible supply piping for corrosion, improper support, or signs of past repairs (mismatched fittings, tape, or clamps).
Check any pressure or expansion tank for visible corrosion, waterlogging (a tank that sounds solid when tapped may be waterlogged), or improper mounting.
Exterior
Test each hose bib (outdoor spigot) by turning it on fully and checking for drips at the handle packing and at the wall penetration.
Frost-proof spigots should drain completely after shutoff — a drip that continues after the handle closes suggests a failed washer or a vacuum breaker issue.
Locate the sewer cleanout (usually a capped pipe near the foundation) and note whether it is accessible.
If the property has a septic system, check for visible risers, an accessible lid, and any alarm panel indicator lights. Note the last service date if records are available.
How to Inspect Supply Lines, Shut-Off Valves, and the Water Heater
Main water supply shut-off
The InterNACHI Standards of Practice require inspectors to identify and inspect the main water supply shut-off as part of every residential plumbing inspection. Record its location (basement, crawl space, utility closet, exterior meter box), confirm it is accessible, and note whether it operates smoothly. A gate valve that has not moved in years may be stuck or may fail to seal fully — that is a Major finding.
Fixture shut-off valves
Every toilet, sink, dishwasher, and washing machine should have its own shut-off valve. Check each one for:
Visible corrosion or mineral buildup at the stem
Evidence of past dripping (white mineral deposits on the floor below)
Whether the valve turns without forcing (quarter-turn ball valves are preferable to older multi-turn gate valves)
Label any valve that is missing, inaccessible, or inoperable as a Major finding.
Water heater inspection
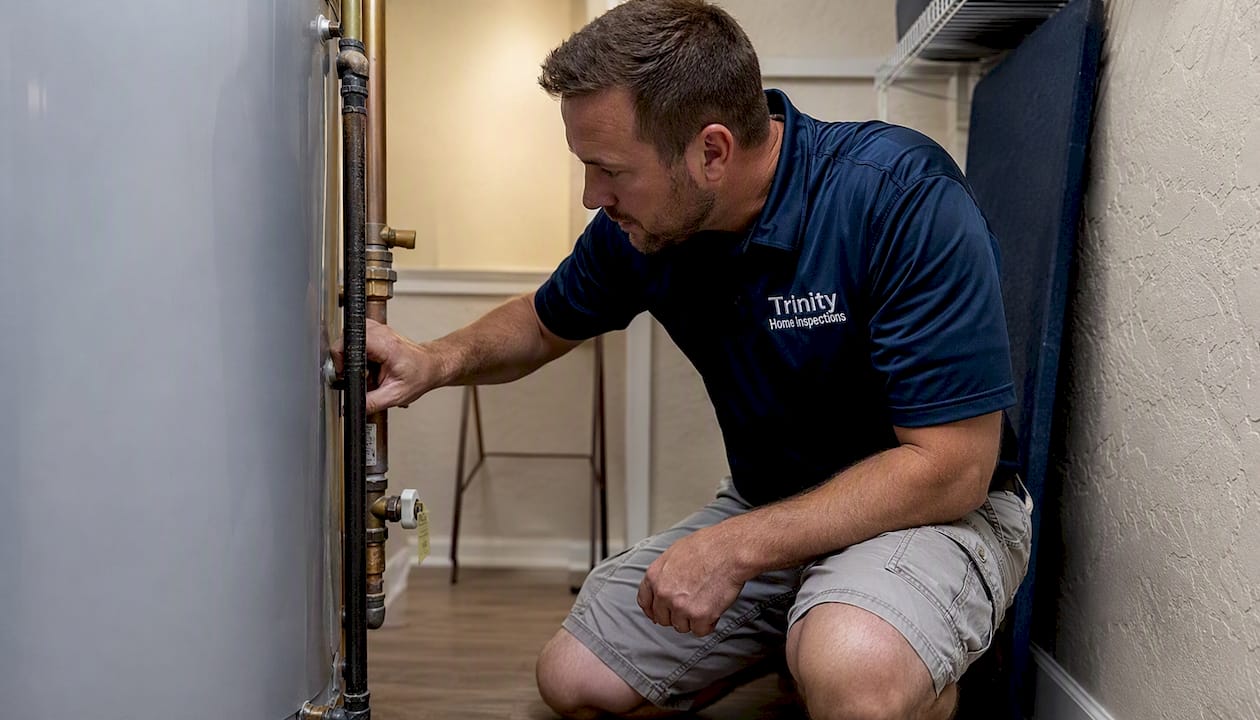
Confirm the energy source (gas, electric, or heat pump), read the capacity and age label on the tank, and check the following:
TPR (temperature-pressure relief) valve: It should be present, have a discharge pipe routed to within 6 inches of the floor or to a drain, and show no evidence of past discharge (mineral staining or corrosion on the valve body).
Venting: Gas water heaters must vent combustion gases to the exterior. Check that the flue connector is secure, slopes upward toward the flue, and shows no rust holes or disconnected joints.
Seismic strapping: Required in many jurisdictions; note its presence or absence.
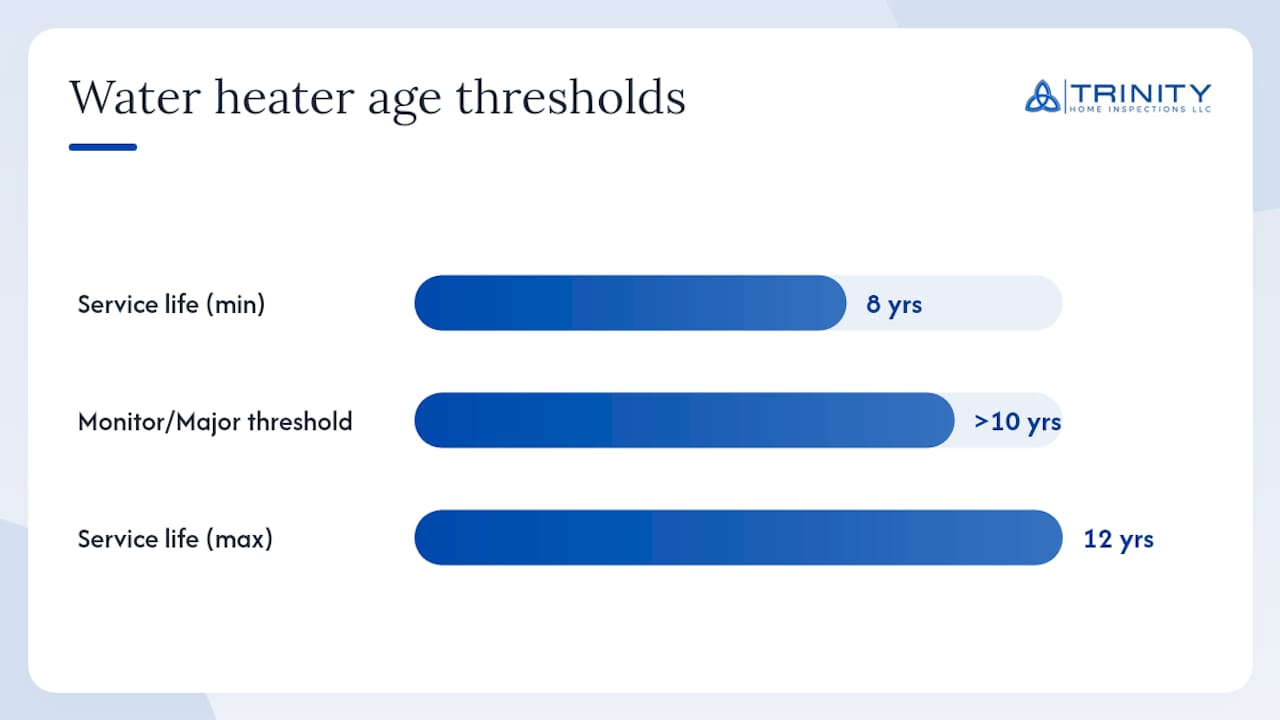
Age: Most tank water heaters have a service life of 8–12 years. A unit older than 10 years warrants a Monitor or Major notation depending on condition.
Standard language to know: The InterNACHI Standards of Practice state that inspectors shall inspect water heating equipment, including the energy source, seismic bracing where visible, and the condition of the TPR valve — but inspectors are not required to operate the TPR valve manually, as doing so can cause the valve to fail to reseat properly.
Pro Tip: Photograph the water heater’s data label (model, serial number, and BTU/gallon rating) before you leave the utility room. The serial number often encodes the manufacture date, and that date is the fastest way to confirm the unit’s age without a separate lookup.
Checking for cross-connections is straightforward: at each fixture, open the hot handle only and confirm that warm water arrives within a reasonable time. If cold water comes from the hot side, or vice versa, note it as a reversed hot/cold connection — a Minor-to-Major finding depending on the fixture type.
A safety note that applies to every inspection: do not operate gas valves, electrical disconnect panels, or any control that requires specialized knowledge to restore safely. Note the item’s visible condition and recommend a licensed plumber or HVAC technician for further evaluation.
Drains, Vents, Toilets, Showers, Sump Pumps, and Septic Systems
Drains and venting
Slow drains are the most common plumbing complaint in residential inspections, and they are often the first sign of a larger problem in the drain-waste-vent (DWV) system. Drain inspection priorities include sewer lines, leak detection, sump pumps, visual inspection, flow testing, and cleanout access — all of which belong on your checklist.
Fill each sink and tub to check drain speed; a drain that takes more than 15–20 seconds to begin clearing is worth noting.
Listen for gurgling sounds at nearby fixtures when a drain is running — gurgling usually means a venting problem.
Sniff near floor drains in the basement or utility room. Sewer gas odor from a dried trap is not a minor nuisance; per ASHI guidance, it warrants professional follow-up.
Confirm that cleanout caps are present and accessible at the main sewer line.
Pro Tip: If you see multiple slow drains on the same side of the house, that pattern points to a shared branch line problem rather than individual clogs. Recommend a camera sewer scope inspection before closing — it is the only way to confirm the condition of the buried line.
Toilets
Beyond the flush test, press lightly on the toilet base in all four directions. Any rocking indicates loose floor bolts or a failed wax ring. A toilet that rocks even slightly can allow sewer gas and moisture to enter the subfloor over time. Also lift the tank lid and observe the fill cycle: the flapper should seal cleanly, the fill valve should shut off before water reaches the overflow tube, and the float arm should not be cracked or waterlogged.
Showers and tubs
Check the shower pan or tub surround for soft spots by pressing on the tile or surround material near the floor. A soft or spongy feel suggests water has reached the substrate. Verify that the overflow plate is present and secured — a missing overflow plate on a tub is a Minor-to-Major finding because it removes the only protection against an overflow reaching the subfloor.
Sump pumps
Visually confirm the float moves freely and is not tangled or resting against the pit wall.
Check that the discharge pipe exits to the exterior and terminates at least 6–10 feet from the foundation.
Look for rust, debris accumulation, or standing water above the normal operating level.
Confirm the pump is plugged into a dedicated outlet and that the cord is not frayed.
If the sump pit has a battery backup unit, note its presence and check the indicator light if visible.
Septic systems
Visible risers, a secured lid, and a functioning alarm panel are the three things to check at a glance. If the yard shows wet spots near the drain field, or if any drain in the house is slow without an obvious cause, recommend a licensed septic contractor for a full evaluation. A standard home inspection does not include probing the drain field or pumping the tank.
How Do Professional Inspectors Test Plumbing?
A standard home inspection is a visual and functional assessment — not a destructive or laboratory test. Here is exactly what a trained inspector does, and where the limits are.
Standard functional tests
Run water at every accessible faucet (kitchen, bathrooms, laundry, utility) and observe flow rate, temperature response, and drain speed.
Flush every toilet and observe the flush cycle, tank refill, and whether the bowl clears completely.
Operate every accessible shower and tub valve, including the diverter if present.
Perform a simultaneous two-fixture flow test: run a shower at full flow while opening a nearby sink faucet. A significant pressure drop at the sink suggests a supply deficiency in the branch line or at the main.
Operate accessible shut-off valves without applying excessive force — a valve that will not turn is noted, not forced.
Inspect visible supply and drain piping for corrosion, improper support, and evidence of past leaks.
What the standard says: The InterNACHI Standards of Practice require inspectors to inspect the interior water supply and distribution system by operating fixtures, inspect drains, waste, and vent systems, and inspect water heating equipment — while also listing specific items inspectors are not required to test, including the interior of flues, water quality or flow rate, and systems that are shut down or winterized.
What inspectors are not required to test
Per the InterNACHI Standards of Practice PDF, a standard inspection does not include:
Measuring water pressure or flow rate with instruments
Testing water quality or potability (the EPA is clear that determining drinking water quality requires source-specific lab analysis)
Operating the TPR valve manually
Inspecting the interior of flues or chimneys
Inspecting systems that are shut off, winterized, or inaccessible
Evaluating private wells or septic systems beyond a visual check
These limits are not gaps in the inspection — they reflect the boundary between a general visual inspection and specialized testing. When a concern falls outside those limits, the right move is to recommend a licensed plumber, a septic contractor, or a water quality lab.
Common Plumbing Defects and How to Prioritize Them
InterNACHI’s residential plumbing overview notes that incorrect installation is a common, often hidden cause of long-term plumbing failures — meaning a system can appear functional during a showing while concealing a defect that will surface within months.
Defects inspectors find most often
Active leaks at supply fittings, drain connections, or the water heater — always Major or Safety
Corrosion on copper or galvanized steel supply lines, especially at joints and near the water heater
Improper venting — drain lines that lack a proper vent connection, causing slow drains and sewer odors
Loose toilet floor bolts — often overlooked but a direct path to subfloor damage
Missing or inaccessible cleanouts on the main sewer line
Reversed hot/cold connections at fixtures — a code violation and a safety concern at showers
Aging or unsupported supply piping — polybutylene pipe (gray, flexible) is a known failure risk in homes built between the late 1970s and mid-1990s
Severity and first action
Safety: Shut off the water at the nearest valve, photograph the defect, and call a licensed plumber before the property is occupied.
Major: Obtain at least two contractor quotes before closing; include the repair cost in your negotiation or request a seller credit.
Minor: Schedule a handyman or DIY repair within 30 days; re-inspect after the fix.
Monitor: Document with a dated photo and re-check at the next annual maintenance inspection.
Questions to ask a plumber before signing a repair contract
Can you scope the main sewer line with a camera before quoting the repair?
Is replacement more cost-effective than repair for a fitting or pipe section this age?
What is the expected service life of the proposed repair material in this application?
How to Use and Customize This Checklist for Any Property
Step-by-step walkthrough workflow
Pre-inspection prep: Confirm the water is on at the meter. Ask the seller or agent for the location of the main shut-off, water heater, and any known plumbing issues.
Start at the water heater: Record the age, energy source, and TPR valve condition before running any fixtures — this gives you a baseline before water pressure changes.
Work room by room from top to bottom: Upper floors first, then main floor, then basement or crawl space. Gravity-fed leaks often show up one floor below their source.
Run the simultaneous flow test mid-walkthrough: Do it while you are still on the main floor so you can observe both fixtures at once.
Photograph before you leave each room: Use the Location_Date_Item.jpg naming convention and capture the defect, the surrounding context, and any labels or serial numbers.
Complete the severity column last: After you have seen the whole system, you will have better context for whether a finding is isolated or part of a pattern.
Pro Tip: Ask the seller to run the dishwasher and washing machine the morning of the inspection. A machine mid-cycle reveals drain performance, hose condition, and supply pressure under real load — conditions that a cold-start test cannot replicate.
Customizing for different property types
For a new construction home, add rows for pressure-balancing valves at showers, expansion tanks on closed systems, and whether the builder has provided a pressure test certificate. For historic homes, add rows for lead solder at copper joints (pre-1986 construction), galvanized steel supply lines, and cast-iron drain condition. For mobile homes, the supply lines often run under the floor in a belly wrap — add a row for belly wrap condition and any signs of ground contact. For properties with wells, add rows for the pressure tank, well pump age, and last water quality test date.
Remove rows that do not apply. A condo on the 10th floor does not need a septic or sump pump row. A property without a garbage disposal does not need that line. A clean, relevant checklist is faster to use and easier to hand to a contractor.
A Perspective on What Checklists Miss
Most plumbing checklists are built around what is easy to see. That is useful, but it creates a blind spot that catches buyers off guard more often than any single defect on the list.
The real risk in residential plumbing is not the dripping faucet or the slow drain. Those are visible. The risk is the installation that looks correct but is not — the drain line with a negative slope that drains fine today because the pipe is clean, or the water heater flue that appears connected but has a gap behind the wall. A checklist can prompt you to look; it cannot substitute for the trained eye that knows what a correct installation looks like and can recognize when something is subtly wrong.
That is why the simultaneous flow test matters more than most buyers realize. A pressure drop when two fixtures run at once is not just a comfort issue. It is a signal about the supply line diameter, the condition of the main shut-off, or the age of the distribution system — information that changes the repair estimate significantly.
The other thing checklists miss is pattern recognition. One slow drain is a clog. Three slow drains on the same side of the house, combined with a sewer odor near the cleanout, is a main line problem. Inspectors are trained to read those patterns. A homeowner with a checklist can collect the data; a certified inspector connects the dots.
Use this checklist as your preparation tool and your documentation record. Then let a professional confirm what the pattern means.
Get a Professional Plumbing Inspection With Trinity Home Inspections
A checklist gets you organized. A certified inspector gets you answers.
[

Trinity Home Inspections serves homebuyers, sellers, and homeowners across Mobile, Baldwin, Escambia, Washington, and Monroe County — including Daphne, Fairhope, Gulf Shores, Orange Beach, and Spanish Fort. Every inspection includes a full plumbing review, free thermal imaging to spot hidden moisture, and a same-day color-coded report delivered the day of the inspection.
What’s included in a Trinity plumbing inspection review:
Visual inspection of all accessible supply lines, drain connections, and shut-off valves
Functional tests at every accessible fixture (faucets, showers, tubs, toilets)
Simultaneous two-fixture flow test for supply pressure assessment
Water heater condition check (energy source, TPR valve, venting, age label)
Thermal imaging scan of suspect areas at no extra charge
Moisture meter readings at visible staining or soft spots
Sewer scope add-on available (main line camera inspection)
Same-day report with photos, videos, severity coding, and contractor-ready notes
If a pre-listing inspection before you list makes sense, or if a plumbing concern has raised questions about moisture or mold, Trinity handles both. Call 251-210-7376 or visit Trinityinspectionsllc to schedule your inspection.
Sources
The following standards and guides shaped the structure and testing steps in this checklist:
FAQ
How do home inspectors check plumbing?
Inspectors run water at every accessible fixture, flush every toilet, and perform a simultaneous two-fixture flow test to check supply pressure, per InterNACHI standards. They also visually inspect visible supply and drain piping, check the water heater, and confirm the location and condition of the main shut-off valve.
What are the main items inspectors focus on for drains?
The priority drain items are sewer line access (cleanout location), drain flow speed at each fixture, signs of backup or gurgling, sewer gas odors, and sump pump condition where present. A camera sewer scope is the recommended next step when multiple slow drains or odors suggest a main line problem.
What does a final plumbing inspection cover?
A final plumbing inspection confirms that all fixtures operate correctly, supply lines are leak-free, the water heater is properly vented and labeled, and drain lines clear without backup. Inspectors run fixtures, examine visible fittings, and note defects — but do not operate gas systems or test water quality, which require specialized contractors or lab analysis.
How do I inspect a plumbing system myself?
Start at the main shut-off valve, then work room by room: run each faucet, flush each toilet, check under sinks for moisture, and test the simultaneous flow of two fixtures. Document every finding with a labeled photo and code each defect as Safety, Major, Minor, or Monitor before deciding on next steps. Use the printable home inspection checklist as your template to stay consistent across rooms.
When should I call a licensed plumber instead of relying on a checklist?
Call a licensed plumber when you find an active leak, sewer gas odor that persists after running water in unused drains, a stuck or missing main shut-off valve, or a water heater with a damaged TPR valve or improper venting. These findings go beyond what a checklist can resolve and require hands-on repair before the property is safe to occupy.
Recommended