
How to Replace a Kitchen Sink with a Farmhouse Apron Sink
- Matt Cameron

- Mar 14
- 10 min read

Upgrading your kitchen with a farmhouse apron sink transforms both style and function, but the installation process requires careful planning and execution. These distinctive sinks feature an exposed front panel and deeper basin that add classic charm while providing extra capacity for busy households. However, replacing a standard kitchen sink with a farmhouse style involves significant cabinet modifications and weight considerations that go beyond typical sink swaps. This guide walks Gulf Coast Alabama homeowners through every step, from initial measurements to final plumbing connections, ensuring you can confidently tackle this rewarding kitchen improvement project.
Key takeaways
Point | Details |
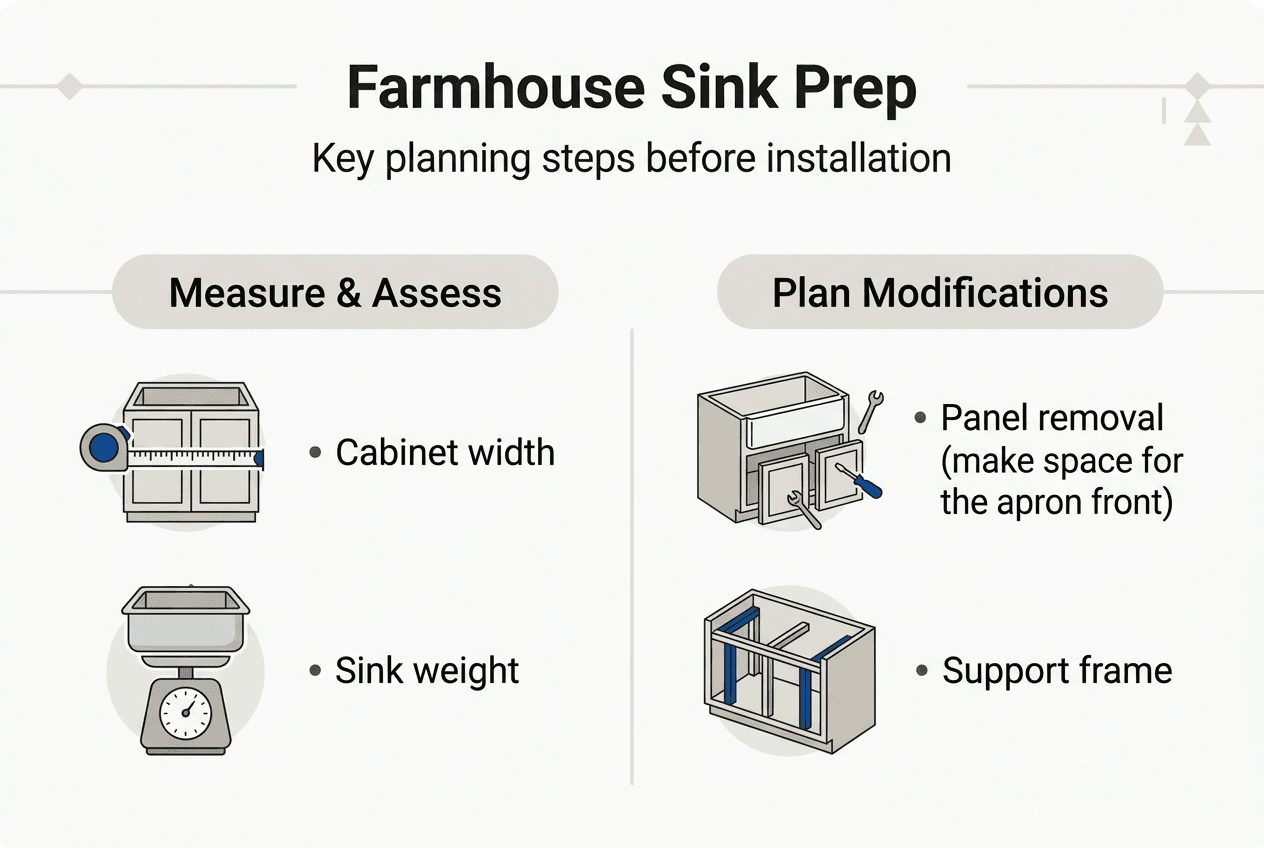
Cabinet modification required | Farmhouse sinks need front panel removal and reinforced support framing to accommodate the apron design |
Weight considerations critical | These sinks weigh 100 to 200+ pounds requiring custom support structures inside base cabinets |
Precise measurements essential | Verify cabinet width exceeds sink width by 2 to 3 inches before purchasing to ensure proper fit |
Professional inspection recommended | Post installation inspections verify plumbing integrity and structural modifications meet safety standards |
Understanding farmhouse apron sinks and planning your replacement
Farmhouse apron sinks stand apart from standard drop in or undermount models through their distinctive exposed front panel that extends beyond the cabinet edge. This design creates a visual focal point while offering a deeper basin that accommodates larger pots, pans, and baking sheets. The exposed apron front defines the shape, while the farmhouse designation describes the rustic style that originated in agricultural settings.
The weight difference between farmhouse and standard sinks demands serious consideration during planning. Farmhouse sinks weigh 100 to 200+ pounds depending on material choice, requiring custom fit base cabinets and reinforced support structures. Cast iron and fireclay models sit at the heavier end of this spectrum, while stainless steel versions offer lighter alternatives without sacrificing durability.
Cabinet modifications represent the most significant departure from standard sink replacement. The apron front requires removing the cabinet face frame and potentially adjusting the cabinet box depth to achieve proper alignment. You’ll need to cut away the front panel where your old sink sat, then build new support structures to distribute the sink’s substantial weight across the cabinet base.
Accurate measurements before purchase prevent costly mistakes and project delays. Measure your existing cabinet width from inside edge to inside edge, then select a sink that leaves adequate clearance on both sides. Most installations require the cabinet interior to measure 2 to 3 inches wider than the sink itself, allowing room for support framing and proper fit.
Your planning checklist should cover these essential items:
Cabinet interior width and depth measurements
Sink material selection based on weight capacity and style preferences
Existing plumbing configuration and required modifications
Countertop overhang adjustments for apron clearance
Support framing lumber and hardware requirements
Pro Tip: Verify your cabinet width measurement at multiple points from front to back, as older cabinets sometimes have slight variations that affect sink fit and require additional shimming during installation.
Before moving forward, review kitchen sink maintenance tips to understand how proper installation affects long term performance and drainage efficiency.
Gathering tools and preparing your workspace
Successful farmhouse sink installation depends on having the right tools and materials ready before you begin. This comprehensive preparation prevents mid project delays and ensures you can work efficiently through each installation phase.
Tool/Material | Purpose |
Reciprocating saw or jigsaw | Cutting cabinet face frame and countertop modifications |
Adjustable wrench and basin wrench | Disconnecting existing plumbing fixtures and supply lines |
Drill with bits | Creating pilot holes and securing support framing |
Level and measuring tape | Ensuring proper sink alignment and accurate measurements |
2x4 lumber | Building reinforced support frame inside cabinet |
Silicone caulk and caulk gun | Sealing sink edges and preventing water infiltration |
Safety glasses and work gloves | Protecting eyes and hands during cutting and fitting |
Bucket and towels | Catching residual water from disconnected plumbing |
Water supply shutoff comes first in your preparation sequence. Locate the shutoff valves under your existing sink and turn them clockwise until fully closed. If individual shutoffs aren’t present or don’t function properly, you’ll need to shut off the main water supply to your home. Open the faucet to drain remaining water from the lines and relieve pressure in the system.
Disconnecting plumbing fixtures requires methodical attention to prevent damage. Place a bucket under the P trap before loosening the slip nuts that connect it to the sink drain and wall pipe. Water and debris will drain into the bucket as you remove these connections. Disconnect the supply lines from the faucet using an adjustable wrench, keeping towels handy to absorb any residual water.
Before starting installation, clear the workspace by removing items from under the sink and the surrounding countertop area. This creates room to maneuver tools and materials while providing clear access to all work zones. Cover nearby flooring with drop cloths to protect against scratches, water spills, and falling hardware.
Safety precautions during cabinet modification and sink installation include:
Wearing protective eyewear when cutting wood or countertop materials
Using work gloves to prevent cuts from sharp edges and metal components
Ensuring adequate ventilation when applying silicone caulk or adhesives
Supporting heavy sink weight with helper or temporary bracing during positioning
Keeping power tool cords away from water sources and wet surfaces
Pro Tip: Use protective gloves and eye protection when cutting silicone beads or removing cabinetry, as old caulk can flake into eyes and sharp cabinet edges can cause cuts during removal.
For additional guidance on drain cleaning and preparation, review proper techniques before disconnecting your existing drainage system. Understanding old sink plumbing removal helps prevent damage to pipes you’ll reuse. Browse kitchen sink replacement tools for detailed equipment recommendations.
Step by step removal of the existing sink and cabinet modifications
Removing your existing sink and modifying the cabinet requires careful execution to preserve surrounding structures while creating the necessary openings for your farmhouse apron sink.
Follow these numbered steps for sink and countertop removal:
Cut through the silicone bead connecting your sink to the countertop using a utility knife, working around the entire perimeter to free the bond
If you have an undermount sink, locate and remove the clips securing it to the underside of the countertop
For drop in sinks, lift straight up once the silicone seal breaks, using a helper if the sink is heavy
Inspect the countertop edge for damage that might require repair before installing the new sink
Remove any remaining silicone residue from the countertop using a scraper and mineral spirits
Cutting through silicone beads represents a critical step in freeing countertops during sink replacement, requiring patience to avoid gouging the counter surface. Work the knife blade between the sink rim and counter, applying steady pressure to slice through the adhesive rather than forcing it.
Cabinet front panel removal and modifications follow the sink extraction. Measure and mark the section of face frame that needs removal to accommodate the sink’s apron front. Most farmhouse sinks require removing the entire front rail and stiles within the sink cabinet opening. Use a reciprocating saw or jigsaw to cut along your marked lines, supporting the cutout section as you complete each cut to prevent splintering.

Installation involves cutting the cabinet front and reinforcing the structure to handle the sink’s substantial weight. After removing the face frame section, inspect the cabinet box for stability and identify where you’ll attach support framing. Sand any rough edges from your cuts to prevent splinters during the remaining installation steps.
Power tool safety during cabinet modification includes:
Securing the cabinet to prevent movement while cutting
Using sharp blades appropriate for the material being cut
Keeping hands and fingers away from the cutting path
Wearing hearing protection during extended power tool use
Unplugging tools when changing blades or making adjustments
This comparison table helps verify cabinet and sink compatibility:
Cabinet Width | Maximum Sink Width | Recommended Clearance |
30 inches | 27 inches | 1.5 inches per side |
33 inches | 30 inches | 1.5 inches per side |
36 inches | 33 inches | 1.5 inches per side |
42 inches | 39 inches | 1.5 inches per side |
Pro Tip: Double check measurements before any cabinet cutting to avoid costly mistakes, and consider creating a cardboard template of your sink’s footprint to verify fit before making permanent modifications.
For guidance on plumbing pipe replacement if you discover damage during removal, consult professional resources. Learn about adjusting plumbing fixtures to optimize your overall kitchen plumbing system.
Installing the farmhouse apron sink and final adjustments
With cabinet modifications complete, you’re ready to build the support structure and install your farmhouse apron sink. This phase requires precision to ensure proper alignment, stability, and leak free operation.
Building a support frame with 2x4 lumber proves crucial for supporting the sink’s weight while retaining usable cabinet space below. Measure the interior cabinet dimensions and cut 2x4s to create a rectangular frame that sits level inside the cabinet box. Position this frame so the top surface aligns with the height where your sink’s bottom will rest, typically 2 to 3 inches below the countertop underside.
Secure the support frame to the cabinet sides using 3 inch wood screws, driving them through the frame into the cabinet walls at multiple points for maximum stability. Add cross braces between the front and back frame members if your sink exceeds 150 pounds, as farmhouse sinks weigh over 100 pounds empty and approach 300 pounds when filled with water and dishes.
Positioning and fitting the sink requires careful attention to the apron front alignment. Lower the sink into the cabinet opening, ensuring the apron face sits flush with or slightly proud of the cabinet front edge according to your design preference. Check that the sink rim makes even contact with the countertop underside around the entire perimeter. Use shims between the support frame and sink bottom to adjust the height and achieve perfect level in both directions.
Reconnecting plumbing starts with the drain assembly. Apply plumber’s putty around the drain flange and insert it into the sink drain hole from above. Secure it from below with the rubber gasket, friction ring, and locknut, tightening until snug but not over torqued. Attach the tailpiece and reconnect the P trap to the drain stub out in the wall, ensuring all slip nuts seal properly without cross threading.
Faucet installation considerations change with farmhouse sinks due to their depth and weight. If mounting the faucet in the sink itself rather than the countertop, verify the sink deck thickness accommodates your faucet’s mounting hardware. Deck mount faucets on thick fireclay sinks may require longer mounting shanks or adapter kits. Wall mount faucets offer an alternative that eliminates deck penetrations while providing flexible reach over the deep basin.
Final installation checks ensure quality and prevent future problems:
Run water through all drains and check every connection for leaks
Verify the sink sits level using a spirit level placed across multiple orientations
Test the garbage disposal if present, confirming proper mounting and operation
Inspect the apron front alignment and adjust shims if needed
Apply a continuous bead of silicone caulk between the sink rim and countertop
Allow caulk to cure for 24 hours before heavy sink use
Pro Tip: Use shims to adjust sink level during installation, placing them between the support frame and sink bottom rather than under the frame itself for more precise control over final positioning.
For additional plumbing guidance, review pex plumbing repair tips that apply to supply line connections and potential leak repairs.
Professional home inspection services in Gulf Coast Alabama
Completing a farmhouse sink installation represents a significant kitchen upgrade that adds value and functionality to your home. However, ensuring your renovation meets safety standards and local building requirements protects your investment for years to come.

Trinity Home Inspections serves homeowners throughout Baldwin, Mobile, Washington, Monroe, Clarke, and Escambia counties with comprehensive inspection services that verify renovation quality and identify potential issues before they become expensive problems. Our InterNACHI certified inspectors use thermal imaging, moisture meters, and specialized tools to assess plumbing integrity, structural modifications, and overall system performance. Whether you’re planning a kitchen remodel or wrapping up a DIY project, our same day reports with detailed photos and videos give you the clarity needed to make informed decisions. We also offer home permit and deed search services to verify renovation compliance, pre sale home inspections that showcase your improvements to potential buyers, and indoor air quality testing to ensure your kitchen ventilation performs properly after modifications.
Frequently asked questions about farmhouse sink installation
How difficult is it to replace a kitchen sink with a farmhouse apron sink?
Farmhouse sink installation requires intermediate to advanced DIY skills due to cabinet modifications and weight management. The project typically takes 6 to 8 hours for experienced DIYers but may extend to two days for first time installers. You’ll need comfort using power tools, making precise cuts, and handling heavy objects safely.
What does a farmhouse sink installation typically cost?
Material costs range from $400 to $1,200 for the sink itself, plus $100 to $200 for lumber, hardware, and plumbing supplies. Professional installation adds $300 to $800 in labor, bringing total project costs to $800 to $2,200 depending on sink material and complexity. Stainless steel sinks cost less than fireclay or cast iron models.
What are the most common mistakes during farmhouse sink installation?
Insufficient support framing causes sinks to sag or crack under weight, while improper measurements lead to poor fit and alignment issues. Many DIYers underestimate the sink’s weight and attempt installation without help, risking injury and damage. Inadequate sealing around the sink rim allows water infiltration that damages cabinets over time.
Do all farmhouse sinks require the same cabinet modifications?
Cabinet modification requirements vary based on sink design and existing cabinet construction. Apron front sinks always require removing the cabinet face frame, but the extent of cutting depends on sink dimensions and apron projection. Some retrofit farmhouse sinks minimize modifications by using the existing cabinet opening with added support structures.
When should I hire a professional instead of DIY installation?
Consider professional installation if you lack experience with power tools, can’t safely lift 100+ pounds, or discover unexpected plumbing or structural issues during removal. Complex situations involving cabinet replacement, countertop modifications, or extensive plumbing rerouting benefit from professional expertise. Homes with older plumbing systems or non standard cabinet construction also warrant professional assessment.
How do I maintain a farmhouse sink after installation?
Daily maintenance involves rinsing the sink after each use and wiping it dry to prevent water spots and mineral buildup. Clean fireclay and cast iron sinks with non abrasive cleaners to preserve the finish, while stainless steel models tolerate more aggressive cleaning. Inspect caulk lines every six months and reapply as needed to maintain water tight seals around the sink perimeter.
Recommended

