
Final Home Inspection Checklist for Alabama Buyers and Sellers
- Matt Cameron
- Jun 4
- 10 min read


A final home inspection checklist is the structured tool buyers and sellers use to confirm that a property matches its contracted condition before the deed changes hands. In Alabama real estate transactions, this process goes by two names you will hear interchangeably: the “final walk-through” and the “final home inspection.” They are the same event, and skipping it or rushing through it is one of the most expensive mistakes a buyer can make. This checklist covers every major category you need to verify, from negotiated repairs and major systems to interior surfaces and exterior components, so you walk into closing with full confidence and zero surprises.
1. What essential repairs should you verify on your final walk-through?
The primary purpose of a final walk-through is to confirm that every repair the seller agreed to in writing has been completed correctly before you close. This is not a new negotiation. It is a verification step, and treating it as anything else creates confusion and delays.
Start by pulling out your original inspection report and the repair addendum from your purchase contract. Go line by line. For each item the seller agreed to fix, ask yourself three questions: Was it completed? Was it done correctly? Is there documentation to prove it?
Here is what to check for each negotiated repair:
Completion status. The work should be visibly done, not partially started or cosmetically patched over.
Workmanship quality. A repaired roof leak should show no staining, soft spots, or fresh water intrusion. A replaced water heater should be properly strapped and vented.
Receipts and documentation. Ask for invoices from licensed contractors, especially for electrical, plumbing, or structural repairs. In Alabama, permitted work should have a final sign-off.
Warranties transferred. New HVAC units, roofing, and appliances often carry manufacturer warranties. Confirm those documents are on-site and transferable to you.
No new damage caused by the repair. Sometimes a plumber fixes a leak but leaves damaged drywall. The repair is done, but the resulting damage is now your problem if you close without noting it.
Pro Tip: Bring your original inspection report to the walk-through and physically check off each repair item on-site. A printable home inspection checklist keeps you organized and gives you a paper trail if disputes arise at the closing table.
If a repair was not completed or was done poorly, document it immediately with photos and notify your real estate agent before you leave the property. Your agent can then contact the seller’s agent to negotiate a credit, a repair escrow holdback, or a closing delay.
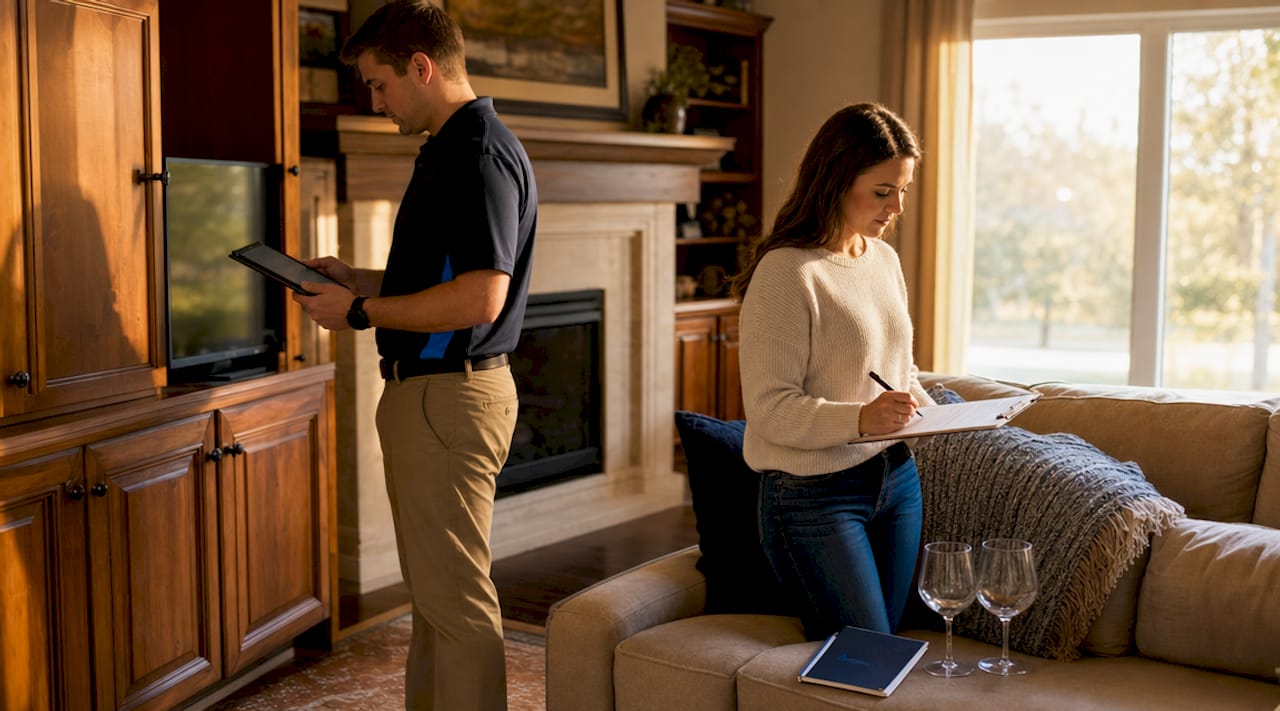
2. How to thoroughly test key home systems and appliances
Testing utilities and systems during the final walk-through, including faucets, toilets, light switches, HVAC, and appliances, is a non-negotiable part of confirming the home is fully operational. A visual check is not enough. You need to run everything.
Work through each system category in this order:
Plumbing. Turn on every faucet in the kitchen, bathrooms, and utility areas. Let the water run for 30 seconds and check under the sink for drips. Flush every toilet and watch for slow drainage or running water after the tank refills. Run the showers and check for hot water delivery and adequate pressure.
HVAC. Set the thermostat to heating mode and wait for the system to cycle on. Then switch to cooling mode and confirm cold air flows from all registers. Check that the air filter is present and that the unit is not making unusual sounds. Documenting HVAC performance at this stage protects you from disputes about pre-existing conditions after closing.
Electrical. Test every outlet in every room using a plug-in outlet tester or by plugging in a phone charger. Flip every light switch. Open the main electrical panel and look for tripped breakers, double-tapped breakers, or signs of corrosion. If the seller agreed to replace a panel or add a GFCI outlet, verify it now.
Kitchen appliances. Run the dishwasher through a short cycle. Test the garbage disposal. Turn on all burners of the stove and check the oven. Run the refrigerator ice maker if the home has one. Confirm the microwave and range hood fan operate.
Laundry connections. Check that the washer hookups have water supply and drainage. Confirm the dryer vent is connected and clear.
Security and doorbell systems. Ring the doorbell. Test any alarm keypads included in the sale. Confirm garage door openers, remote controls, and keypads all function.
Pro Tip: Bring a simple outlet tester from any hardware store. It costs under $10 and tells you instantly whether an outlet is wired correctly, reversed, or ungrounded. At Trinity Home Inspections, we test every accessible outlet and switch, not just a representative sample, because a dead outlet behind your nightstand is a real problem.
Most walk-throughs last 30 to 60 minutes depending on home size. Allocate your time accordingly. Rushing through systems testing is where buyers miss the issues that cost them the most after move-in.
3. What interior and exterior elements should be inspected before closing?
Beyond systems and repairs, you need to assess the physical condition of the home itself. The goal is to confirm no new damage has occurred since your original inspection and that the property is in the condition described in your contract.
Interior inspection checklist
The ASHI Standard of Practice organizes home inspection categories around structural, electrical, plumbing, HVAC, and interior components. Use that same framework for your walk-through.
Walls, ceilings, and floors. Look for new cracks, stains, or soft spots that were not present during the original inspection. Fresh paint over a water stain is a common concealment tactic. Press gently on any suspicious area.
Windows and doors. Open and close every window and exterior door. They should operate smoothly, latch securely, and lock properly. Check window seals for fogging, which indicates a failed thermal pane.
Basement and crawl space access. If the home has a basement or crawl space, open the access point and look for standing water, new moisture staining, or pest activity.
Garage. Test the automatic door opener, the wall button, and the manual release. Confirm the auto-reverse safety feature works by placing a 2x4 flat on the ground in the door’s path.
Seller belongings removed. Your contract specifies what stays and what goes. Confirm all furniture, personal items, and debris the seller agreed to remove are gone. Abandoned items left behind become your disposal cost.
Exterior inspection comparison
Area | What to check | Red flag |
Roof and gutters | Visible missing shingles, sagging gutters | New damage since original inspection |
Siding and trim | Cracks, gaps, or missing sections | Fresh caulk hiding damage |
Grading and drainage | Soil slopes away from foundation | Water pooling near the foundation |
Driveway and walkways | Cracks or heaving | Trip hazards or drainage toward home |
Exterior fixtures | Lights, hose bibs, outlets | Non-functioning or missing covers |
In Gulf Coast Alabama, pay particular attention to signs of moisture intrusion and mold near the roofline, soffits, and around windows. The humidity here accelerates wood rot and mold growth faster than most other regions in the country. If you see discoloration or soft wood anywhere on the exterior, note it and photograph it before you leave.
4. When and how to conduct a final walk-through effectively in Alabama
Scheduling the walk-through 24 hours before closing gives you the best combination of timing: the home is in its final pre-closing state, and you still have time to address any issues before you sit down at the closing table. Scheduling it a week out gives the seller too much time to introduce new problems. Scheduling it the morning of closing leaves you no room to negotiate if something is wrong.
Before you arrive, confirm these items are in place:
All utilities are active, including electricity, gas, and water. You cannot test systems in a home with the power off.
The seller has vacated or is in the process of vacating.
Your real estate agent is present or available by phone.
You have your purchase contract, the original inspection report, and the repair addendum in hand.
Bring the following tools with you:
A phone or camera for photos and video
A flashlight for attic hatches, under-sink cabinets, and dark corners
A notepad or a buyer’s inspection checklist you can mark up in real time
An outlet tester
A phone charger to test outlets quickly
A sequential inspection workflow that starts with repairs, moves to systems, then assesses new damage, and finishes with the exterior keeps you organized and reduces the chance of missing something. Do not let conversation or distraction pull you off your sequence. Work room by room, floor by floor, and finish outside.
5. How to document and address issues found during the final inspection
Taking photos and detailed notes during the walk-through builds the documented punch list you need to negotiate repairs or credits before closing. Without documentation, your claims are your word against the seller’s. With photos, timestamps, and written descriptions, you have evidence.
Here is how to handle issues you find:
Minor cosmetic issues. Note them but do not delay closing over a scuffed baseboard or a missing light bulb. These are not material defects.
Incomplete repairs. Reference the specific line item in your repair addendum. Photograph the unfinished work. Your agent should contact the seller’s agent immediately.
New damage not present at original inspection. This is a material change in property condition. You have the right to request a repair credit, a price reduction, or a closing delay to allow repairs to be made.
Missing items that were supposed to convey. If the contract says the refrigerator stays and it is gone, that is a breach. Your agent can demand it be returned or negotiate a credit equal to its replacement value.
Signs of mold or water damage. Do not close on a home with active moisture intrusion without a professional assessment. Mold remediation in Alabama can run into thousands of dollars depending on the extent of the damage.
Pro Tip: Create a simple punch list by numbering each issue, describing it in one sentence, and attaching the corresponding photo. Send it to your agent in writing, not just verbally. Written communication creates a record that protects you if the issue becomes a dispute after closing.
Buyers and sellers both benefit from clear documentation during the final home inspection. Sellers who have already completed a pre-listing inspection and addressed known issues tend to sail through this stage. Buyers who arrive prepared with their checklist and documentation tools close with confidence instead of anxiety.
Understanding when to walk away is also part of this process. If major structural damage, active water intrusion, or significant undisclosed defects surface during the walk-through, consult your real estate attorney before signing anything. Most purchase contracts in Alabama include contingency language that gives you an exit if the property condition has materially changed.
Key takeaways
A thorough final home inspection checklist protects Alabama buyers and sellers by verifying repairs, testing all major systems, and confirming property condition matches the contract before closing.
Point | Details |
Verify all negotiated repairs | Check each repair against the contract addendum and request receipts for licensed work. |
Test every system hands-on | Run HVAC, plumbing, electrical, and appliances rather than relying on visual checks alone. |
Inspect interior and exterior | Look for new damage, missing items, moisture signs, and exterior deterioration not present at original inspection. |
Schedule 24 hours before closing | This timing catches last-minute issues while leaving room to resolve them before the closing table. |
Document everything in writing | Photos, timestamps, and a numbered punch list give you negotiating power and legal protection. |
What I have learned from final walk-throughs on the Gulf Coast
After conducting inspections across Mobile, Baldwin, and Escambia counties, I can tell you that the final walk-through is where deals either close cleanly or fall apart at the last minute. The difference almost always comes down to preparation.
The most common mistake I see buyers make is treating the walk-through as a formality. They show up without their inspection report, spend 15 minutes glancing around, and sign off. Then they call me two weeks after moving in because the HVAC is not cooling or there is water under the kitchen sink. Those problems were there during the walk-through. They just were not caught because no one tested anything.
Gulf Coast Alabama homes have specific vulnerabilities that buyers from out of state often underestimate. Humidity-driven wood rot around window frames and soffits, termite damage in older pier-and-beam homes, and moisture intrusion in crawl spaces are far more common here than in drier climates. A checklist built for a home in Ohio does not account for those realities. Your walk-through needs to reflect where you are buying.
I also want to say something to sellers reading this. A pre-listing inspection before you put your home on the market is the single best thing you can do to protect yourself from a deal falling apart at the finish line. When you already know what is in your home and have addressed the real issues, the buyer’s final walk-through becomes a confirmation rather than a discovery session. That is a much better place to be 24 hours before closing.
The checklist is not bureaucracy. It is your best defense against closing on a property that is not what you agreed to buy.
— Matt
Schedule your final home inspection with Trinity Home Inspections
[

Trinity Home Inspections serves homebuyers and sellers across Mobile, Baldwin, Escambia, Washington, and Monroe counties with InterNACHI-certified inspections, same-day photo and video reports, and free thermal imaging included with every inspection. Whether you need a buyer’s walk-through inspection, a pre-listing seller inspection, or specialized mold testing services when moisture concerns surface during your walk-through, Trinity has you covered from one call. Call 251-210-7376 or visit TrinityInspectionsLLC.com to schedule your inspection today.
FAQ
What is the purpose of a final home inspection checklist?
A final home inspection checklist is used to verify that negotiated repairs have been completed, major systems are operational, and the property’s condition matches the purchase contract before closing. It is a confirmation tool, not a new negotiation.
How long does a final walk-through take in Alabama?
Most walk-throughs last 30 to 60 minutes depending on the size and complexity of the home. Larger homes or properties with multiple repair items may require more time, so plan accordingly and do not rush.
What should I bring to my final walk-through?
Bring your purchase contract, the original inspection report, the repair addendum, a phone or camera, a flashlight, an outlet tester, and a printed checklist. Freedom Mortgage recommends conducting a hands-on inspection rather than a visual-only review.
Can I delay closing if I find problems during the final walk-through?
Yes. New damage or incomplete repairs discovered during the walk-through can justify a closing delay, a repair credit, or in serious cases, contract cancellation. Document all issues with photos and communicate them to your agent in writing immediately.
Do sellers in Alabama need to prepare for the buyer’s final walk-through?
Sellers benefit from completing all contracted repairs before the walk-through, removing all personal belongings, and leaving utilities active for testing. A pre-listing inspection completed before listing the home reduces the likelihood of surprises surfacing at this late stage.
Recommended

