
Homeowners: Thermal Scans Reveal Hidden Roof to Wall Flashing Damage

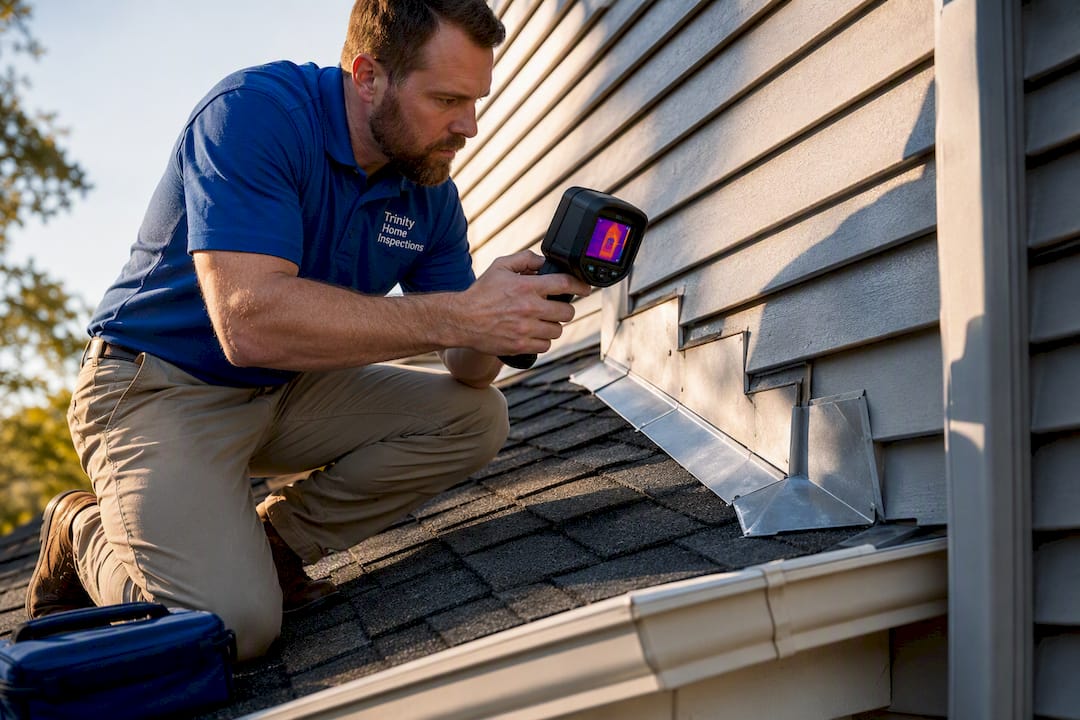
When roof-to-wall flashing is installed incorrectly, rainwater bypasses the roof entirely and tracks straight into the wall cavity behind your siding, where it rots sheathing, soaks insulation, and grows mold long before you ever see a stain. The two most common culprits are missing kick-out flashing and continuous flashing used where step flashing belongs. If you suspect either, the right first move is a documented inspection with photos, moisture readings, and thermal imaging before you patch anything with caulk.
TL;DR:
Proper installation of roof-to-wall flashing requires individual step flashing pieces, correct laps, and durable, corrosion-resistant materials to prevent leaks.
Missing or undersized kick-out flashing often causes water to seep behind siding, leading to rot, mold, and hidden damage that can worsen over multiple seasons.
Visual inspections alone are unreliable; thermal imaging and moisture meters are vital tools to detect early signs of hidden water damage behind siding.
Early repairs, such as retrofitting kick-out flashing or replacing faulty step flashing, are cost-effective and often prevent extensive structural damage.
Documentation of flashing condition, photos, and moisture readings before repairs ensures accountability and helps negotiate timely, effective fixes.
What Roof-to-Wall Flashing Is Supposed to Do
Roof-to-wall flashing exists at every point where a roof plane meets a vertical wall, and it works only if three separate pieces cooperate correctly. Step flashing consists of individual L-shaped metal pieces, one installed with each course of shingles running up a sloped roof-to-wall junction, so water is shed onto the roof rather than behind the wall. Counter flashing covers the top edge of step flashing and ties into the wall’s weather-resistive barrier (WRB), creating a second line of defense. Kick-out flashing sits at the bottom of that step-flashing run, at the spot where a sloped roof meets a wall and gutter, and its only job is to divert water away from the wall and into the gutter instead of letting it run down behind the siding.
Correct installation depends on a few non-negotiable details:
Step flashing is installed one piece per shingle course, never as one continuous strip
Each piece laps the one below it, matching the shingle pattern so water always sheds downward
Flashing metal integrates with the WRB behind the cladding, not just against the shingles
Materials are corrosion-resistant metal of adequate gauge, consistent with the expectations behind IRC R905.2.8.5 for asphalt shingle roofs
Skip any one of these steps, and the assembly stops being a drainage system. It becomes a funnel.
What Actually Happens Inside the Wall When Flashing Fails
Water does not evaporate when it gets behind siding. It runs downhill inside the wall cavity until it hits something that stops it, and that something is usually the bottom of the wall framing or a horizontal obstruction like a window header.
Missing or undersized kick-out flashing at roof-wall intersections causes concentrated runoff to pour behind exterior wall cladding, and the Building America Solution Center documents that this produces significant rot in sheathing and framing typically 1 to 3 feet above the floor. That band is not random. It marks where water tracking down from the roof edge finally soaks the top of the wall cavity at the lower corner, right where a missing diverter should have sent it into the gutter instead.
A single storm makes the scale of the problem clear. Heavy rain can dump very large volumes of water onto an average roof, and InterNACHI notes that without adequate sidewall or kick-out flashing, that runoff finds its way into wall cavities, damaging sheathing, framing, and insulation and creating conditions for mold. The damage compounds over multiple seasons of exposure.
What makes this genuinely tricky for homeowners is that modern cladding is good at hiding it. Fiber cement, vinyl, and brick veneer don’t show water stains the way old wood siding did, so the wall can look flawless from the curb while the sheathing behind it is soft and dark. Typical progression looks like this:
Sheathing decays first, losing its structural stiffness where it stays wet longest
Framing members rot next, especially at the sill plate and adjacent studs
Insulation saturates and loses R-value, and stays wet because it has nowhere to dry
Mold colonizes the damp wood and insulation, often before any interior stain appears
Interior drywall finally shows a stain, by which point the repair scope has grown well beyond the flashing itself
Common Installation Mistakes That Cause Leaks
Most flashing failures trace back to a short list of installer shortcuts, and inspectors see the same patterns repeat across new construction and re-roofs alike.
Continuous flashing instead of step flashing. A single long strip looks tidy, but it lets water travel sideways along the wall instead of being broken into small, shingle-length runs that shed downward. Field experience shows most wall-junction leaks start here.
Missing or undersized kick-out flashing. Some installers skip it entirely; others improvise a diverter that isn’t sized or sealed correctly, and an unwelded seam on a homemade piece defeats the purpose just as badly as no flashing at all.
Reverse-shingled flashing. Pieces installed upside down or backward direct water into the wall rather than away from it, an error that’s often invisible until the siding comes off.
Nailing through the flashing’s wall leg. Every nail through that vertical leg is a new puncture point for water to find.
Burying flashing under siding with no reveal. Siding installed too low erases the gap flashing needs to breathe and drain.
Treating caulk as a permanent seal. Caulk at a counter-flashing reglet typically fails within 8 to 12 years, which makes it a maintenance item, not a fix.
Re-roofing without touching the flashing. Layering new shingles over old step flashing can bury the metal and eliminate the reveal, creating a wick path that didn’t exist before.
Pro Tip: If a contractor’s leak “fix” is a tube of sealant and nothing else, ask what’s underneath it. Caulk over bad flashing buys you a season, not a solution.
How to Spot Hidden Flashing Damage Before It Spreads
You don’t need a moisture meter to notice the first warning signs, but you do need to know where to look. Outside, watch roof-wall junctions for streaking, discoloration, warped or bulging siding, and rust trails below any metal flashing. Inside, check ceilings and walls near those same junctions for stains, soft or spongy drywall, and a musty smell that doesn’t have an obvious source.
Exterior symptoms lag behind the actual damage, sometimes by years, because modern claddings mask evidence of intrusion that older wood siding would have revealed much sooner. That’s exactly why a visual walk-around isn’t enough on its own.
A thorough inspection layers in tools that see what eyes can’t:
Thermal imaging identifies cool, wet zones behind cladding by reading surface temperature differences, often before any visible stain forms
Moisture meters confirm suspected damp areas with a hard reading instead of a guess
Drone roof imagery documents flashing geometry and condition at junctions that are unsafe or impractical to walk
Targeted invasive checks, such as a small siding removal at a suspicious junction, when the other signals point to a real problem
The Building America Solution Center specifically points to thermal imaging and moisture meters as effective tools for catching this kind of damage before staining ever shows up on a wall.
Repair Options and What They Typically Involve
Not every flashing problem means tearing off the roof. The right fix depends almost entirely on how far the water has already traveled.
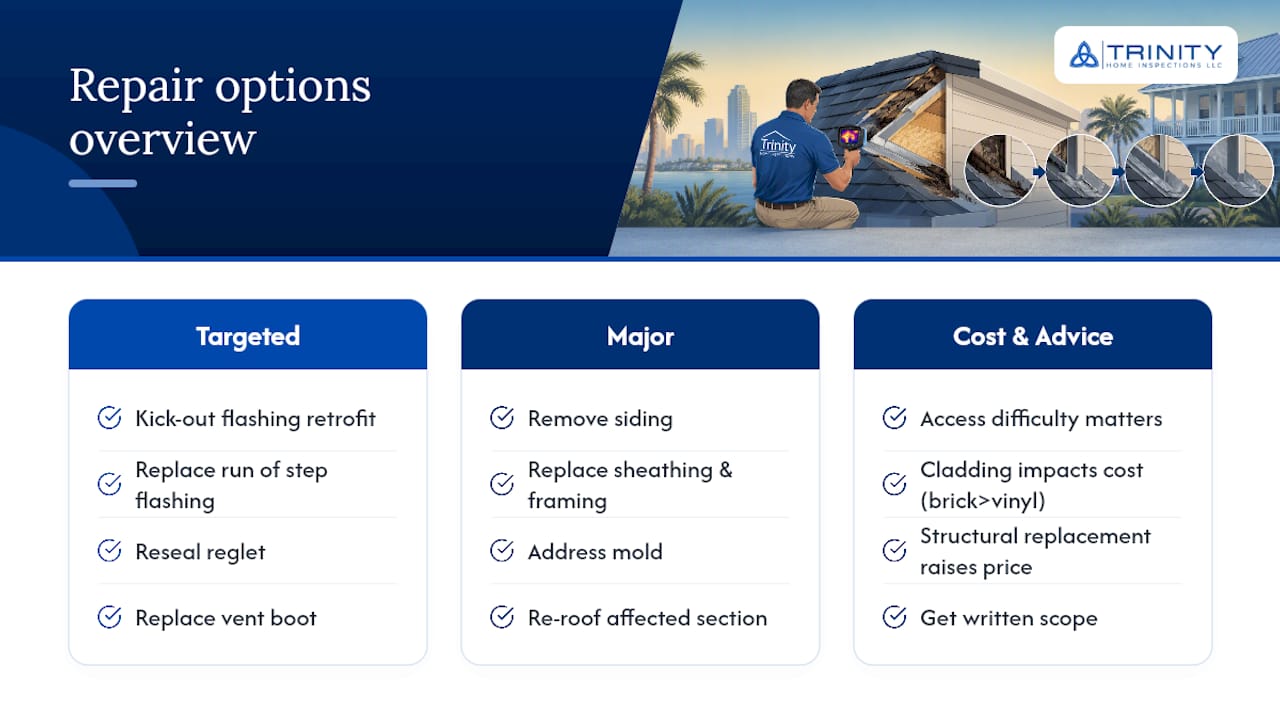
Targeted repairs cover most early-caught issues. Retrofitting a proper kick-out flashing into an existing roof-wall junction, replacing a run of step flashing, or resealing a counter-flashing reglet are all jobs a qualified roofer can typically handle without a full re-roof, and JDH Remodeling notes these targeted fixes handle the majority of cases caught early. A cracked plumbing vent boot falls into this same category. It’s a small, cheap part, but a split rubber boot at the pipe penetration lets water in every bit as effectively as a missing kick-out, and it’s an easy miss on a quick roof glance.
Major remediation becomes necessary once rot has spread past the flashing itself. That scope can include removing siding, replacing sheathing and framing members, addressing mold, and re-roofing the affected section, since patching flashing over already-rotted wood solves nothing.
What actually drives cost is access difficulty, how far hidden rot has spread, the cladding type (brick veneer removal costs far more than vinyl), and whether structural framing needs replacement. Get a written scope, not a verbal estimate, and get more than one bid when the damage looks extensive. A scope that doesn’t name specific flashing components by type is a scope you can’t hold anyone accountable to later.
What to Require Before You Sign Off on the Work
Preventing a repeat of this problem starts with the contract language, not the finished product. Before work begins or is accepted as complete, put these requirements in writing:
Step flashing installed one piece per shingle course. No continuous strips, no exceptions.
Kick-out flashing that’s either prefabricated or correctly field-fabricated with welded seams. Prefabricated kick-outs are generally more reliable than improvised diverters, which are frequently undersized or leak at the seam.
Documented integration between flashing and the WRB, not just flashing tucked against the shingles.
Before-and-after photos of every flashing detail before siding or roofing covers it up.
A written warranty that names the flashing work specifically, not a vague “workmanship” clause.
Pro Tip: A contractor who resists lifting shingles to show you the step flashing, or who offers caulk as the whole fix, is telling you something. Walk away or ask for a second opinion before that job gets covered up.
How Trinity Home Inspections documents flashing problems
Flashing defects hide behind siding, which is exactly why the inspection method matters as much as the inspector’s eye. Trinity Home Inspections is an InterNACHI Certified home inspector, with FAA drone training and licensing for roof views that aren’t safe to walk, backed by completed Standards of Practice and National Home Inspectors Exam requirements.
Every roof-to-wall junction gets checked with the same layered approach described above:
Thermal imaging to flag cool or wet zones behind cladding, included at no extra charge when conditions allow
Moisture meters to confirm any suspected damp area with a real reading
Drone imagery for roof sections that are unsafe or impractical to walk
A same-day, color-coded digital report separating safety/major issues from DIY/minor ones, with photos, video, and a list of trusted contractors for quotes
Why Timely Inspection Beats Guessing
The wall-junction leaks that turn into five-figure remediation jobs almost always started small. A missing kick-out or a run of continuous flashing sits quietly for a few rainy seasons before anyone notices a stain, and by then the sheathing and framing have already paid the price. Catching it early, with photos and moisture data in hand, is also what gives a buyer real leverage to negotiate repairs or a credit before closing rather than after.
If you’re touring a home with a complicated roofline or you’ve noticed a faint musty smell near an exterior wall, don’t wait for a visible stain to confirm it. Documentation now is cheaper than reconstruction later.
— Matt
Get a Flashing-Focused Inspection Before It Becomes a Bigger Repair
Trinity Home Inspections gives you the one thing a curbside look never can: a documented, tool-verified read on what’s actually happening at your roof-wall junctions, not a guess based on what’s visible from the ground. Every inspection includes a roof walk or drone pass where climbing isn’t safe, free thermal imaging when conditions allow, moisture meter checks at suspicious junctions, and a same-day color-coded report you can actually use.
[

What’s included: a full roof-to-wall junction check, thermal imaging at no extra cost, moisture readings where warranted, same-day photo and video documentation, a color-coded priority list separating safety issues from minor items, and referrals to contractors we trust for repair quotes. If your transaction involves title or permit questions on top of the physical inspection, our property, deed, and permit search service covers that too. For background on how these junctions are supposed to work before your inspection day, read our guide to roof-to-wall connections.
Call 251-210-7376 or book online at TrinityInspectionsLLC.com to get a same-day report on your roof-to-wall flashing before it becomes a bigger repair.
Sources
FAQ
What are the most common problems with roof flashing?
The most frequent issues are continuous flashing used where step flashing is required, missing or undersized kick-out flashing, and caulk relied on as a permanent seal instead of properly lapped metal.
What should I do if I think my roof flashing was installed wrong?
Schedule a documented inspection with photos, moisture meter readings, and thermal imaging before any repair work begins, so you know the actual extent of hidden damage rather than guessing.
How do you fix roof flashing where it meets a wall?
Minor issues often mean retrofitting a proper kick-out flashing or replacing a run of step flashing pieces, while extensive rot behind the wall requires removing siding and replacing damaged sheathing or framing.
How much does it cost to replace roof flashing?
Cost depends heavily on access, cladding type, and how far hidden rot has spread, which is why a written scope and more than one bid matter before you approve major work.
Can a cracked plumbing vent boot cause a roof leak?
Yes. A split or cracked rubber vent boot lets water into the roof deck around the pipe penetration just as effectively as a missing kick-out flashing, and it’s a common miss on a quick visual check.
Recommended

