
How to Clean Your AC A-Coil for Better Cooling Efficiency

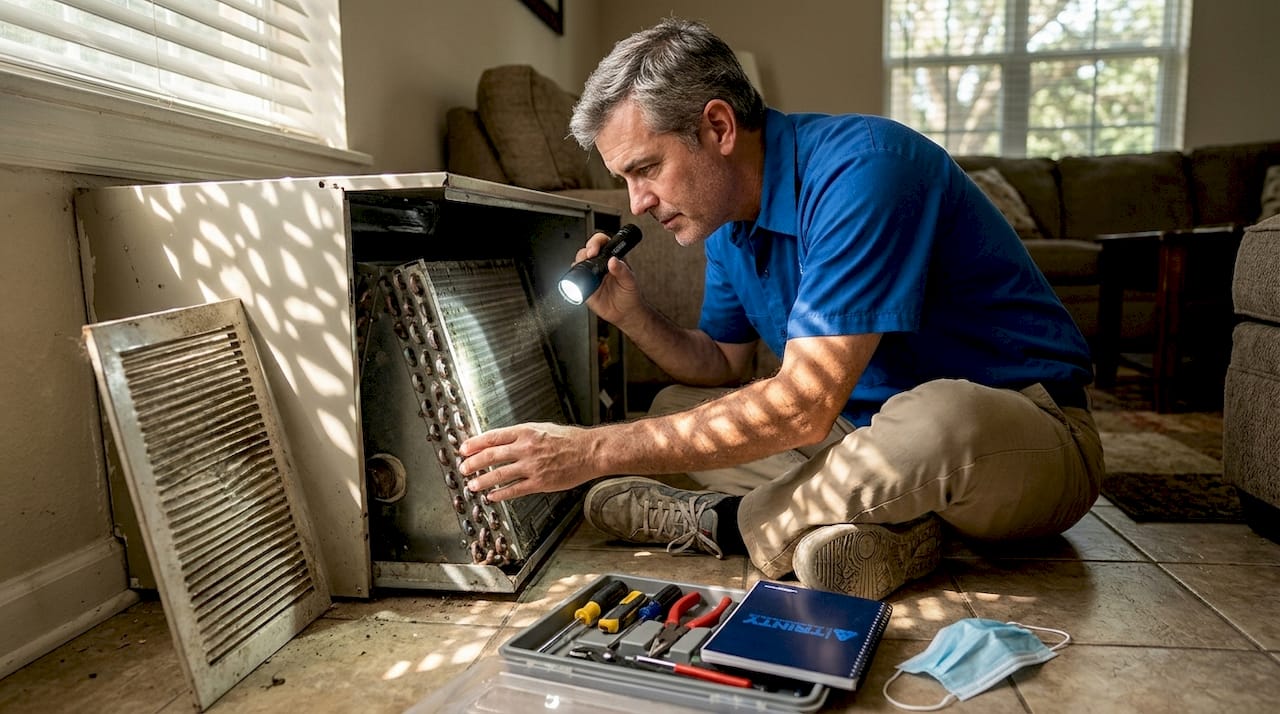
Living on the Gulf Coast means your air conditioner works harder than almost any other system in your home. When your A-coil (the evaporator coil inside your air handler) gets coated with dust, pollen, and Gulf humidity residue, your AC can lose 15 to 30% efficiency and drive energy use up by as much as 40%. That translates directly into higher power bills, warmer rooms, and a system that wears out faster. The good news is that a careful homeowner can clean this coil in about an hour, restore meaningful performance, and avoid an expensive service call.
Key Takeaways
Point | Details |
Safety first | Always disconnect power at the breaker before cleaning your AC A-coil. |
Use the right cleaners | No-rinse foaming coil cleaner is safest—avoid water on indoor coils to prevent mold. |
Routine saves money | Regular A-coil cleaning can improve efficiency by up to 30% and lower utility bills. |
DIY vs. pro service | DIY works for light dirt, but call a professional for heavy or coastal buildup, or recurring problems. |
Why a clean A-coil matters for your AC performance
The A-coil sits inside your air handler and absorbs heat from the air moving through your home. Think of it as the workhorse of your cooling system. When a layer of dust, mold spores, and debris builds up on those thin aluminum fins, the coil can no longer pull heat out of the air efficiently. Your system compensates by running longer cycles, which drives up electricity costs and puts extra wear on the compressor and fan motor.
Here is what a dirty A-coil actually costs you:
Higher utility bills. A coated coil forces the system to work harder, and energy use climbs up to 40% compared to a clean coil. In Gulf Coast Alabama summers, that difference shows up fast on your power bill.
Reduced airflow. Debris restricts the space between fins, cutting airflow and leaving rooms feeling warm and stuffy even when the thermostat is set low.
Higher indoor humidity. A dirty coil cannot remove moisture from the air as effectively, which means your home feels clammy and uncomfortable.
Shortened system life. Longer run times and higher operating temperatures accelerate wear on every major component.
Poorer air quality. Mold, bacteria, and allergens can colonize a dirty, damp coil and circulate through your home every time the blower runs.
“Cleaning restores efficiency, cuts bills 10 to 15%, improves airflow 46%, and reduces fan energy 41 to 60%.” — ACHR News research summary
Gulf Coast Alabama adds a specific layer of difficulty here. Salt air from Mobile Bay and the Gulf of Mexico accelerates corrosion on coil fins. High pollen counts from pine and oak trees clog fins faster than in drier climates. Coastal humidity keeps the coil surface damp longer after each cooling cycle, which is exactly the condition mold needs to grow. Understanding the Gulf Coast HVAC protection challenges specific to our region helps you clean smarter and schedule maintenance at the right intervals.
The energy savings from clean coils are real and measurable. A single cleaning session can make a noticeable difference in how quickly your home reaches the set temperature and how long the system stays off between cycles.
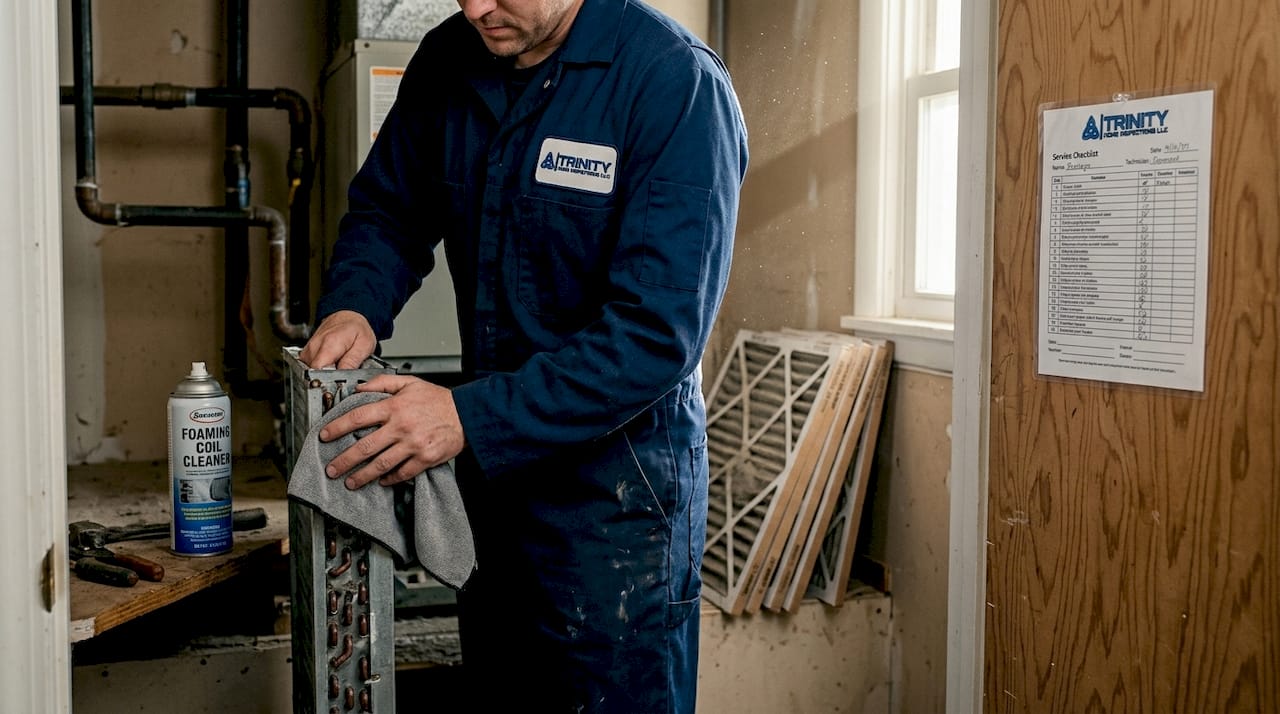
Now that you see why a clean A-coil is essential, let’s look at what you need before starting the cleaning process.
What you’ll need: Tools and safety precautions
Gathering the right tools before you open the air handler panel saves time and prevents mistakes. More importantly, following the correct safety steps protects you from electrical hazards and chemical exposure.
Safety gear you must have:
Nitrile or rubber gloves to protect your hands from coil cleaner chemicals
Safety glasses or goggles to keep spray and debris out of your eyes
An N95 respirator mask, especially important if you suspect mold growth on the coil
Long sleeves to protect your arms from sharp aluminum fins
Tools and supplies for the job:
Flathead and Phillips screwdrivers to remove the air handler access panel
A vacuum with a soft brush attachment for removing loose debris
A can or bottle of no-rinse foaming coil cleaner (available at any hardware store)
A fin comb to straighten bent aluminum fins
White vinegar and a small funnel for drain line maintenance
A flashlight or headlamp to see inside the air handler clearly
Tool | Purpose | Acceptable substitute |
No-rinse foaming cleaner | Dissolves dirt without water rinse | Manufacturer-approved coil spray |
Soft brush vacuum | Removes loose debris gently | Soft paintbrush plus shop vac |
Fin comb | Straightens bent fins | None — fins are delicate |
N95 mask | Protects from mold and dust | P100 half-face respirator |
White vinegar | Clears drain line buildup | Diluted bleach (1:16 ratio) |
One rule stands above all others: always shut off power at the breaker before touching any part of the air handler. Flipping the thermostat to “off” is not enough. Go to your electrical panel and switch off the breaker labeled for your air handler or HVAC system. Confirm the unit is off before opening any panels.
Never use a pressure washer on an indoor A-coil. The force will bend fins, push debris deeper into the coil, and introduce water where it can cause mold and corrosion. Harsh chemical degreasers designed for outdoor use can also damage the delicate aluminum fins and the coil coating.
Pro Tip: Take a photo of how your air handler panel is assembled before removing any screws. You will thank yourself when it is time to put everything back together.
Check the A-coil cleaning safety tips on our site for a more detailed breakdown of chemical safety and what to do if you find heavy mold growth before you start.
With your safety gear and tools organized, you’re ready for step-by-step cleaning.
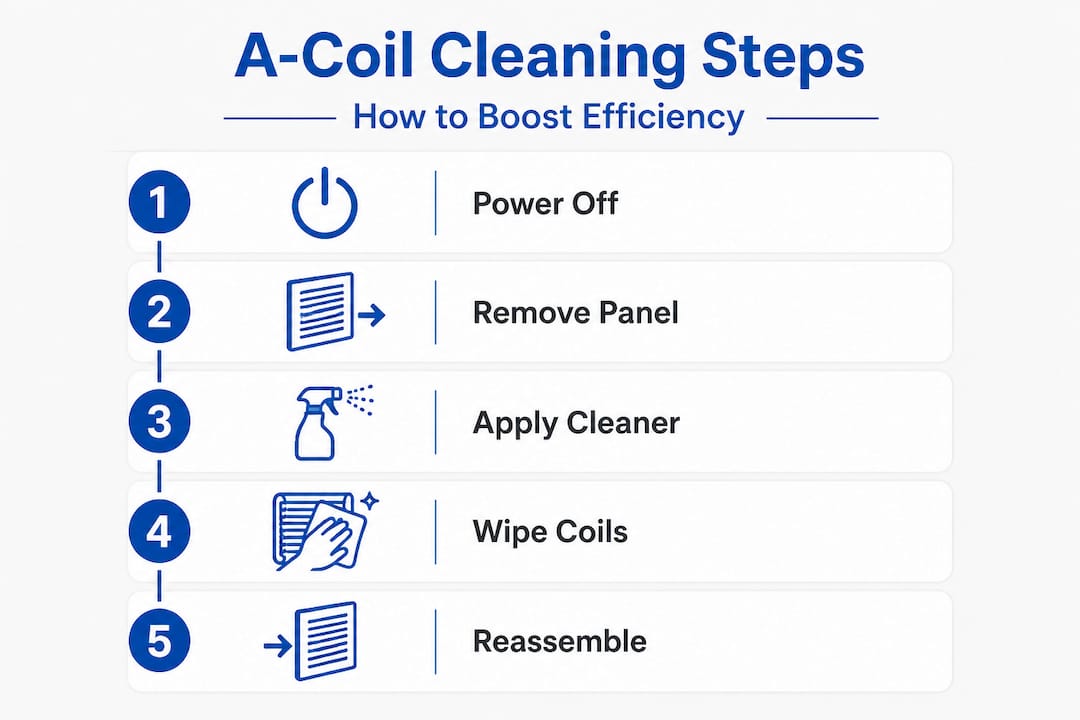
Step-by-step: How to clean your AC A-coil like a pro
Follow these steps carefully and you will get professional-quality results without the service call fee.
Turn off the breaker. Go to your electrical panel and switch off the circuit for your air handler. Do not skip this step.
Remove the access panel. Unscrew the panel on your air handler to expose the A-coil. Set the screws somewhere safe.
Inspect the coil visually. Use your flashlight to look at the fin surface. Note any areas with heavy buildup, bent fins, or visible mold growth.
Vacuum loose debris. Using the soft brush attachment on your vacuum, gently remove dust, pet hair, and loose debris from the coil surface. Move the brush parallel to the fins, never across them, to avoid bending.
Apply no-rinse foaming coil cleaner. Shake the can well and spray an even coat across the entire coil surface. The foam will expand into the fins and begin dissolving grease and biofilm.
Let it dwell for 5 to 10 minutes. The cleaner does the work during this time. Do not wipe or rinse. The foam will liquefy and drip down into the drain pan below the coil, carrying dissolved debris with it.
Straighten bent fins if needed. Use a fin comb matched to your coil’s fin spacing to carefully straighten any bent sections. Bent fins restrict airflow just like dirt does.
Clean the drain pan. Pour a cup of white vinegar into the drain pan to kill algae and flush the drain line. For a more thorough approach, review clearing AC drain lines before you start.
Reassemble the panel. Replace the access panel and tighten all screws. Restore power at the breaker.
Run the system and check performance. Set your thermostat a few degrees below room temperature and let the system run for 15 to 20 minutes. Feel the supply vents for stronger, colder airflow compared to before cleaning.
Step | Time required | Key caution |
Power off and panel removal | 5 minutes | Confirm breaker is off |
Vacuuming | 5 to 10 minutes | Use soft brush, move parallel to fins |
Cleaner application and dwell | 10 to 15 minutes | Do not rinse or wipe |
Fin straightening | 5 minutes | Match fin comb to fin spacing |
Drain pan and line flush | 5 minutes | Vinegar only, no bleach near coil |
Reassembly and test | 10 minutes | Listen for unusual sounds |
Pro Tip: If you notice a musty smell when the system first starts after cleaning, that is normal and should clear within a day. If the smell persists after 48 hours, you may have mold deeper in the system that needs professional attention.
For a more detailed walkthrough with photos, the detailed A-coil cleaning instructions on our site walk you through each step visually.
After cleaning, it’s important to troubleshoot and prevent common DIY missteps.
Troubleshooting and avoiding common mistakes
Even careful homeowners run into problems. Knowing what can go wrong and how to respond keeps a simple cleaning job from turning into a costly repair.
Common mistakes and how to avoid them:
Skipping the breaker shutoff. This is the most dangerous mistake. Live voltage inside an air handler can cause serious injury. Always confirm power is off before touching internal components.
Using water or a wet cloth to rinse the coil. Water introduces moisture into areas that may not drain properly, creating ideal conditions for mold. No-rinse foaming cleaners are specifically formulated to work without a water rinse.
Brushing across the fins instead of parallel to them. Aluminum fins are thin and bend easily. Bent fins restrict airflow almost as much as dirt. Always move any brush or vacuum attachment in the same direction the fins run.
Ignoring the drain pan and line. A clogged drain line is one of the most common causes of water damage in Gulf Coast homes. Algae grows fast in warm, humid conditions. Flush the line every time you clean the coil.
“DIY cleaning is viable for light to moderate dirt, but heavy coastal buildup often requires professional service.” — ACHR News research
Signs that your coil needs professional help rather than a DIY cleaning include visible black or green mold covering large sections of the coil, ice forming on the coil during operation, a persistent musty odor that does not clear after cleaning, or no improvement in cooling performance after a thorough cleaning session. These conditions point to deeper problems that go beyond surface dirt.
Gulf Coast homeowners face a specific risk: salt particles carried inland from the coast deposit on coil fins and begin corroding the aluminum over time. This corrosion is not something a foaming cleaner can reverse. If you see pitting or white powdery deposits on the fins, that is corrosion, and a professional should assess whether the coil needs treatment or replacement.
Pro Tip: Review the HVAC DIY maintenance basics guide before your first cleaning attempt. It covers the broader system context so you understand how the A-coil fits into the overall picture.
For ongoing concerns about coastal buildup, the coastal AC maintenance resource covers corrosion protection strategies specific to our area.
With confidence in your cleaning technique and troubleshooting skills, let’s lock in lasting AC efficiency.
How to keep your A-coil cleaner, longer
Cleaning the coil is only half the battle. Building good habits between cleanings keeps the coil cleaner and extends the time between major maintenance sessions.
Ongoing habits that protect your A-coil:
Change your air filter on schedule. A clean filter is your coil’s first line of defense. In Gulf Coast Alabama, a 1-inch filter typically needs replacement every 30 days during peak cooling season. Higher-MERV filters (rated 8 to 11) catch more pollen and dust before it reaches the coil.
Keep the area around your air handler clear. Boxes, stored items, and clutter near the air handler restrict airflow and push more debris toward the coil.
Trim plants and shrubs near your outdoor unit. While this applies more to the condenser coil outside, restricted outdoor airflow forces the indoor system to work harder, which increases coil surface temperatures and accelerates buildup.
Do a quick visual check every three months. You do not need to do a full cleaning every quarter, but a brief look at the coil surface with a flashlight tells you whether buildup is starting and whether you need to act sooner than planned.
Schedule a professional deep cleaning every one to two years. In coastal areas, Trane recommends no-rinse methods for indoor coils to avoid water damage and mold risk. A professional service can also apply coil coating products that slow corrosion and reduce future buildup.
The seasonal HVAC maintenance checklist we put together for Gulf Coast homeowners pairs well with A-coil cleaning because it covers the full system at the right times of year. Pair that with a solid home maintenance checklist and you have a repeatable system that keeps your home running efficiently year-round.
Do not overlook drain line upkeep as part of your routine. A blocked drain line can cause water to back up into the air handler, damaging the coil, the blower motor, and the surrounding structure.
Pro Tip: Set a phone reminder every 30 days to check your filter and every 90 days to peek at the coil. These two habits alone will extend your system’s life and keep your energy bills predictable.
Having explored all the practical and preventative aspects, here’s a fresh perspective from years of Gulf Coast expertise.
The truth about DIY A-coil cleaning most experts won’t share
Here is something the HVAC industry does not advertise loudly: most manufacturers write their maintenance warnings to protect themselves from liability, not to reflect what a careful, informed homeowner can actually handle. When Bryant or Trane says “contact a professional for coil cleaning,” they are covering worst-case scenarios, not describing your situation after reading a thorough guide and gathering the right tools.
The honest reality is that light to moderate A-coil cleaning is well within reach for most homeowners. The steps are not complicated. The tools are inexpensive. The risk of doing it wrong is low when you follow the correct process. Waiting for an annual service call to handle something you could address yourself in an hour means months of reduced efficiency, higher bills, and unnecessary wear on your system.
That said, the Gulf Coast genuinely changes the math in one important way. Salt air, extreme humidity, and heavy pollen loads create conditions that can push a coil from “light buildup” to “heavy corrosion” faster than in most other parts of the country. We see this regularly when inspecting homes in Fairhope, Gulf Shores, and Orange Beach. A homeowner who cleans diligently but misses early corrosion signs can end up with a coil that needs replacement rather than cleaning.
The practical takeaway is this: do your own light and moderate cleanings confidently. But do not skip the annual professional check, especially if your home is within a few miles of the coast. A trained eye can spot corrosion, refrigerant issues, and mold growth that a flashlight and foaming cleaner will not reveal. Protecting AC systems in harsh climates requires both your consistent attention and periodic professional verification. The two approaches work together, not in competition.
DIY cleaning done right is one of the highest-return maintenance tasks you can perform as a Gulf Coast homeowner. It costs under $20 in supplies and an hour of your time, and it delivers real, measurable comfort and savings. Do it. Just know when to call for backup.
For lasting comfort and protection: Professional help is just a step away
DIY A-coil cleaning handles the routine maintenance that keeps your system running efficiently between professional visits. But some situations call for trained eyes and specialized tools. If you are seeing persistent moisture around your air handler, a musty odor that won’t clear, visible mold on or around the coil, or energy bills that stay high despite regular cleaning, those are signals that something deeper is going on.

Mold growth inside an HVAC system is a particular concern in Gulf Coast Alabama homes. It spreads quickly in humid conditions and can affect indoor air quality throughout the entire house. Our professional mold inspection service uses certified lab testing and chain-of-custody sampling to give you a clear, accurate picture of what is actually in your air. If you are buying, selling, or simply want peace of mind about your home’s condition, our home inspection services cover HVAC systems, moisture concerns, and much more, all in a same-day report with photos and thermal imaging included at no extra charge. Reach out to Trinity Home Inspections and let us help you protect what matters most.
Frequently asked questions
How often should I clean my AC A-coil?
Check and clean your A-coil at least once per year, but in coastal areas, quarterly visual checks help you catch heavy buildup before it becomes a problem requiring professional service.
Is it safe to use water or pressure washers to clean an indoor A-coil?
No. Always use a no-rinse foaming cleaner specifically designed for indoor coils, because water and high pressure can damage fins, cause mold growth, and create water damage inside your air handler.
What if I still have cooling problems after cleaning my A-coil?
If cleaning does not restore normal performance, contact a professional to check for refrigerant issues, deeper mold growth, or other system problems, since DIY cleaning addresses surface dirt but cannot fix mechanical or chemical failures.
Are A-coils in Gulf Coast homes at higher risk for dirt and corrosion?
Yes. Salty air, high humidity, and heavy pollen loads make Gulf Coast A-coils significantly more susceptible to buildup and corrosion from coastal conditions, which is why more frequent inspections and professional cleanings are recommended for homes near the water.
Recommended
