How to run a refrigerator water line from your sink
- Matt Cameron
- 2 hours ago
- 13 min read

TL;DR:
Running a refrigerator water line is an easy, cost-effective DIY project taking about 1-2 hours.
Use reliable fittings like tee with ball valve and choose PEX or stainless steel tubing for humid climates.
Prevent leaks by wrapping connections with Teflon tape, avoiding saddle valves, and regularly inspecting for moisture.
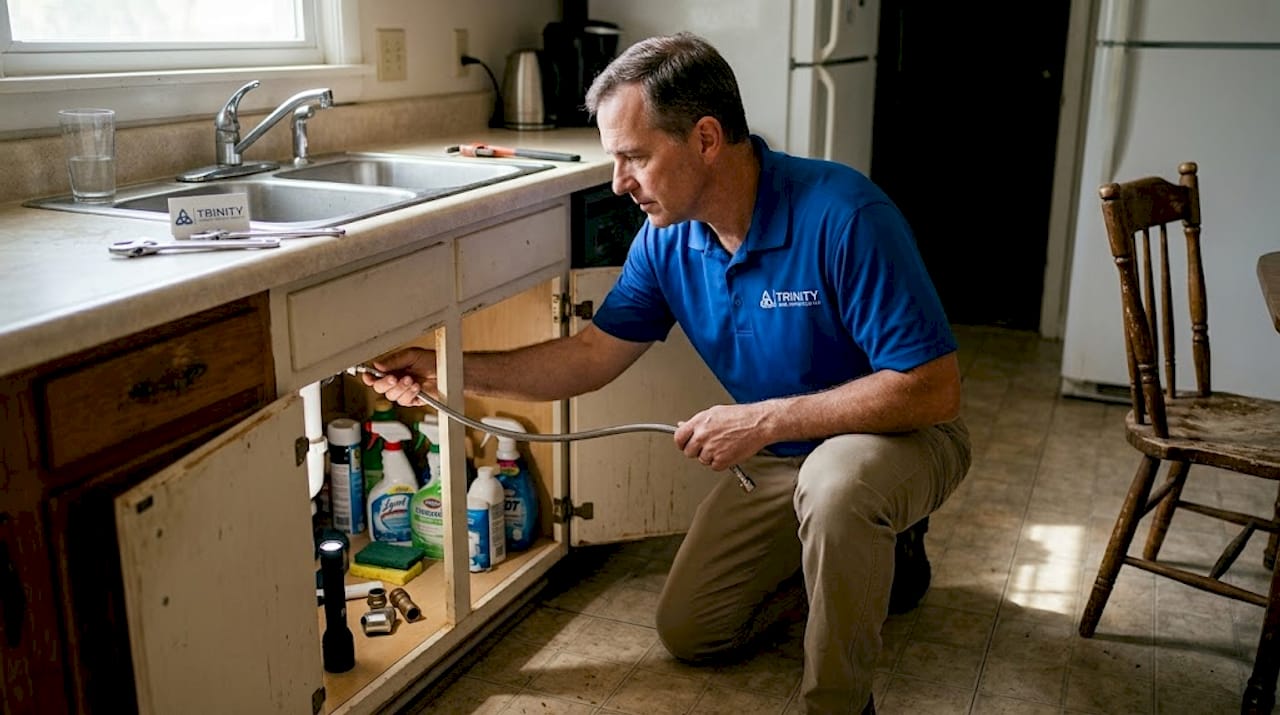
You filled the ice maker for the last time by hand, and that was enough. Getting fresh filtered water or a steady supply of ice from your refrigerator sounds simple, but without a water line in place, it stays out of reach. The good news is that running a refrigerator water line from your kitchen sink is one of the most rewarding DIY plumbing projects a homeowner can tackle. It takes about one to two hours, costs far less than a plumber visit, and the results last for years when done right. This guide walks you through every step, from picking the right tubing to leak testing, with tips specific to Gulf Coast Alabama homes.
Key Takeaways
Point | Details |
Have the right tools | Gather all necessary materials and understand tubing options before starting your install. |
Follow step-by-step instructions | Carefully route, connect, and test the water line to prevent leaks and ensure safe operation. |
Pick reliable valves | Choose compression or tee valves over saddle valves to boost longevity and reliability. |
Prioritize leak checks | Always test connections thoroughly, especially in humid regions where leaks lead to mold. |
Consider professional help | For inspections or plumbing code queries, local experts offer peace of mind after your DIY project. |
What you need to install a refrigerator water line
Once you understand why having a dedicated water line makes life easier, the next move is gathering every tool and part before you touch a single pipe. Running to the hardware store mid-project because you forgot a compression fitting is the kind of setback that turns a one-hour job into an all-afternoon ordeal.
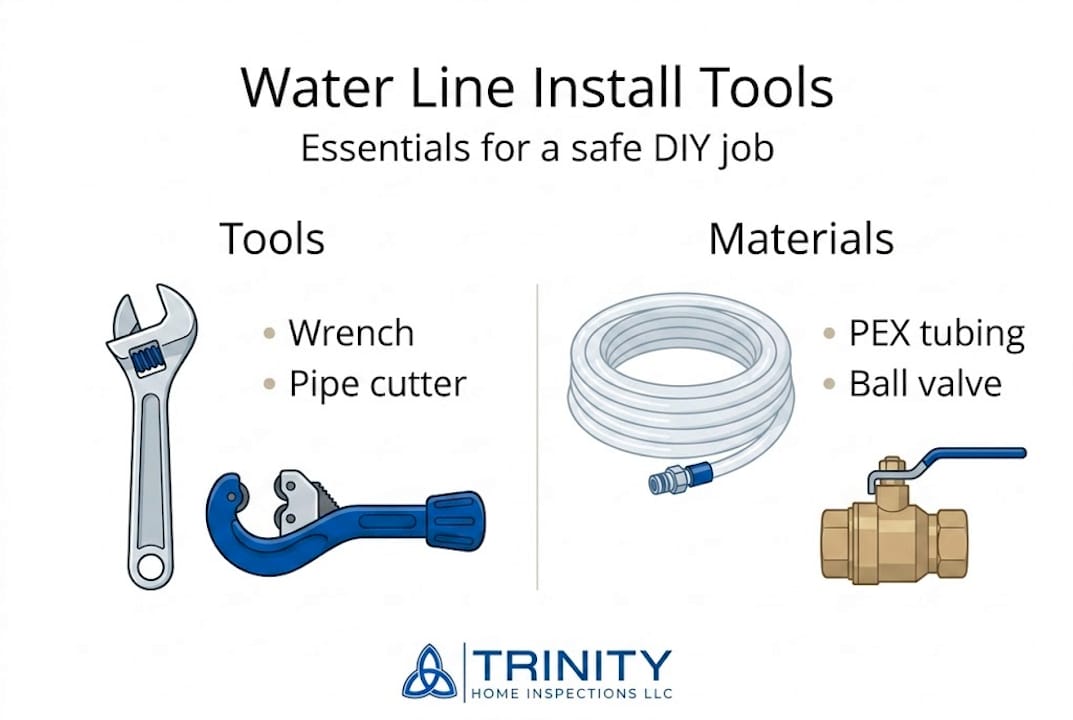
Tools and materials at a glance
According to installation guidance for refrigerator water lines, the core tools and materials you need include an adjustable wrench, a tubing cutter, Teflon tape, a bucket for catching drips, and a drill if you need to route the line through cabinet walls. On the materials side, you will need 1/4-inch OD tubing in your chosen material, a tee fitting or saddle valve, and compression fittings to make the final connections at the refrigerator inlet.
Item | Purpose | Notes |
Adjustable wrench | Tightening fittings and compression nuts | Keep one medium and one small handy |
Tubing cutter | Clean, square cuts on copper or PEX | Cleaner cuts than a hacksaw |
Teflon tape | Sealing threaded connections | Use two to three wraps per thread |
Bucket and towels | Catching water when you open the line | Essential, not optional |
Drill with bits | Routing through cabinet walls or floors | Only needed for long runs |
1/4-inch OD tubing | Carrying water from supply to fridge | Choose type based on layout |
Tee fitting or saddle valve | Tapping the cold water supply | Tee fitting preferred |
Compression fittings | Connecting tubing at each end | Match to your tubing diameter exactly |
Choosing the right tubing type
Not all tubing is the same, and in a humid Gulf Coast climate, your choice really matters. Four main tubing options are copper, PEX, braided stainless steel, and plastic. Copper is durable and long-lasting but rigid and harder to route around corners. PEX is flexible, easy to work with, and handles temperature changes well. Braided stainless steel is reliable and resists kinking or crushing. Plain plastic tubing is the cheapest but also the least durable, making it the most likely to crack or develop slow leaks over time.
The single most important rule: whatever tubing you pick, make sure it is rated for potable water. That label is not just a formality. It means the material will not leach chemicals into the water you drink or use for ice. In Alabama, your local code may also have specific requirements, so it pays to check before you buy.
Pro Tip: If your refrigerator sits more than ten feet from the sink, choose PEX or braided stainless. These materials handle longer runs with fewer connection points, which means fewer opportunities for a future leak.
Push-connect vs. compression fittings
Push-connect fittings snap onto the tubing without any tools. They are fast and beginner-friendly, but they are not ideal for runs behind walls or in tight, hard-to-reach spaces. Compression fittings require a wrench and a bit more patience, but they create a more reliable seal that stands up to years of use. If you plan to properly stay up-to-date on changing refrigerator water filters, a compression connection at the fridge end makes future service straightforward.
Safety notice: Before you do anything else, know where your water shut-off is located. Shut off the cold water supply line under the sink before touching any pipes. Have your bucket ready. Even a line with no pressure left in it will release a surprising amount of residual water.
Step-by-step installation: Running the water line from your sink
Once you have your tools ready, here is how to complete a worry-free installation. The standard DIY method involves tapping into the cold water supply line under your kitchen sink using a tee fitting or a valve added to the existing shut-off, then running 1/4-inch tubing to the refrigerator’s water inlet, securing the route, and testing every connection for leaks before you declare the job done.
The installation process, step by step
Following a proven sequence keeps you organized and prevents the most common mistakes. Detailed installation steps confirm this order works reliably for most kitchen layouts:
Shut off the water supply. Turn off the cold water valve under the sink. If you do not have an individual shut-off there, close the main water valve for the house. Open the faucet to release pressure and drain remaining water into your bucket.
Install your tee fitting or new valve. Remove the cold supply line from the existing shut-off valve. Install a tee fitting so you have one port for the sink supply and one port for the refrigerator line. Alternatively, replace the existing shut-off with a dual-outlet valve designed for this purpose. Saddle valves are another option but carry significant drawbacks covered in the next section.
Measure and cut your tubing. Measure the distance from the tee fitting to the refrigerator inlet, adding extra length to allow the fridge to be pulled out for cleaning or servicing. Cut the tubing cleanly and squarely using your tubing cutter, not a knife or scissors.
Route the tubing carefully. Guide the tubing from under the sink, through any cabinet walls if needed, and toward the refrigerator. Keep the line away from heat sources like the dishwasher or oven. Avoid sharp bends. Use plastic cable clips or clamps to secure the tubing every two to three feet so it stays in place and does not shift over time.
Connect the tubing to the fridge inlet. Slide the compression nut and ferrule onto the tubing before inserting it into the refrigerator’s water inlet. Hand-tighten the compression nut, then give it a quarter turn with your wrench. Wrap the threaded inlet with Teflon tape before making the connection if the fitting is threaded.
Turn the water on and check for leaks. Restore water pressure slowly. Watch every connection point closely for the first few minutes. Tighten any fittings that show even a small drip, but do not overtighten.
Safety reminder: Never skip the leak check. Even a slow drip behind the refrigerator or under the sink can cause serious water damage and mold growth. In Gulf Coast Alabama’s high-humidity environment, moisture issues compound quickly. Always verify connections with water running before you push the refrigerator back into position.
Fitting method comparison
Method | Ease of install | Leak risk | Best for |
Tee fitting with ball valve | Moderate | Low | Long-term, reliable installs |
Saddle valve | Easy | High | Not recommended |
Push-connect fitting | Very easy | Moderate | Short, accessible runs |
Compression fitting | Moderate | Very low | Most situations, best overall |
Alabama code and routing notes
Alabama plumbing regulations allow homeowners to handle simple DIY plumbing tasks like adding a refrigerator water line. If your project requires major alterations to the main plumbing system inside the home, a licensed plumber is required. For most refrigerator water line installs tapping off the kitchen sink shut-off, you are well within what is allowed as a homeowner. That said, if you are also thinking about upgrading your kitchen sink at the same time, combining both projects may cross into territory where a licensed plumber should be involved.
For routing, the biggest frustration Gulf Coast homeowners face is navigating through kitchen cabinets that share walls with other rooms or that sit over concrete slab foundations. Drilling through a cabinet side wall is usually the cleanest solution. Use a bit slightly larger than your tubing diameter, smooth the hole edges, and use a grommet to protect the tubing from abrasion. Review Alabama plumbing code tips if you are uncertain about material choices for your specific situation.
Valves, fittings, and avoiding leaks: What Alabama DIYers should know
Now that you have installed the tubing, picking the right fittings and valves makes a big difference for leak protection and longevity. Getting this part right separates a water line that works quietly for a decade from one that creates a slow drip problem behind your fridge that you only notice when the floor starts to warp.
Comparing your valve options
Valve type | Pros | Cons | Recommended? |
Saddle valve | Fast to install, no pipe cutting | Prone to leaks, clogs, banned in some codes | No |
Tee with ball valve | Reliable, code-compliant, easy shut-off | Requires cutting pipe | Yes |
Dual-outlet shut-off | Clean installation, replaces existing valve | Slightly higher cost | Yes |
Push-connect tee | No tools needed, fast | Less durable long term | Situational |
Saddle valves are popular because they pierce the pipe without cutting, making installation fast. The problem is that they are genuinely prone to leaks over time, can clog with mineral deposits, and are banned in certain jurisdictions. For a home on the Gulf Coast where humidity is already working against you, a leaking saddle valve behind the refrigerator is a mold event waiting to happen. A compression fitting or tee ball valve setup costs a little more time upfront but is far more reliable.
Leak prevention steps every DIYer should follow
Wrap all threaded connections with two to three layers of Teflon tape before assembly.
Hand-tighten first, then use a wrench for a quarter to half turn maximum. No more.
Inspect every fitting visually with the water on. Do not rely on feel alone.
Keep a shut-off valve at the tee so you can isolate the refrigerator line without shutting off the whole kitchen.
Make the route accessible. Do not bury the line behind drywall if you can run it through existing cabinet space instead.
Check connections again at 24 hours and 72 hours after installation.
Overtightening fittings is one of the most common and damaging mistakes. It cracks plastic ferrules and distorts brass compression rings, creating a leak that was not there before. The goal is snug, not maximum force. If a fitting keeps dripping after reasonable tightening, the issue is usually a damaged ferrule or a poor cut on the tubing end, not insufficient force.
Stat callout: The Gulf Coast Alabama region regularly sees relative humidity levels above 70 percent for extended periods throughout spring, summer, and fall. At those humidity levels, even a small drip under a refrigerator or inside a cabinet can lead to visible mold growth within 24 to 48 hours. This is not an exaggeration. It is a real regional risk that makes leak prevention more important here than in drier parts of the country.
Pro Tip: Run a strip of white paper towel along each connection joint after you turn the water on. Any moisture, even a tiny weep, will show up immediately on the paper. This method catches drips that are too small to see or hear but large enough to cause damage over weeks and months.
For any concerns about tubing materials and how they hold up in Alabama’s climate, reviewing PEX regulations in Alabama gives you a solid foundation before you buy materials.
Testing, troubleshooting, and maintenance tips
With your new water line in place, the final step is making sure everything works and stays safe for years to come. Installation is only half the job. The other half is verifying the system and knowing how to keep it running cleanly.
How to test your water line after install
Restore water pressure slowly. Open the shut-off valve at the tee gradually rather than all at once. This prevents a water hammer effect that could stress new fittings.
Watch every connection for two full minutes. Do not walk away. Stand at each joint and look closely for any moisture forming on the outside of the fitting.
Check the refrigerator inlet connection. Pull the fridge out enough to see the connection at the back. Confirm it is dry.
Run a test dispense or ice cycle. Activate the water dispenser on your refrigerator door or start an ice-making cycle. Listen for the fill valve to open. Water should flow smoothly without sputtering.
Check water pressure at the dispenser. If the flow seems weak, the issue is usually a kinked tube, a partially closed valve, or a clogged refrigerator filter.
Return in 24 hours for a second check. Look under the sink, trace the line visually, and inspect behind the fridge one more time.
Troubleshooting common problems
Weak or slow water flow: Check for kinks in the tubing, especially at corners. Verify the shut-off valve at the tee is fully open. Check whether the refrigerator’s internal water filter needs replacement.
No water at all: Confirm the refrigerator water line is connected to the correct inlet on the back of the unit. Some models require a setup step in the settings menu to activate the dispenser.
Dripping at a fitting: Tighten a quarter turn. If it continues, turn off the water, disassemble the connection, inspect the ferrule and tubing end, and reassemble cleanly.
Cloudy or off-tasting water: Flush the first three gallons through the system to clear manufacturing residues from the new tubing. Then check whether the refrigerator filter needs to be activated or replaced.
Keeping your water line healthy over time
DIY installations are feasible for most homeowners with basic tools, and the project typically takes one to two hours. But the work does not end on installation day. In humid Gulf Coast Alabama homes, moisture management is an ongoing practice.
Inspect visible sections of the water line every six months.
Check under the sink for any moisture or staining near the tee fitting.
Replace your refrigerator water filter every six months or every 200 to 300 gallons, whichever comes first.
If you ever notice a musty smell near the refrigerator, investigate immediately. Mold behind or under a fridge is not always visible right away.
Keep the area under the sink dry and uncluttered so any future leak is visible instead of hidden behind stored items.
Pro Tip: Photograph your tubing route and all connection points right after installation. Store the photo in your phone or home maintenance folder. If you ever need a plumber or home inspector to evaluate the line later, that photo saves significant time and gives a clear before-and-after reference.
Our take: What most guides miss about DIY refrigerator water lines
Most online how-to articles treat refrigerator water line installation as a universal, straightforward task. The steps are the same anywhere, and the guides are written for a homeowner in Phoenix as much as one in Foley or Fairhope. That misses something important. Where you live changes what matters most.
Here on the Gulf Coast, leak prevention is not a bonus tip. It is the entire point. A slow drip that might go unnoticed for weeks in a dry climate becomes a mold problem within days in a home where summer humidity sits well above 70 percent for months at a time. That context should shape every decision you make during this project, from tubing type to valve choice to where you route the line.
Push-connect fittings are genuinely convenient, and we are not dismissing them. But they work best in accessible locations where you can check them regularly. Hidden behind a wall or pinched under a cabinet frame, they can work loose over years of vibration from the refrigerator compressor. That is a real failure mode that generic guides rarely address.
On saddle valves, the guidance is simple: skip them. We have seen the aftermath of saddle valve failures during home inspections, and it is never pretty. The slow leak they eventually develop is almost always found in the worst possible spot, where it has been quietly damaging subfloor material or cabinet bases for months before anyone noticed.
The advice that matters most for long-term success is this: build serviceability into your install from the beginning. Keep the line accessible. Put a dedicated shut-off at the tee. Know where that shut-off is so anyone in the house can find it in an emergency. Reviewing PEX plumbing safety in Alabama is also worth your time if you are selecting materials, because not all PEX products are equal and the Gulf Coast climate has specific demands.
One more thought: a well-done water line installation is a small but real selling point when it comes time to list your home. Buyers notice when appliances work cleanly and when plumbing looks tidy and professional. A properly installed water line with clean routing, a good shut-off, and no history of leaks tells a positive story about how you have cared for the property.
Protect your home and ensure a job well done
A DIY refrigerator water line project is a great way to add convenience and value to your home. But even the best installs benefit from a professional set of eyes afterward, especially in a region where hidden moisture and mold are real concerns.
[

At Trinity Home Inspections, we serve homeowners across Gulf Coast Alabama, including Mobile, Daphne, Fairhope, Foley, Gulf Shores, and Orange Beach. If you want peace of mind after a DIY plumbing project, we can inspect for moisture, leaks, and code concerns using thermal imaging and moisture meters included at no extra cost. We also offer mold inspection services for homes with existing humidity concerns, sewer line inspection services to make sure your drain side is clear, and a real estate permit search to help you stay informed about your property records. Call us or book online and get your same-day report.
Frequently asked questions
Is it legal for Alabama homeowners to install a refrigerator water line themselves?
Yes, Alabama allows DIY installs for simple refrigerator water line projects, as long as no major plumbing alterations are made. If the project gets more involved, a licensed plumber is required.
What is the best tubing type for refrigerator water lines in humid climates?
PEX and braided stainless are the top choices for humid environments because they resist bursting, handle flexibility well, and hold up over time, provided they carry a potable water rating.
How do I avoid leaks when connecting the water line?
Avoid overtightening fittings, use Teflon tape on all threaded connections, and test every joint with water pressure running before you push the refrigerator back into place.
Can saddle valves be used for refrigerator water lines in Alabama?
Saddle valves are not recommended because they are prone to leaks, tend to clog with mineral buildup over time, and are banned in some local codes. A tee fitting with a ball valve is a far better long-term choice.
How long does DIY refrigerator water line installation usually take?
Most homeowners finish the project in one to two hours when they have all tools and materials ready before they start.
Recommended